To improve Windows 10 performance, you should always try to remove all the irrelevant files. Deleting temporary files from the system is one of the most significant ways that can make PC fast. The good thing is that you have got 4 different yet simple procedures to Delete Temp Files in Windows 10.
Temporary files are those who are stores in disc drives for the operating system while in the process. After the finishing of the task, these files become useless and considered as junk only.
Previously executing a command line in the Run dialog was only used to do the task for the users. With the advancement of Windows 10, Microsoft bought this utility of freeing up space due to temporary files through the built-in Settings app.
Let’s see the methods in the discussion below.
4 Ways to Delete Temp Files in Windows 10
Way-1: Delete Temp Files in Windows 10 using Windows Settings app
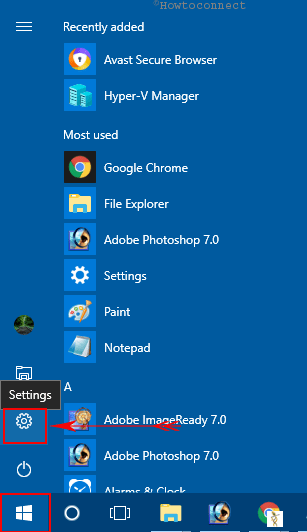
• Hover the cursor to the bottom left corner of the taskbar and click Start Menu icon to open it.
• Make a click on the cog icon and let the system launch Settings app on your screen.
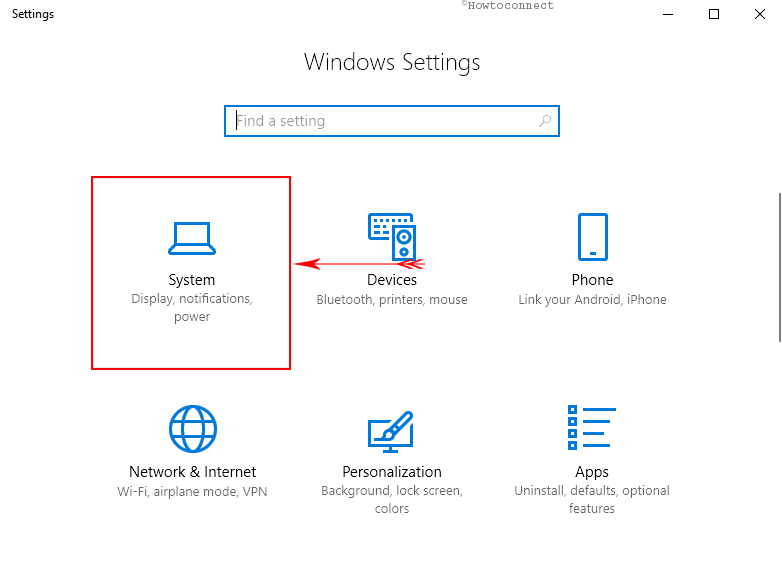
• On Settings interface, move the pointer over the System category and click on it.
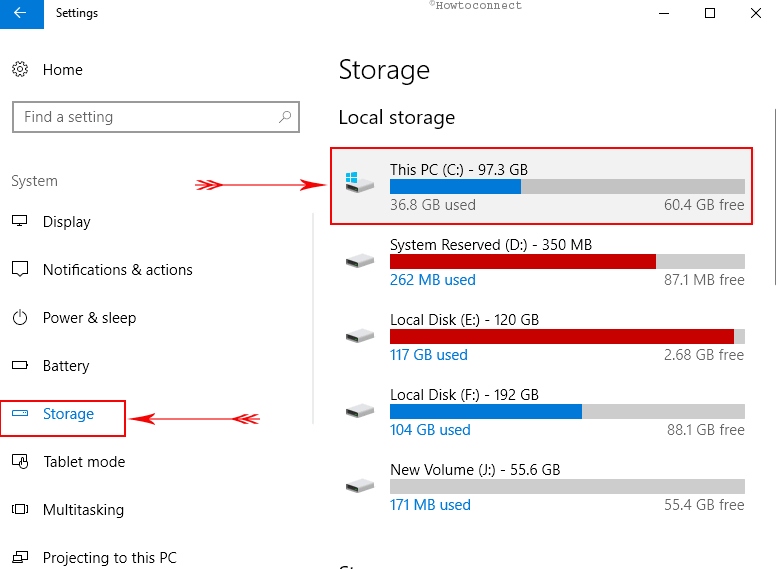
• When System settings page comes into view, select Storage section from the left pane.
• Go to the corresponding right pane and click on This PC (C:). The system will then guide you forward to the Storage items.
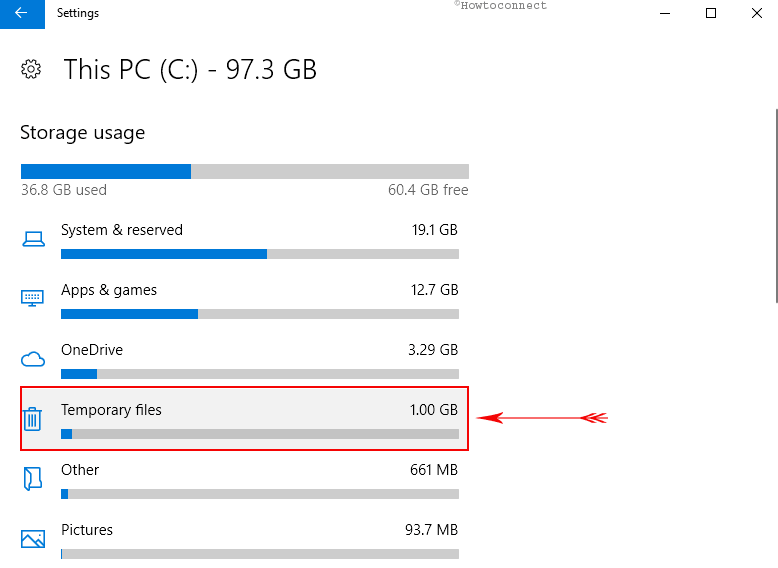
• Scroll down and reach out to Temporary files as well as do a click on it when highlighted.
• Upon guided to the next page, checkmark the Temporary files box and click Remove files button to proceed ahead. In addition to Temporary files, you can also select other items to get rid of them.
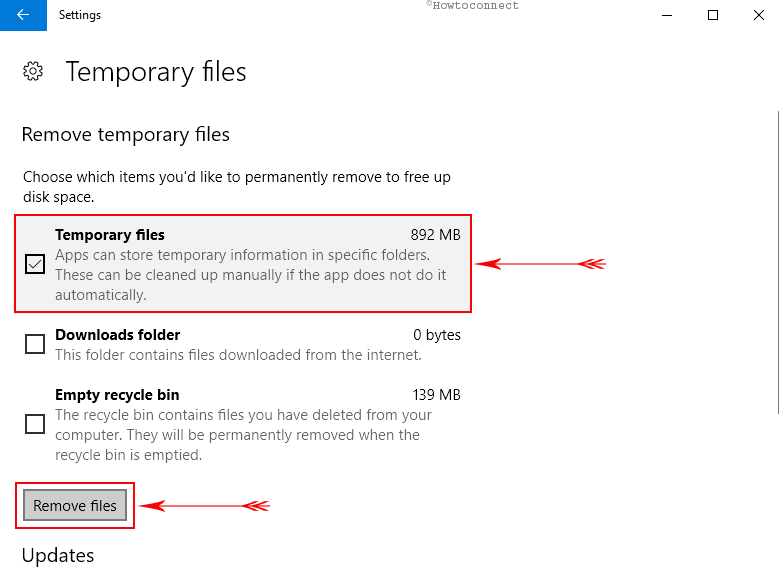
• A loading dots circle will start moving and stops once the temporary files are deleted from the PC.
Way-2: Most conventional method- Using Run dialog
Step-1: Perform a joint press of Win+R hotkeys to open Run dialog to appear.
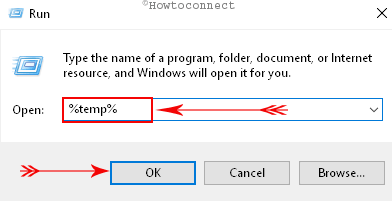
Step-2: Type %Temp% command string in the empty space of Run and select OK button to proceed.
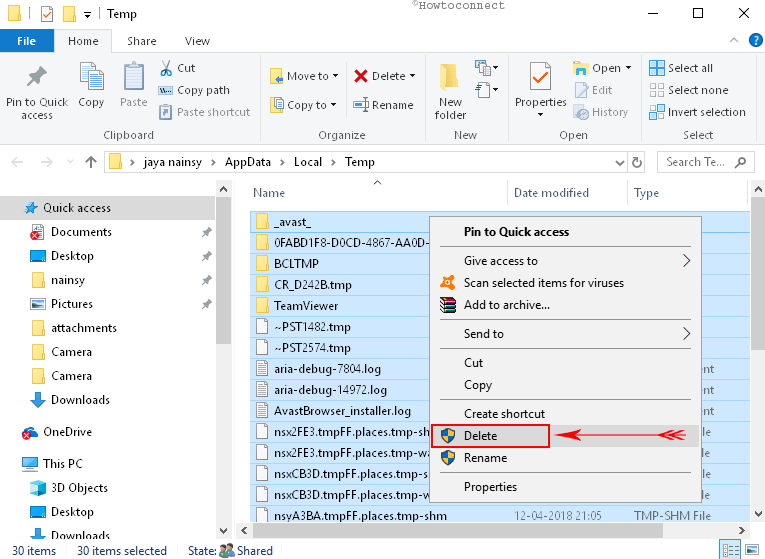
Step-3: Once the folder containing Temporary files flashes on to the PC screen, select all of these using the combination of Ctrl+A hotkeys. Then make a right click on the selected files and choose ‘Delete‘ from the context menu that shows up. In addition, hitting the Delete key on the keyboard will also let you do away with those files.
Step-4: When UAC warning dialog prompts for permission, select Yes to delete all of the temporary files.
Note- There will be some files that might be in use and system fails to delete them. In that case, check the box next to the option “Do this for all current items” and henceforth click the “Skip” button to leave them for use.
Way-3: Delete Temp Files through Disk Cleanup
I. Launch Start Menu, type cleanmgr, and press Enter when Disk Cleanup appears as the result.
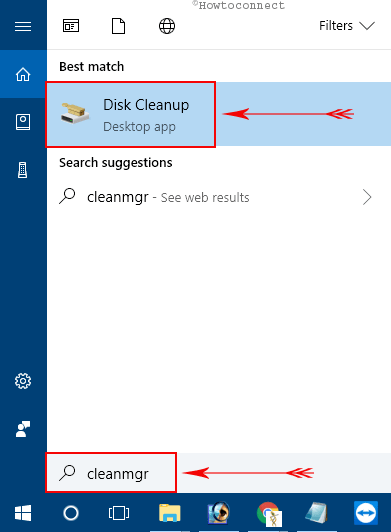
II. From the drop-down, choose the C: drive and click OK to continue.
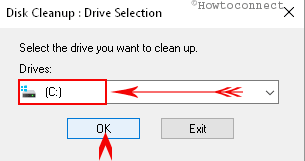
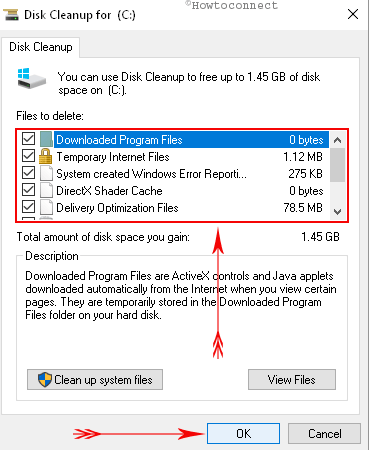
III. Now, select Temporary files and other checkboxes to delete all of them. Finally, click OK to get rid of them.
To keep PC clutter free, create Schedule Disk Cleanup in Windows 10.
Way-4: Create a Batch File to Delete Temp Files in Windows 10
i. Open Start Menu, type notepad and when you notice Notepad Desktop app as the result, select it.
Tip: See Create Keyboard Shortcut to Notepad on Windows 10.
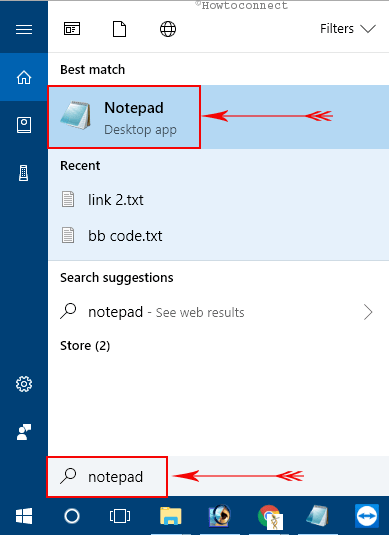
ii. Type or copy-paste the below-given command in the text editor.
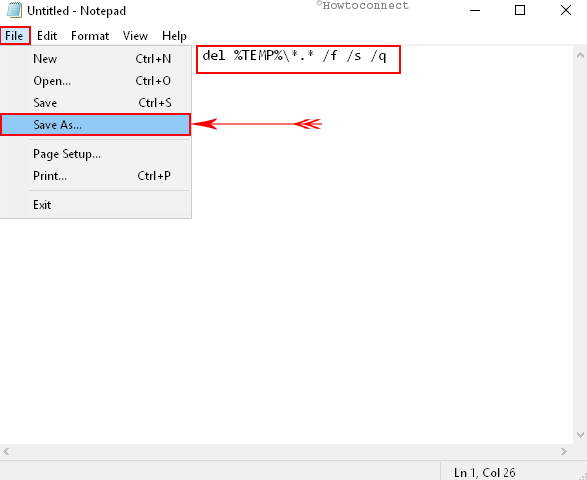
del %TEMP%\*.* /f /s /q
iii. After inputting the command, click File and Save as shown in the following screenshot.
iv. On the Save As box, choose Desktop as the location. Next, save the file with .BAT extension.
For reference, read How to Delete Temp Files at Every Startup in Windows 10.
Therefore, these four methods are the most useful and convenient ways to Delete Temp Files in Windows 10. So; let’s get those trashes out using the above-mentioned instructions and keep your Windows clean!
