Recycle Bin has been a permanent part of the Windows operating system from last twenty years. Most of the users prefer to keep it on the desktop as the folder helps to restore the accidentally deleted files. But some people want to keep their desktop clean with zero or least number of icons. As a result, they want to Remove Recycle Bin on Desktop in Windows 10. Fortunately, the removal is pretty easy and requires just a few clicks. However, when you change your mind and wish to add Recycle Bin on Desktop in Windows 10 again, that is also unsophisticated.
The purpose of the Recycle Bin in Windows is to accumulate the files/folders which a user deletes. These items are temporarily stored in the bin that allows removing permanently. Moreover, you can also restore the file or folder to its previous location from the Recycle Bin, if any such a need arises or if you removed the file accidentally. See – How to Allocate Custom Size to Recycle Bin on Windows 10.
Add/Remove Recycle Bin on Desktop in Windows 10
Here is How to Add/Remove Recycle Bin on Desktop in Windows 10 –
Remove
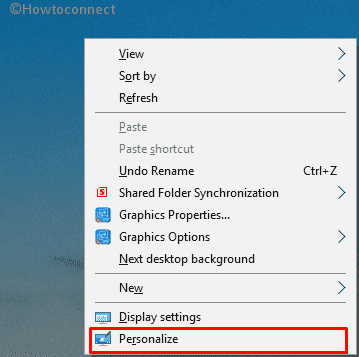
Step-1: Right click on the desktop screen and select Personalize from the options on the context menu.

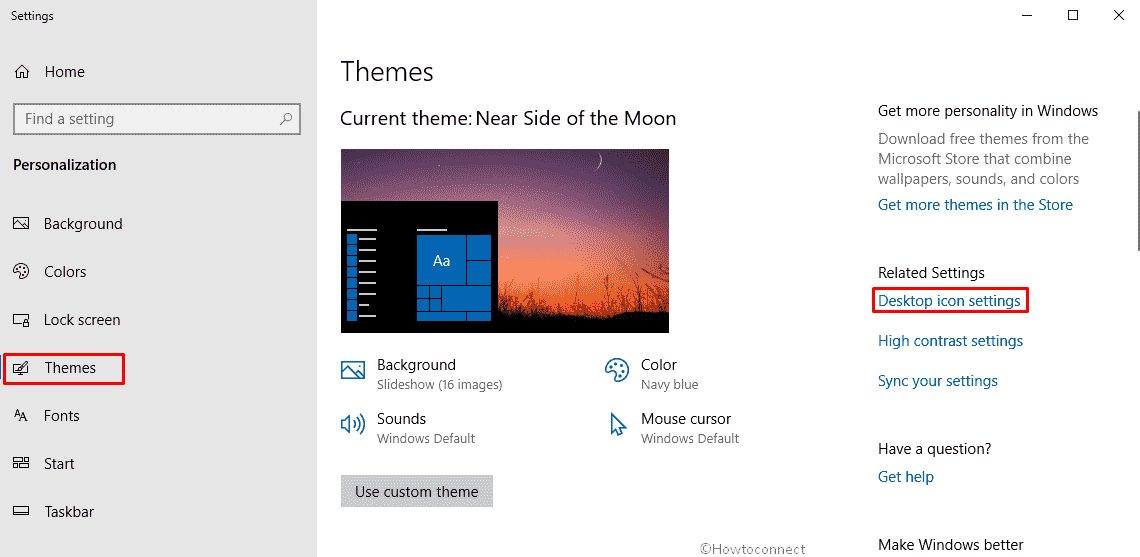
Step-2: On the running window, select Themes from the left column. Click on Desktop icon settings located under the title Related Settings section from the right side of the Settings page.

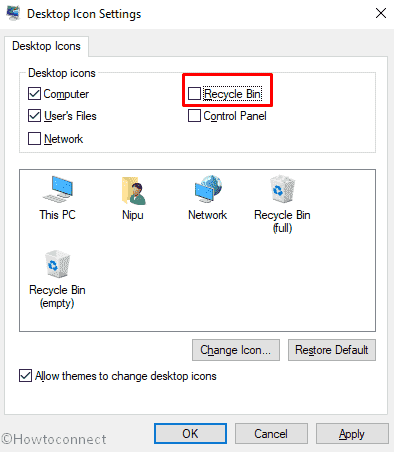
Step-3: Uncheck the Recycle Bin option.

Step-4: Finally, click on Apply and then OK to make the changes effective.
Add Recycle Bin on Desktop in Windows 10
To bring the icon back, follow the steps below –
- Press Win+I at a time to open the Settings app.
- When it comes into the sight, click on Personalization.
- Select Themes from the left pane and mouse over the cursor to the right side.
- Click on Desktop icon settings from the rightmost corner.
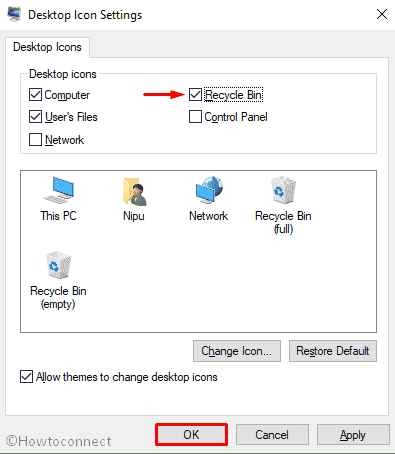
- On the following wizard, check the box of Recycle Bin and click on OK.

That’s all!!!
