Are you looking for an easygoing guide to use Photos App on Windows 10? Filling your digital space with colorful pictures and selfies is an ever emerging trend. Photo app on Windows 10 is a must for you to know to enhance your picture viewing and photography experience. This built-in application has a variety of choices which you can explore.
If you are using Windows 10, you must know how to use Photos app. It is pretty good option to keep your digital photos safe on your laptop, while equally important is to organize them so that you would have ability to locate without difficulty.
Pictures scattered over hard drives can also increase your pain. Thankfully Photos app on Window 10 offers you an easy way out. It helps you organize, locate, quickly edit and finally share your images. Photos app allows you to arrange your pictures as per the time and date with the help of nice editing tools. You find easy to share options while maintaining the regular quality of the image.
An Ultimate Guide to Use Photos App on Windows 10
The default application will handle all your browsing, editing and viewing tasks for pictures. This photo app is intuitive to mend your altogether experience to do different desirable activities with some editing. All over, when you use Photos app on Windows 10 you boost your experience with pictures as per your choice.
The most effective part is you can easily enhance your photo viewing experience and let things work well for you that too as per your choice.
Here is a list of steps you need to follow to have a great browsing experience.
Let’s explore further to know more to use Photos app on Windows 10 –
How to Start Photos App on Windows 10
Stepping in from the start menu – the app has the blue background, with tile icon like structure.
The app is live with your window 10 activations. Now the pictures of you will be visible there in a folder. Even your uploaded pictures from your one drive account they will get displayed here.
Although it is pretty simple to start your photo app yet it is important to understand it before proceeding. With the enhanced features and improved performance, this photo app suits your needs.
The fresh installations of new Windows 10 have already an advanced form of Photo app as a default app in the form of a big tile. Step in by pressing the start menu button as it’s already there in the Start button.
Even if it’s not, just press “Start” and then search for photos by typing “photos” so that you can quickly jump to the desirable thing and bring that quickly via search.
On the first Run
The Photos Application on Windows 10 folder will be blank if there is nothing to show. Particularly, when you have not uploaded any picture in your OneDrive folder – then just a darker screen is visible. You can try its first run by clicking or uploading a few pictures or maybe screenshots altogether.
You will have to either press Windows and Print Screen buttons together or if you are working on a tablet with you then just hold up the window button and then press the volume button.
Locate your Pictures
Now see where the pictures are. Reach the folder named Pictures library. By default, your screenshots are actually saved there. Browse in to get the picture of your wish list. You can also access the same through your desktop and attempt a poke around in Photos App on Windows 10.
Copy more and more pictures to get them added to your library section and follow the suit.
The section of ‘Collection’ given there at the top will keep all of these pictures very well arranged date-wise (in the reverse chronological form).
You can click the stipulated date mentioned at the top, where you can get the information in more detail about the month or year. It always helps you to choose pictures more informative.
Photos Everywhere
Onedrive app is specially meant to work with your earlier loaded pictures from your mobile, or system or any additional connected devices. It gives you direct access to all of your photographs without juggling into the rough water.
When you occupy OneDrive account, switch on its setting to automatically upload photos moreover video from either of the associated sources (mobile, system, tablet) to the cloud storage.
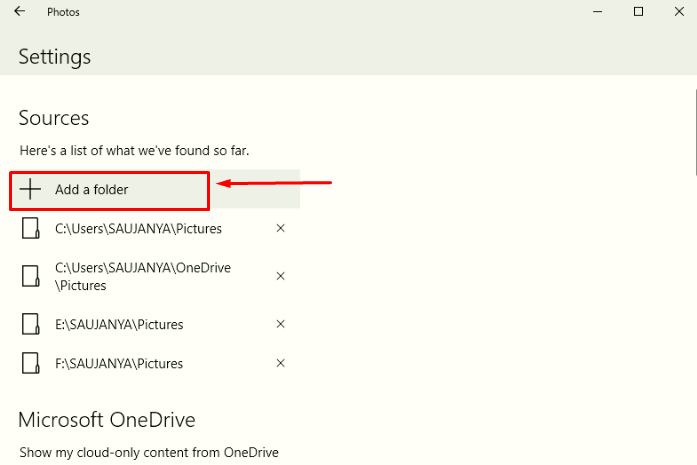
At the very first, you will view the images from the Pictures folder or anytime saved by you on your OneDrive. However, to append an additional folder to that of Photos app on Windows 10, navigate to its Settings at the bottom left and likewise press the Sources section. Now, you can either click or tap to add a folder at the bottom. Select, name, and get this folder some of the Pictures.
Once your pics are uploaded they will look, well, organized according to captured date.
Get the Detail of File
With Windows 10 built-in Photos app, you will witness pictures well-organized date wise. Whenever you wish to visit the details of an older file you may only click the upper rightmost corner. That contains – filename, location, size, date and the time taken. Sometimes also provide you information about the device with which it has been captured.
Post and share
You can try Share button at the screen top. A list of applications will prompt where you can share images when you use Photos App on Windows 10.
Popularly on social media wall – Facebook, Instagram or Twitter, you can quickly partake Photos app pictures with your friends. You can notwithstanding multiple photos to either network can easily share as and when you wish.
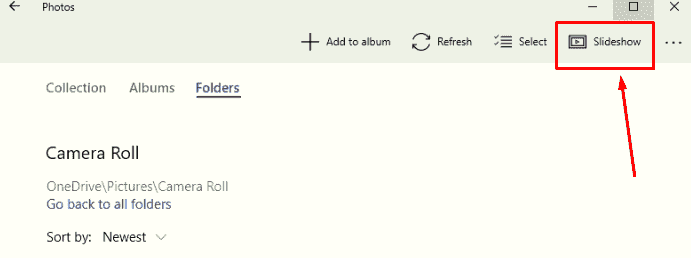
See Photos in a slideshow
At the right side of the share option, you will find the slideshow choice.
Click the button and sit relaxed. Just have an experience for the sweet memories of gone days while photo app on Windows 10 will keep moving through the entire album like in a smooth way and of course in an album like order. Cherish the moments and celebrate your memories with this wonderful option.
Accepting the pop-up as yes, Hit on the F5 key given there on the keyboard. All your photos will then start showing as slideshow on the display. For improved navigation experience use the left and right arrow keys and easily navigate between files.
Albums
Now just return back and come to the main screen. Here, just click on ‘Albums’ option present there on the left corner if you wish to switch to the Albums view.
Photos out of all the folders from your Pictures gallery will club and appear in the form as if you are viewing an album. If you keep the similar shots in one place in albums, it will get you an alternative browsing option way to revisit your collection.
Place one after another suitable title to your album. The headline will help you identify the unique folder and let you view the inside photos.
As per your choice you can always add or remove photos and let the useless pictures empty your space and library. It any album don’t hit you can keep them underneath.
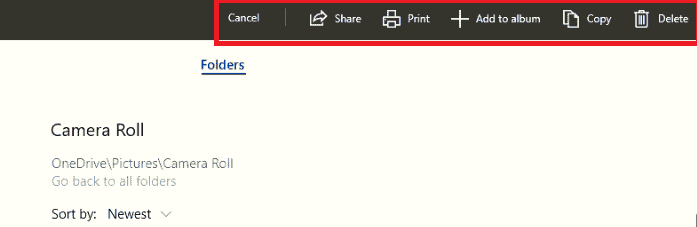
Share, Copy, Edit, Delete Multiple items
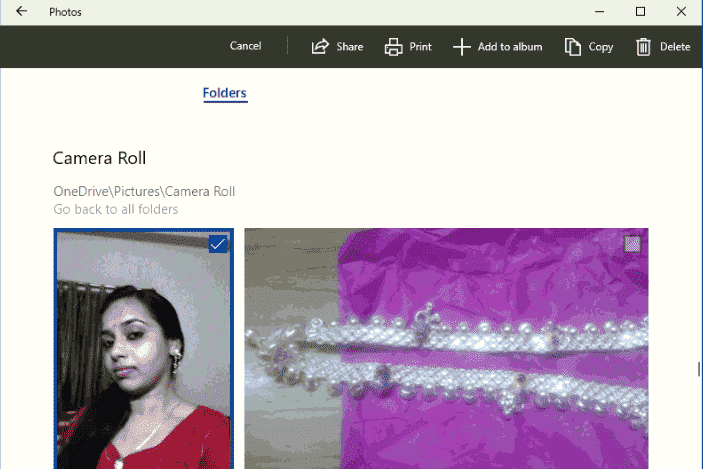
While looking in for slideshow in either collection or album view – on left corner side find the button you’ll get the option to select a number of photographs. Simply click the checkbox to select multiple items simultaneously.
Afterward, explore a number of options available and through ‘Share’ allow them to appear on your social networking site. Or maybe to another app or it can any other folder on the same PC or another supporting gadget. While ‘Delete’ will let it remove either from the local storage location or all devices connected to the system.
‘Copy’ option will let you take an image to another location and send it to the required place. Just open up File Explorer, browse target folder and then choose ‘Paste’ option from the list.
Use Photos app on Windows 10 to Edit, Enhance and Improve Pictures
If you use Photos app on Windows 10 it offers some editing features such as filters, one-click enhance which improves the basic texture with some essential fixes.
To edit, click on one photo, open and select pencil icon to open the editor interface. You will find different categories such as – Basic fixes, light, contrast, color, and vivid effects. The Basic fixes include one-click enhance button, options to rotate option, crop, “straighten”, remove red-eye.
Tweak Photo settings
Press ‘Settings’ button present at the bottom-left of photo app of Windows 10. You will find the ‘setting’ option there having a list of items present to access its preferences. Depending upon your customization taste you have the power to switch off the automatic enhancements feature for your photos. You can also put a particular photo as a photo tile to show on that as the head tile of the Startup menu. Moreover, if you do not prefer to use Photos for images stored in the built-in cloud storage, just unlink OneDrive account.
Use Selective Focus
Selective focus option is helpful to do excellent editing when you use Photos app on Windows 10. With this tool, you can sharpen the focus on the real object in the foreground/background and slightly blurry apart from the primary domain of DSLR cameras.
Autofocus, taken as a default feature needed to be learned upon. It is an obvious feature enabled in modern cameras. Let us stop you here to tell how exactly it works with the photo app.
In order to use Selective focus in the Photos app on Windows 10, just click the ‘Effects’ button from the bottom left. Now you will have to hit the ‘Selective Focus’ present on its right side.
You will observe a semicircle given with blue color four dots there on your image. Re-position the semicircle if you wish to and then click or drag those four dots in order to reshape the area where you want to focus.
Even the extent of blurriness of the side parts can be chosen from the (Strongest to the Weakest).
For that, you will have to click the circular ‘Blur’ icon given at the topmost right, and then select appropriate one option out of the five options available.
Use Photos app on Windows 10 to Import Files, Stored Outside
You can wish to receive images from – pen drive or other external sources. Simply insert that drive into the system, hit over the ‘Import’ icon given at the top-right side. The Photo app on Window 10 smart application usually detect that drive and all images present inside and ticked by default.
Click on the Continue option to import them. Now on the screen, you will have a series of following options to delete or remove the photos there from the drive. We hope you can now use Photos app on Windows 10 pretty easily.
I have used several photo programs, unfortunately, none compatible with WIN 10, obtained with my cameras. All were fairly simple to use and easy to organize and access. The WIN10 program is totally confusing. All I need is the ability to download photos from my camera, phone or other devices, store them in a file of my choosing, then edit and organize as I need.