Audio Troubleshooter for Windows 10 Pro, Home – When you confront a mess up you attempt several tweaks to overcome. But here is a single utility that can rectify multiple hardships regarding sound.
This utility is nothing other than Audio Troubleshooter for Windows 10. Hence, here we are giving a download link furthermore writing the steps to use the audio troubleshooter. See: How to Configure Sound Settings on Windows 10.
Download Audio Troubleshooter for Windows 10 Pro, Home
Download Audio Troubleshooter
Step 1 – To begin the procedure, head to Fix sound problems web page. Else, you can download the tool from here: audio10.zip.
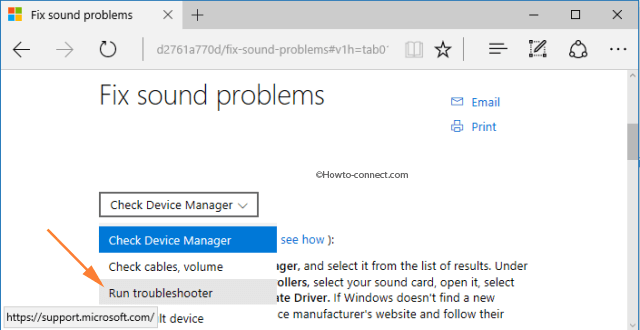
Step 2 – Underneath the Fix sound problems heading a drop-down menu is visible. Click on it and then hit the choice Run troubleshooter.
Step 3 – In the resultant interface, click or hit the link try the audio troubleshooter.
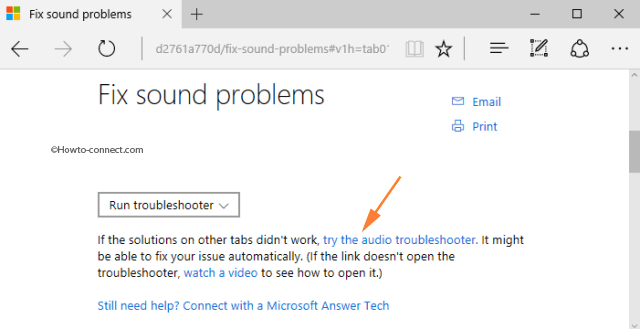
Step 4 – The download of the troubleshooter will commence instantly.
How to Use Audio Troubleshooter for Windows 10
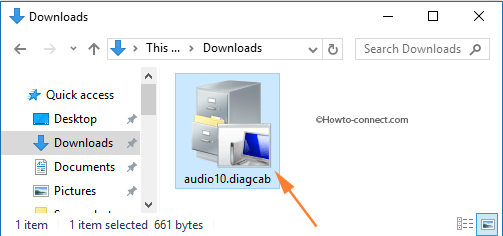
Step 1 – Navigate to the folder where downloaded items are stocked and trace out the file entitled audio10 or audio10.diagcab. Double-click on it.
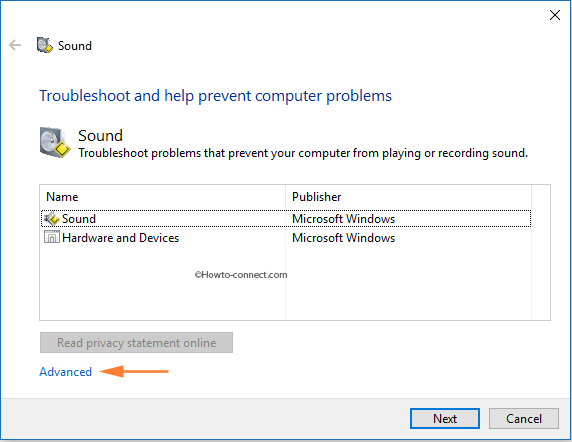
Step 2 – The main interface of the troubleshoot will arrive on the screen. Click or hit the Advanced link, visible at the bottom.
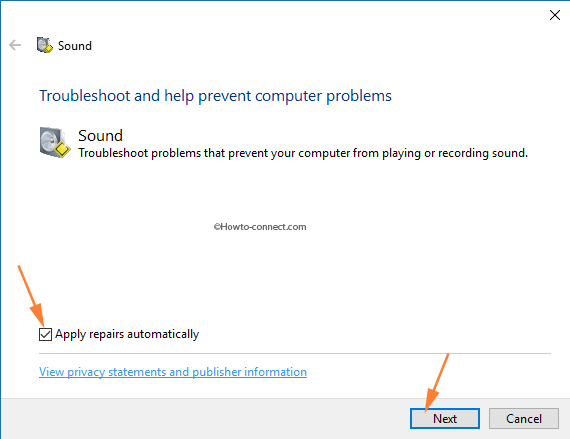
Step 3 – Put a tick mark on the tiny cell that reads Apply repairs automatically and hit Next button.
Step 4 – The Audio troubleshoot will begin tracking the prevailing issues.
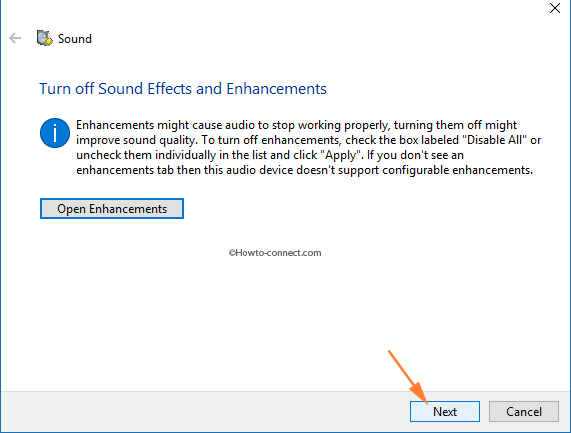
Step 5 – Next, you will be asked to Turn off Sound Effects and Enhancements, click or hit Next button to proceed further.
Step 6 – Click or hit the option Play test sounds.
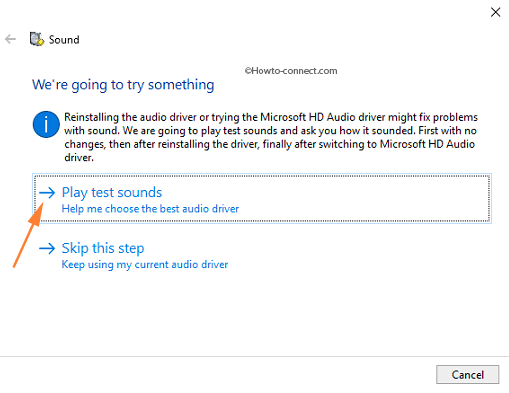
If the troubleshooter finds something unsatisfactory or detects a mess, it will either reinstall the audio driver or try the Microsoft HD Audio driver.
Hence, the troubleshooter will produce a sound and will ask you how it sounded.
Step 7 – Listen to the played sound cautiously. Three options – Good, Bad, and I didn’t hear anything will be noticeable.

Note – All three options exhibit their references with them. Like Good says Keep using my current driver. Bad and I didn’t hear anything refers to Try reinstalling current driver or Try using Microsoft HD Audio driver.
Step 8 – Depending on the sound quality you heard, click the appropriate option. If the troubleshooter exhibits a note that it was unable to rectify the issue, then you should give a shot to other sound options in step 7.
Step 9 – Depending on the system’s mess up, it will get fixed either by reinstalling the driver or by switching to the Microsoft HD Audio driver.
Step 10 – As the last step, the troubleshooter will exhibit the outcome.
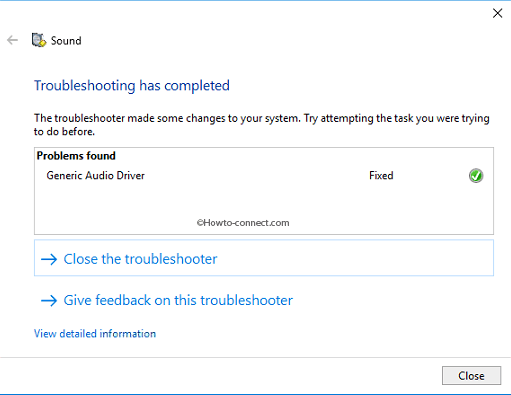
Step 11 – Troubleshooting couldn’t identify the problem will arrive as an outcome if there is nothing messy.
Well, there are many everyday measures that you all undertake while encountering issues with audio. They are – examining Device Manager, closing audio enhancements, checking cables, or maybe trying other audio formats. However, it is not necessary that these measures will fix up the mess.
Concluding Thoughts
So, it is a good initiative by the team to design a troubleshoot. It can rectify the mess by reinstalling your prevailing driver. Or can switch to the Microsoft HD Audio driver to fix the issue.