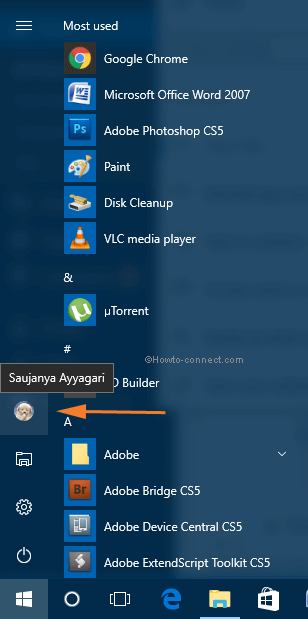
On Windows 10, you can easily change Account Picture through Start Menu. On the lower left of Start Menu, you find your Account photo which leads to the alteration of account picture.
With the Embark of Windows 10, it is pretty much easier to get a few things done when compared to its previous versions. Now you don’t have to all the way to the PC Settings through Charms bar and Settings option. Windows 10 has brought the former function of Start Menu with enhancement of app tiles in a new augmented version. You can get access to everything very smoothly. Unlike Windows 8 or 8.1, you don’t have to go through so many steps to change an account picture. Windows 10 Start Menu contains your Account option and lets users change Account Picture, Sign Out and Lock Account.
Here in this Windows 10 tips, we will show you how you can Change an Account Picture on Windows 10. Let’s go to the steps:
Change an Account Picture on Windows 10
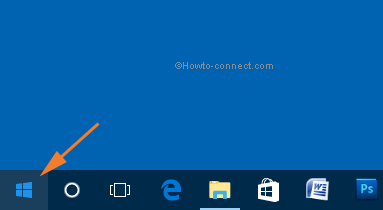
- Click on the Start button on Taskbar.
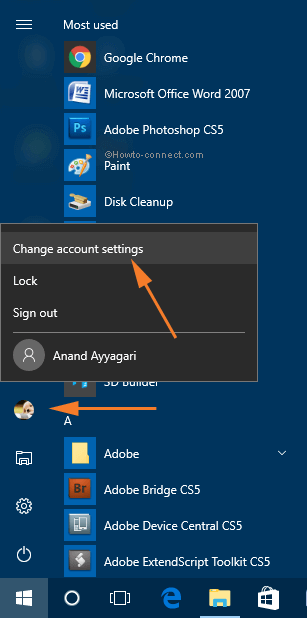
- On the left portion of Start Menu, you can see your Account photo. Click on your Account photo. You see three options in a dropdown – Change Account Settings, Lock and Sign out. Click Change Account Settings.
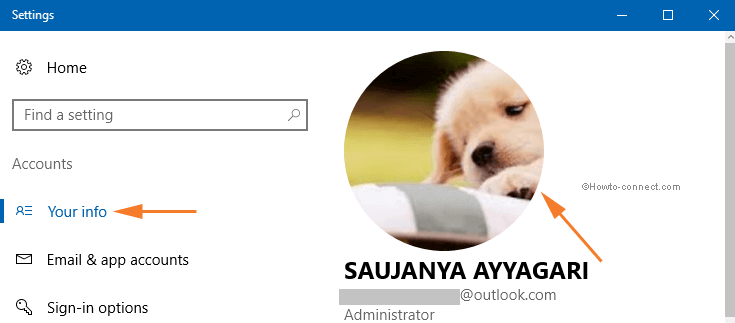
- You are taken to Your info section of the Accounts category of Settings app. On the right, you can see your present account picture.
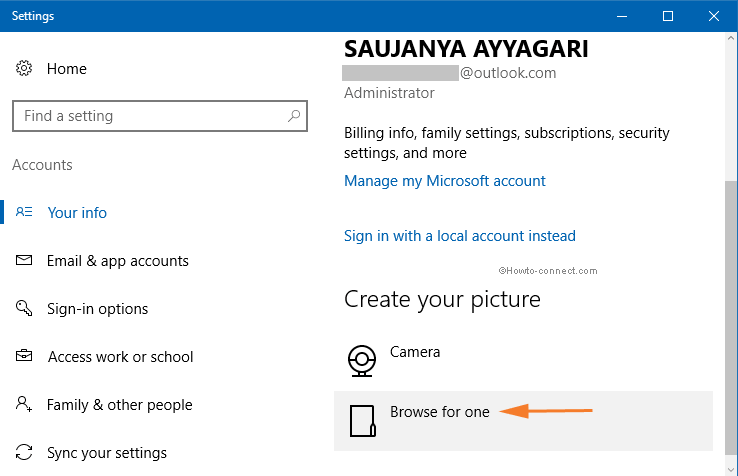
- Scroll down until you reach the heading that reads as Create your picture. Two buttons are present there, click on Browse for one.
- A window pops up where you can navigate to the location where you have stored your picture that you want to use as your account picture. Click the image which you want to set as Account picture and next on Choose Picture button.
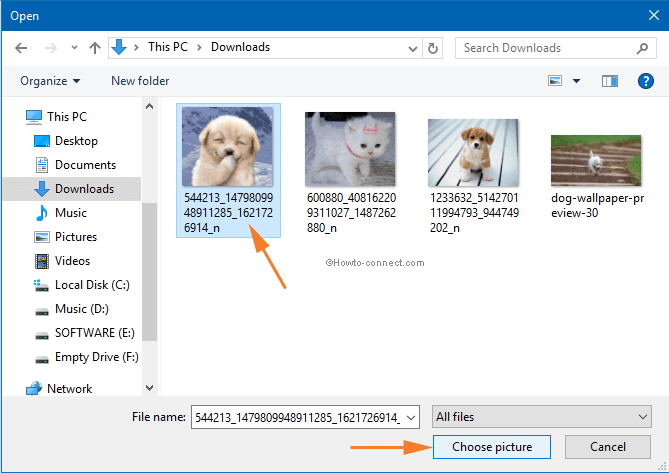
- You have changed your Account Picture. Apply a cool pic and enjoy.

The start menu disappeared, I have 3 buttons, restart, shut down and something else…. NO ACCOUNT photo or settings where it used to be.
oh! you are the best. Thank you I made it 🙂 Saranghae 🙂