Method to How to Change PowerShell Look on Windows 10 with steps. – Windows PowerShell is a command-line shell that allows you to customize appearance settings of its own. If you work on PowerShell very often, then changing its look is definitely something you will try to do it. You can modify the size of the window or use another color for the text for the interface of this tool. Others may want to make the font look little bigger or smaller as per requirement and so on. You might want to customize another important tool with this guide – How to Change Color and Font of Command Prompt in Windows 10, 8.
In this guide, we show you the instructions to Change PowerShell Look in Windows 10. To customize the appearance settings of the console, you need to get access to its Properties. The Windows PowerShell Properties includes various settings related to the console.

Now, let us begin the guide and explore the areas that can change the look of the console as per your preference.
Ways to Change PowerShell Look in Windows 10
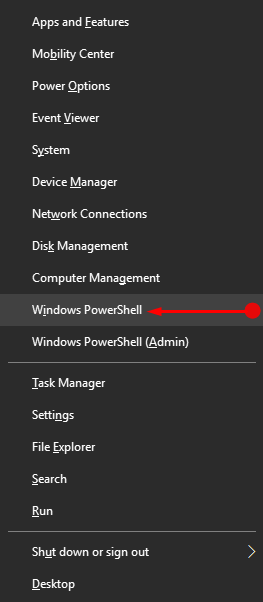
Step 1 – Right-click Windows logo on the far left of the taskbar and from the list of options that pops up, locate and click Windows PowerShell.
For reference, you can read our guide on How to Run PowerShell as administrator in Windows 10.
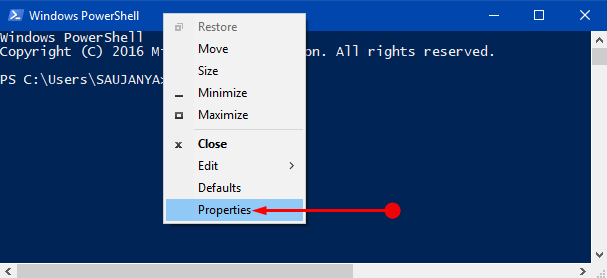
Step 2 – Once Windows PowerShell opens on the PC screen, you will notice the application’s icon on the upper left corner of the window. So, right-click on the icon and when few options show up, select Properties.
Step 3 – Windows PowerShell Properties box will pop-up with few tabs. To change PowerShell Look in Windows 10, you can set a different font, modify the window size, and assign different colors and lastly can manage its opacity level.
Now, let us walk through the areas that will change PowerShell Look in Windows 10.
Font
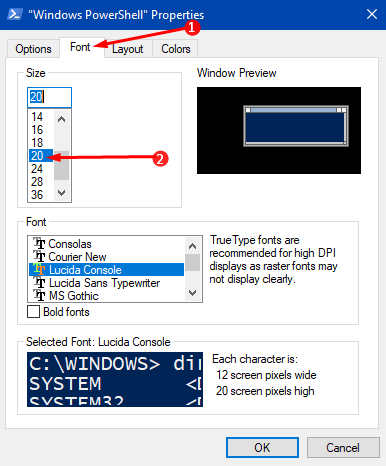
Step 1 – On the Windows PowerShell Properties box, switch to the second tab, Font. Here, you will find four different sections related to the font.
Step 2 – To increase or decrease the size of the font, select the number accordingly in the Size section. While doing so, you will get to see its preview in the Windows Preview section.
Step 3 – Moving ahead, if you are not happy with the default font, browse the list in the Fonts section and pick up the one you prefer.
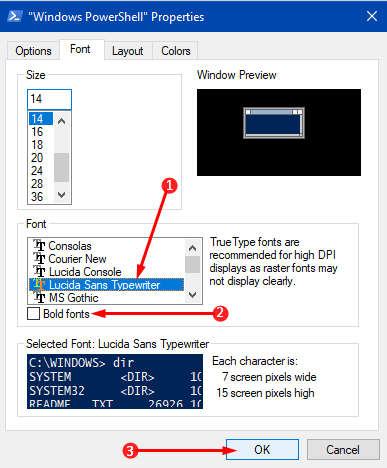
Step 4 – If you want the fonts to appear in bold, check the box Bold fonts. Once you are done with the changes, click OK button to implement the font look of PowerShell in Windows 10.
Follow an article on the utility of this tool on Create Restore Point on Windows 10 Using PowerShell.
Window Size
Step 1 – To change the windows size of PowerShell, go to the third tab Layout.
Step 2 – In this tab, you will find three sections. The second section Window Size includes settings for Width and Height. Use the arrows of both the options to increase or decrease the width and height of the window.
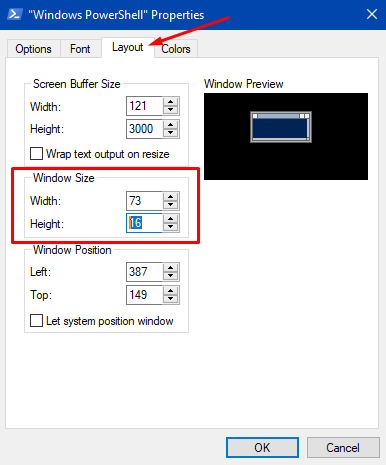
Step 3 – Finally, click OK to implement the new size of the window.
Note – You will notice the preview of the changes immediately on the Window Preview section.
You can also Open Command Prompt in Small Size by Default on Windows 10.
Colors
Step 1 – The last tab of Windows PowerShell Properties box is Colors and it lets users set text and background colors for the console. So, switch to the last tab Colors.
Step 2 – The first four radio buttons are for Screen Text, Screen Background, Popup Text and Popup Background.
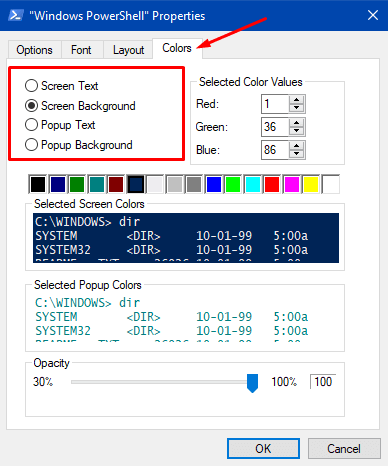
Screen Text – Select this option and assign a new preferable color for the text from the list that appears just underneath the options.
Screen Background – Use any other color of your choice as the background for the application.
Popup Text – Change the color of the pop-up text when any dialog box emerges when you run commands on Windows PowerShell.
Popup Background – This allows you to set another color as the background of the dialog box that pops up.
Step 3 – After modifying the colors you can also set the Opacity level. The minimum transparency is 30% and the maximum opacity that you can set is 100%. So, use the slider and adjust the level as per preference.
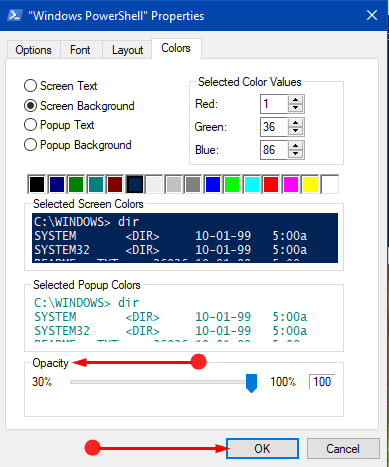
Step 4 – After modifying all the colors and adjusting the opacity level, click OK button to Change PowerShell Look in Windows 10.
Pursue another similar guide on Add Background Color to Start, Action Center, Taskbar on Windows 10.
So, after finishing the above steps and making changes in the mentioned areas will completely Change PowerShell Look in Windows 10.
Conclusion
Not only PowerShell but you can also make changes in the Command Prompt and give a personalize touch to it also. This generally looks great when you are working on your own PC where everything is well organized by you. If you have more options that can Change PowerShell Look in Windows 10, do write them in the comments form.