When you upgrade to a greater Windows 10 version it keeps a copy of the previous version. This allows to downgrade to the earlier build if you encounter any problems in the newer one. The common reasons being the hardware drivers are not working properly in the latest updated version or incompatibility issues. The uninstallation process can be carried out only if the Windows.old folder is not deleted.
By default, you can go back to the previous version within 10 days after release. However, if the user surpasses this period, the windows automatically delete the old folder. As a result, you find go back to the previous version of Windows 10 missing or Get started button greyed out. You become unable to initiate the downgrade. But, there is a method for answering how to roll back windows 10 update after 10 days. This will help you to increase the limit of 10 days to a maximum of 60 days. And you could successfully rollback windows 10 update.
Change the roll back period to 60 days in Windows 10
Here is How to change the roll back period to 60 days in Windows 10 –
1] Using CMD Command prompt
- Click search present on the taskbar.
- Type in – cmd.
- Press – Crtl + Shift + Enter.
- When User Account Control appears, click – Yes.
- In the elevated Command Prompt, type the following –
DISM/ Online/Get-OSUninstallWindow
- Hit – Enter.
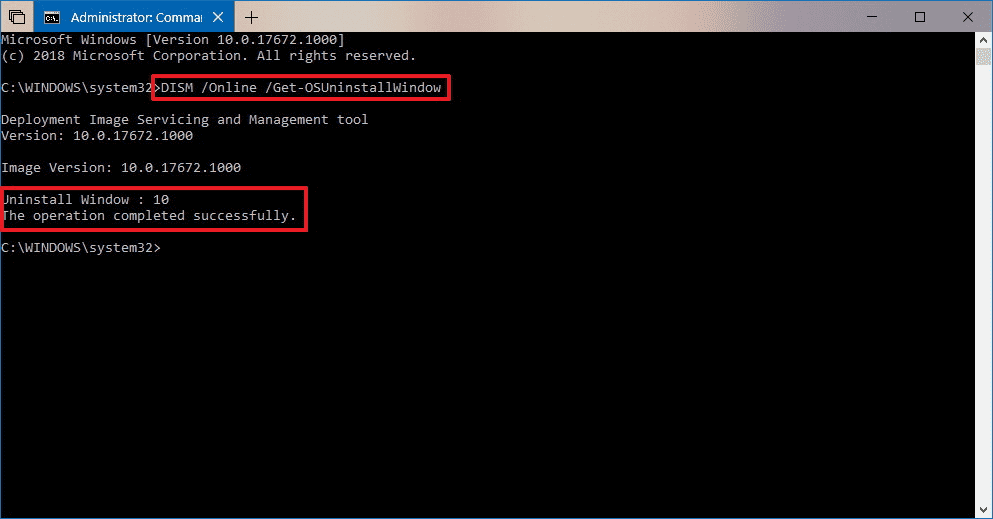
- This shows the rollback days or period under – Uninstall Window.
- To change the rollback period, replace numberofdays between 2 to 60 days in the below command –
DISM/ Online/Set-OSUninstallWindow/Value:numberofdays
- Now, copy and paste the command.
- Hit – Enter.
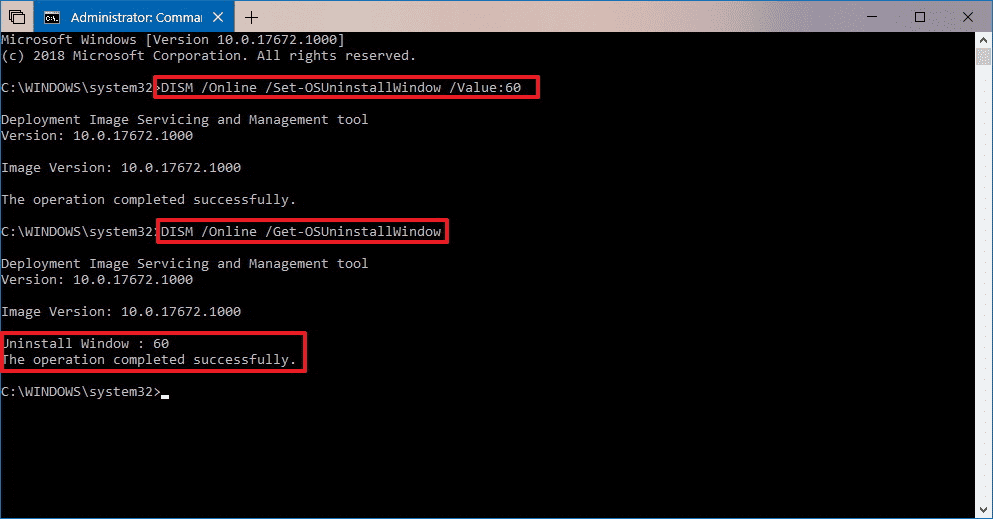
- The changes take place immediately.
In case the system shows an Error stating the system is unable to find the path, this means there is no earlier version of Windows 10. The error might appear when the 10 days limit passes over.
2] Roll back period to 60 days in Windows 10 by renaming the Windows.old folder
You can also change the roll back period to your desired time limit by renaming the folders responsible to downgrade the version. Using this way, you can rollback after unlimited days. All you need is to make the following changes within 10 days of installing the new version.
- Press the – Win+E.
- Select Local Disk (C:) from the Quick access pane. Note that this should be installation drive.
- Next, click – View menu.
- Check the box before – Hidden items.
- Look for the folders – $Windows~BT and Windows.old.
- Right click on $Windows~BT and select – Rename.
- Give a new name to the folder such as – Win10$Windows~BT.
- In the same ways right-click the Windows.old and choose – Rename.
- Provide a name such as – Win10Windows.old.
Now when you have decided to rollback to restore the original names of both the folders –
- Right click the Win10$Windows~BT and name it – $Windows~BT.
- Similarly, rename Win10Windows.old to Windows.old.
- Now, click – Start.
- Type in – Recovery.
- Hit – Enter.
- Click the Get started under – Go back to the previous version of Windows 10.
That’s all!!