In order to personalize a Windows 10 PC, Windows Spotlight images always attract users. These wallpapers are stored somewhere deep in the computer. If you want to view or use them elsewhere you need to Change Spotlight Images to PNG/JPG Format.
Windows 10 OS offers an extensive range of Lock Screen wallpapers as Windows Spotlight to enhancement of experience. However, they are in limited number but you may be wondering where you can grab those awesome collections of images for personal use. When you navigate to the location, you see them as blank files with unfamiliar names. Fortunately, Windows 10 allows you Change Spotlight Images to PNG/JPG Format. Renaming so many images individually is definitely a tiresome task. However, they allow altering the file with batch command. Let us explore the steps and for your convenience, we have split the guide into three sections.
How to Change Spotlight Images to PNG/JPG Format in Windows 10
Save Spotlight Images in New Folder
Step 1 – Open File Explorer to Change Spotlight Images to PNG/JPG Format by clicking its icon on the taskbar.
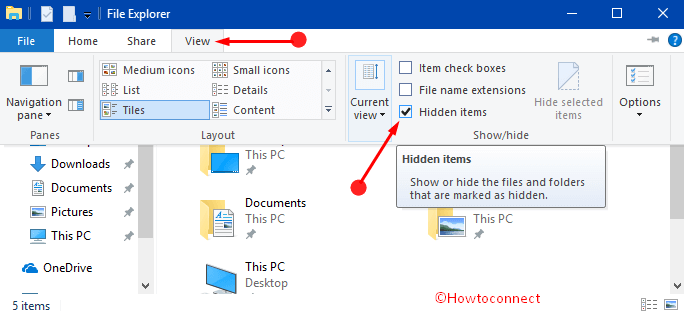
Step 2 – Now, click View tab on the menu bar. When the ribbon comes into view, select the Hidden items box as shown in the given image.
Step 3 – After you do this, navigate to the below-mentioned path –
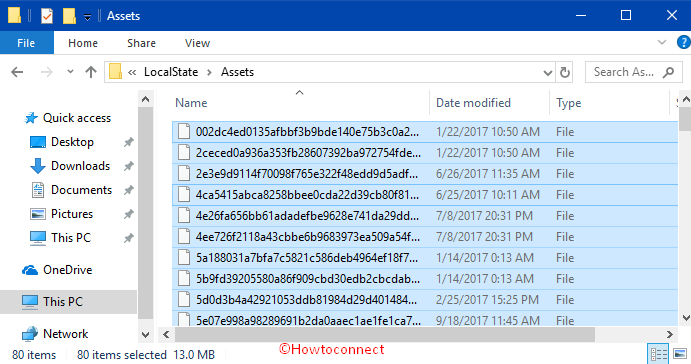
C:\Users\UserName\AppData\Local\Packages\ Microsoft.Windows.ContentDeliveryManager_cw5n1h2txyewy\LocalState\Assets
Note – In the above command, ensure to substitute UserName with the original username.
Alternatively, open Run dialog box using “Win+R”, copy-paste the ahead path and paste “Enter” –
%LocalAppData%\Packages\Microsoft.Windows.ContentDeliveryManager_cw5n1h2txyewy\LocalState\AssetsStep 4 – Here, the Assets folder contains all the Spotlight images but you cannot view them until you modify their extensions. You can see that these files display huge and unfriendly names. So, first select all the files by collectively pressing Ctrl + A keys and then copy them with the help of hotkeys Ctrl + C.
Step 5 – Now paste them in a new folder in your Documents or Desktop or at any location of your choice. To paste the files, use keystrokes “Ctrl + V“.
Run Command Lines to Change Spotlight Images to PNG/JPG Format
Step 1 – Moving ahead, you need to open an elevated Command Prompt so that you can to Change Spotlight Images to PNG/JPG Format. To do so, first, ensure that the new folder where you saved images is open.
Step 2 – Execute a right-click on an empty space inside that window. Out of few options, locate and click “Open Command window here (Administrator)“.
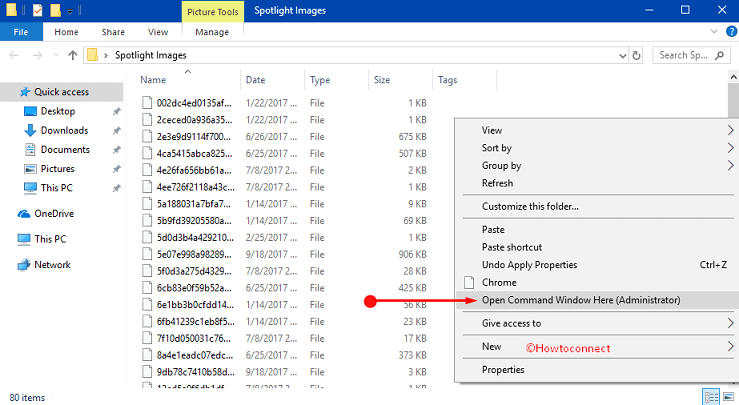
Step 3 – Upon the prompt of UAC, click Yes.
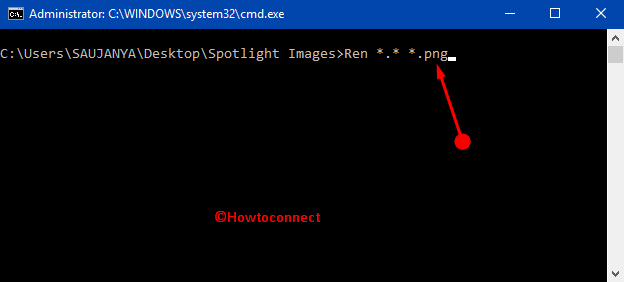
Step 4 – Input the below-given command to modify the image into PNG format. After inserting the command, press Enter.
Ren *.* *.png
Step 5 – To make it into JPG, use this command line and press Enter.
Ren *.* *.jpg
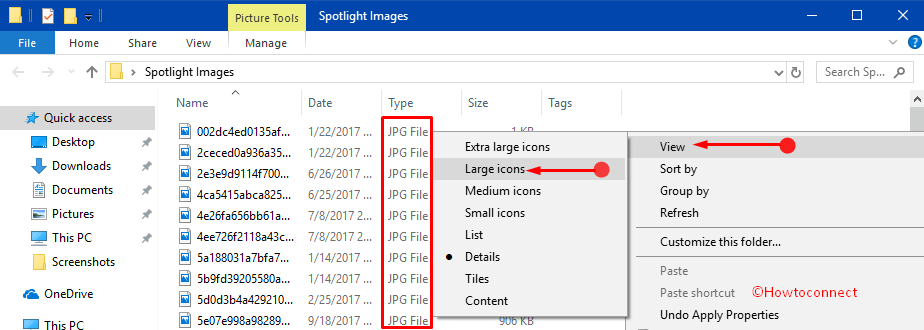
Step 6 – Now, open the new folder that contains Spotlight images and you can notice the conversion in the file formats. But to see the images, execute a right-click inside the window, moreover, click View => Large Icons.
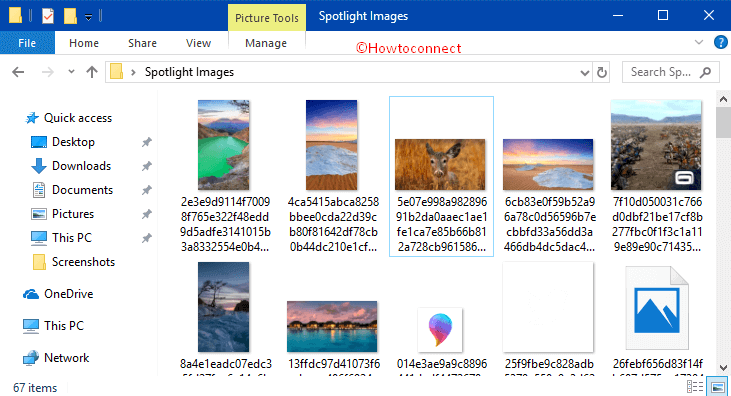
Step 7 – Here, you notice that all the files are not pictures, so delete the unwanted ones. Moreover, you can also see a good collection of vertical images. You can store them separately as they are quite useful for mobile lock screen and home screen.
Note – You can re-run the above steps after a couple of weeks to retrieve more awesome images.
Alternate Method
Many users fail to launch Command Prompt (admin) directly from within the folder and there is an alternative way that lets them do the conversion of file formats of a folder in one go.
If you don’t see “Open Command window here (Administrator)” option, follow the below steps to Change Spotlight Images to PNG/JPG Format.
Step 1 – Type cmd on taskbar search field and jointly press Ctrl + Shift + Enter keys. If you come across UAC prompt, click Yes.
Step 2 – In the Command Prompt, first input the path of the new folder where you stored the files (images of Spotlight). To do so, type in –
cd pathofthefolder
Note – Please replace pathofthefolder with the actual path. For example, I have stored the contents in a folder namely Spotlight Images in my Desktop and so the command goes like this –
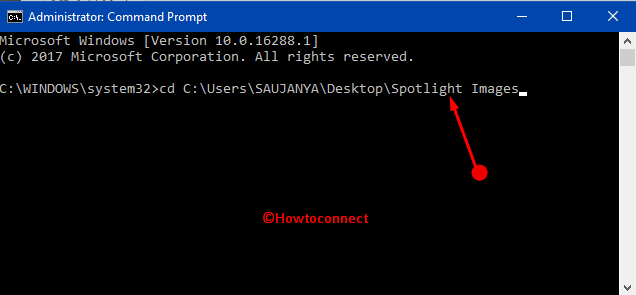
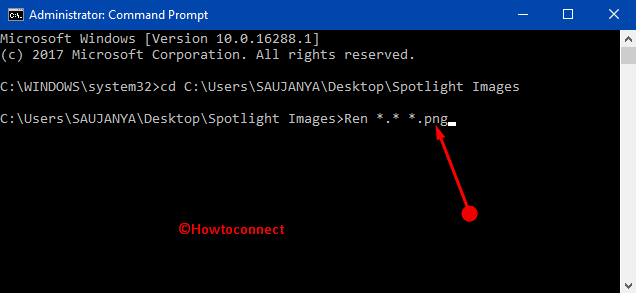
cd C:\Users\SAUJANYA\Desktop\Spotlight Images
Step 3 – To Change Spotlight Images to PNG format, type in the given batch command as shown in the screenshot and press Enter.
Ren *.* *.png
Note – The above command should go with the path of the Spotlight folder. For instance, the full command will be –
C:\Users\SAUJANYA\Desktop\Spotlight Images>Ren *.* *.png
Step 4 – To convert the Spotlight images to JPG format, use the following batch command –
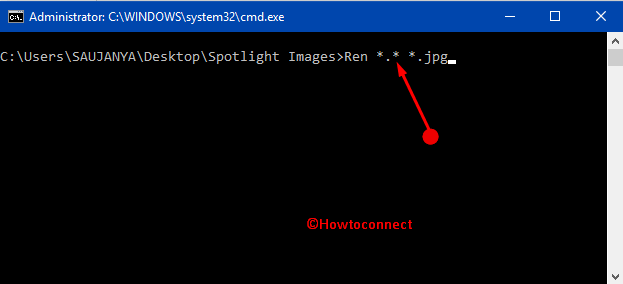
Ren *.* *.jpg
The entire command along with the path of the folder goes like this –
C:\Users\SAUJANYA\Desktop\Spotlight Images>Ren *.* *.jpg
Conclusion
Hopefully, using a simple command line, you can pretty much easily Change Spotlight Images to PNG/JPG Format in Windows 10. But if you are using the second method, make sure to provide the correct path of the new folder else you may encounter errors in the Command Prompt. However, you may like to follow the steps in a gap of a few weeks to gather new wallpapers. If you have some other ways to manually modify these wallpapers files formats altogether, do write them to us.