In this article, you will see the procedure to Check Open Ports in Windows 11 or 10 Using CMD (or Command Prompt). When an app uses a TCP/IP port on your device in order to access a network, that port would be locked out – no other program may be able to use it. And while everything related to ports and traffic is usually taken care of on its own by the system, there might be situations when you might have to know the application that is blocking a specific port.
Here you can find some built-in ways to do so- specifically the ways to check open ports using CMD or Command Prompt. Apart from using the Command Prompt, you can even consider using some third-party applications that can easily list the ports and the apps or processes that are using them.
Way to Check Open Ports in Windows 11 and 10 Using CMD
Here is how to check open Ports in Windows 11 or 10 Using CMD –
To find port-use with process names
Follow along with these steps to get the list of ports in use and the names of the processes tied up with them respectively.
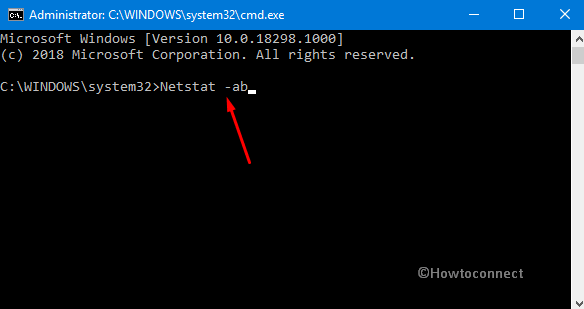
Step-1: Open Run dialog box by pressing Win+R hotkeys. Type cmd in the text box and hit Shift + Ctrl + Enter keys altogether.
Step-2: Hit Yes on the UAC prompt.
Step-3: This will let you access an elevated Command Prompt on the screen. Here, type in or copy-paste the below-given code and hit Enter.
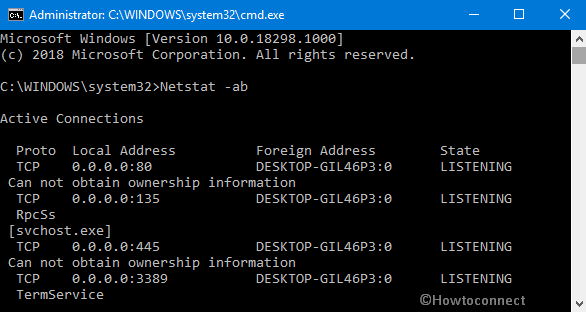
Netstat -ab
Wait for the entire result to load. Once you successfully run this command, simply scroll down to the port number you want to check. As shown below, you’ll be able to see the process’ name respectively below the port it is linked to.
To find port-use with the process identifiers
Usually, identifying the application represented by a specific process name can be tricky. This method might help you identify the application that a process relates to.
Here also, first of all, launch the “Command Prompt” with admin rights using any of your preferred methods.
Copy-paste or type the below code and ensure to hit Enter.
netstat -aon
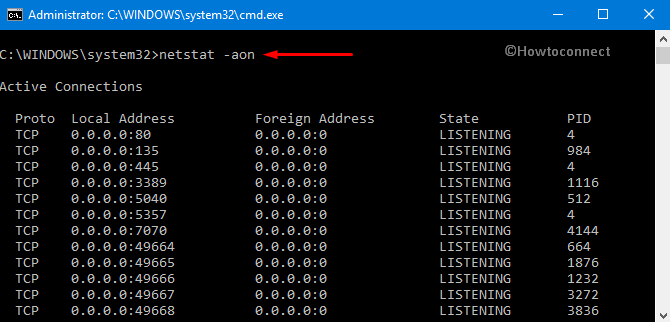
Finally, the result now will contain the “PID” or the process identifiers instead of the names. Simply scroll down to the port you want to check and note the PID corresponding to it.
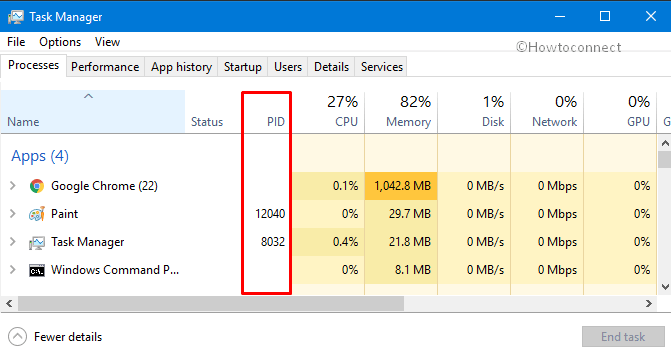
Moving ahead, open Task Manager. To do so, perform a right-click on the taskbar and select the option namely “Task Manager”.
Go to the Processes tab. Right-click on the Name column and choose PID (see snapshot).

You just need to find the PID you note earlier. The ‘Name’ column corresponding to the PID must reveal the application associated with the port.
That’s all!!
1) How to Flush DNS Cache in Windows 10 Using CMD
2) How Run System Restore Using Command Prompt (CMD) in Windows 10
3) How to Get BitLocker Recovery Key from CMD in Windows 10
4) How to Open Device Manager Using Command Prompt in Windows 10
5) How to Get IP Address using PowerShell on Windows PC