Procedures to Check Which Process Is Using More CPU in Windows 10. – Windows 10 is expected to run flawlessly but for several reasons, it fails to do so. In some cases, the OS slows down completely due to the consumption of high CPU by certain processes. So, you might need to know about those processes that are actually slowing down the system. Well, in this article, we will provide you a few utilities using which you can keep a track on CPU usage. If you want good performance from your PC, then pursue Things to do to Make Windows 10 PC Fast – User Guide.
To Check Which Process Is Using More CPU in Windows 10, you have three distinct and mostly used free monitoring utilities. Let us first know why actually you need to monitor the CPU consumption? Sometimes, one program needs the full attention of CPU and as a result, other programs that also require CPU fail to get enough time to perform their tasks perfectly. Hence, this leads to very slow performance of the OS. So, if you also have some troubles regarding the usage of CPU, then walk through the guide as three methods with steps are mentioned below to Check Which Process Is Using More CPU in Windows 10.
Ways to Check Which Process Is Using More CPU in Windows 10
Let us learn about the components and their steps to know CPU usage one after the other.
1. Task Manager
The first method is through Task Manager and this built-in utility generally serves the need of the basic users by monitoring about all the apps, processes and services that are right away running on your PC.
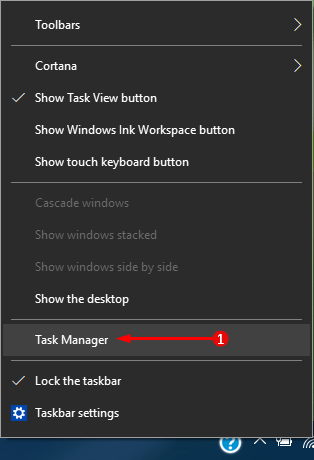
Step 1 – First and foremost, locate a blank space on taskbar and execute a right-click there. From the list of options that appear, select Task Manager, the third last one.
To know more methods to launch Task Manager, follow How to Open Task Manager in Windows 10.
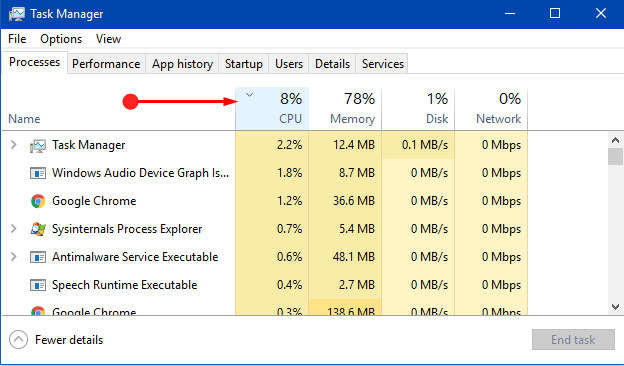
Step 2 – Now, Task Manager will come up on the screen and by default, Processes tab will be noticeable.
Step 3 – Inside the Processes tab, you will see a few columns with different titles. The Name column displays all the processes that are running both in the foreground as well as in the background.

Step 4 – Next, click the CPU title and it will categorize the processes depending on their CPU consumption.
Step 5 – Moving on, click on the Performance tab and it gives you an overview of how your CPU is being utilized by Windows 10 PC. So, by default, the CPU category will show a graph on its right pane.
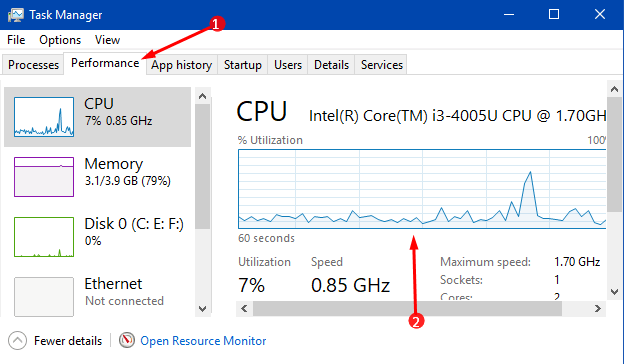
Step 6 – The x-axis on the graph reads the time and the y-axis indicates the total utilization of CPU.
2. Resource Monitor
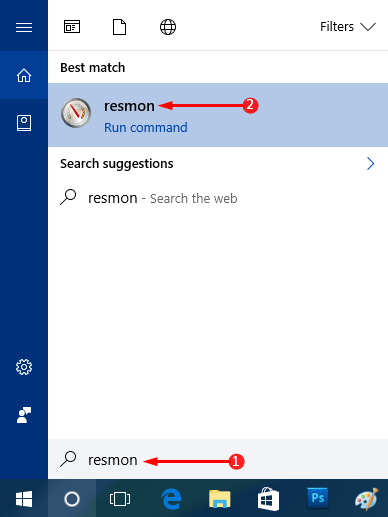
Step 1 – To begin this procedure, launch Taskbar search. Now, type the command resmon and then the Best match will display resmon (Desktop app), click on it.
Step 2 – Next, the Resource Monitor window will appear on the screen with several graphs on the right pane and other information on the rest of the window.
Step 3 – Well, by default, the CPU tab explores up and the first section will be of Processes. There you will notice all the running processes and other related details in the respective columns.
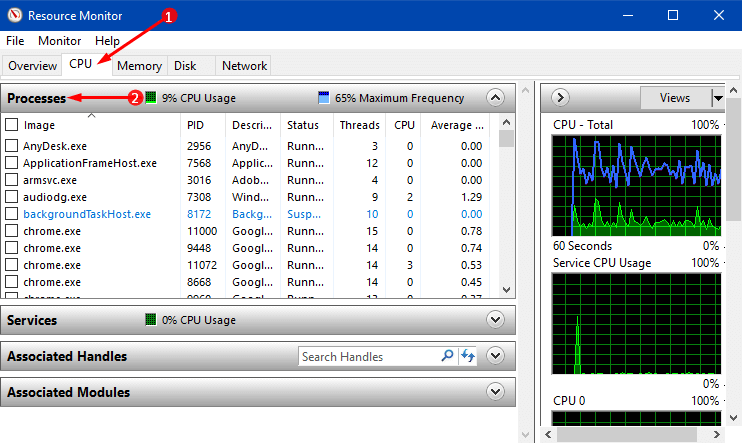
Step 4 – To know, which process is consuming how much CPU, then select the Average CPU column. Moreover, if any process that is not responding, then its name will appear in the red color text.
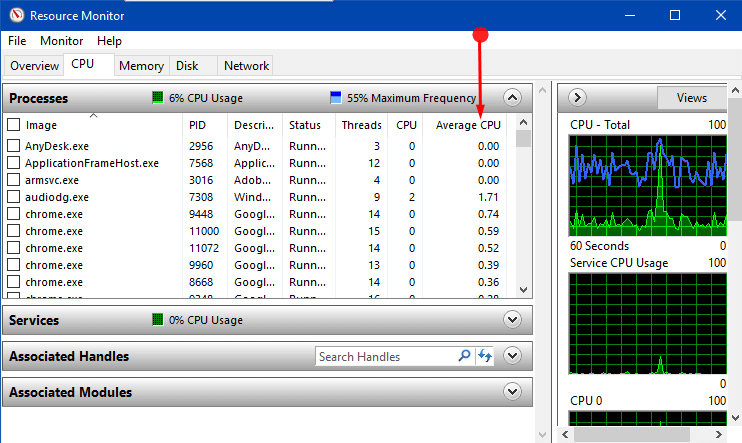
Step 5 – Moving ahead, you will notice graphs of CPU usage on the right-hand side. Now, if you have a multi-core CPU, the first two graphs represent average data for all cores. Whereas, the next graphs illustrate each core respectively.
3. Process Explorer
If you are a techie and want to explore more about CPU usage, then Process Explorer comes into action. Process Explorer is free system monitor for Windows computers, licensed by Microsoft. It provides the functionality of Task Manager and in addition, holds lots of rich features including CPU details.
Step 1 – Start this method, by downloading Process Explorer from this web page.
Step 2 – It will be a small zip file, so, right-click on ProcessExplorer and select Extract Here.
Step 3 – Now, find and double-click a file labeled as procexp.exe. Click Agree button on the window that shows up the agreement terms of Process Explorer.
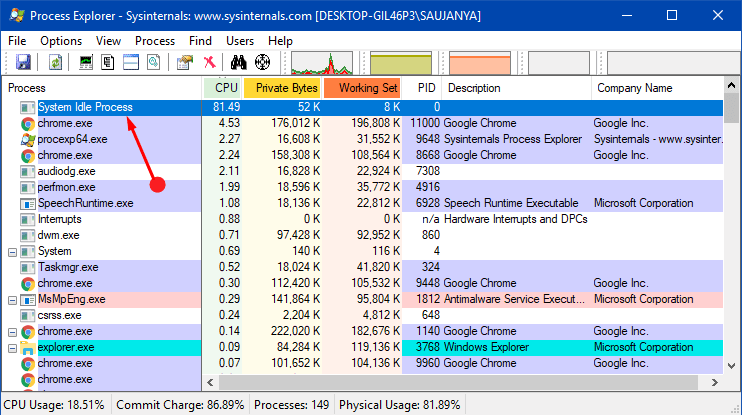
Step 4 – This will launch the main window of Process Explorer on the screen. Next, locate and select the CPU column.
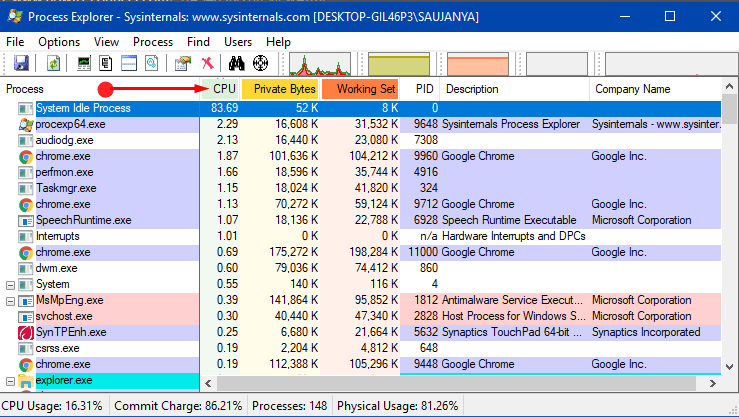
Step 5 – The process that lists on the top is the one that drains up the most CPU. When I took the below screenshot, the CPU was idle 81.49%. In this way, it displays the running processes that consume CPU in decreasing order.
Winding Up
By now, you will be quite sure to use any of the above monitoring tools to know about the functioning of CPU. Hence, follow any of the utilities to Check Which Process Is Using More CPU in Windows 10 as per your requirement and let us know which was more helpful to you.