Registries are the core component of Windows as they hold all the settings related to hardware, software, third-party services, and everything else your operating system use. Oftentimes to make changes in system settings you need to tweak the registry entries at the same time create a new key in Registry Editor. People add a new key to the Windows Registry to serve a specific goal, generally to enable a setting or fix unexpected error codes your PC faces.
While tweaking the Windows registry, be sure about your actions as a single mistake often makes the computer useless by corrupting system elements. Therefore, it’s always better to backup the entire registry database before you attempt to modify keys or values. This way, you can revert back to the default changes Windows 11 offers if anything goes wrong. However, adding a new registry key only will neither be detrimental to your PC nor helpful. To make the key effective, you must set its value correctly.
Create a new key in Registry Editor on Windows 11
Here is how to create a new key in Registry Editor Windows 11 –
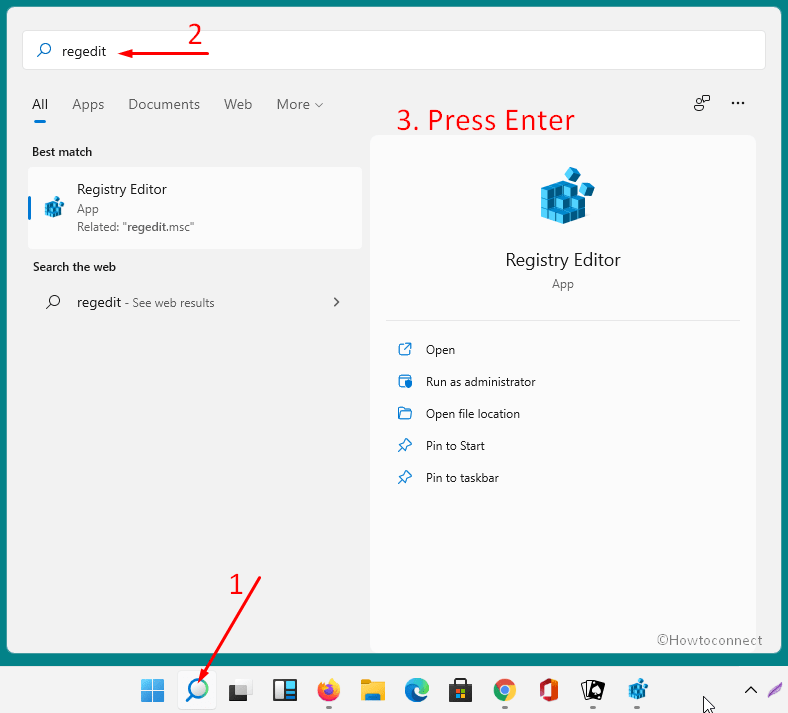
- Press – Win+R.
- Type in regedit.exe in Run Dialog box.
- Hit – Enter.

- When a User account control prompts for your consent, select – Yes.

- Once Registry Editor appears, you will notice there are 5 root keys available in the left pane.
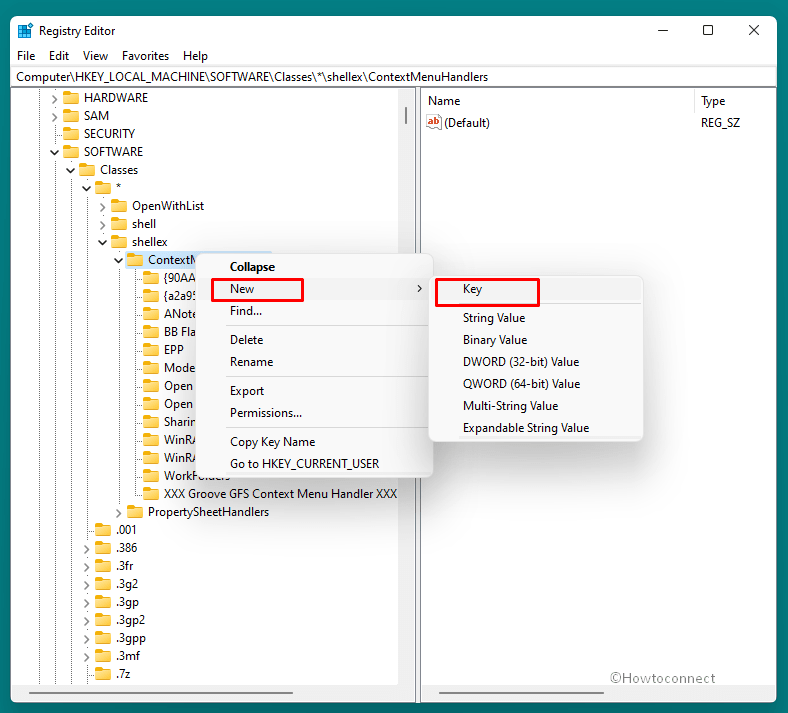
- Expand the string by double-clicking and reach the entry where you want to create a new key.
- Next, Choose New > Key.
- Name this key as your need.

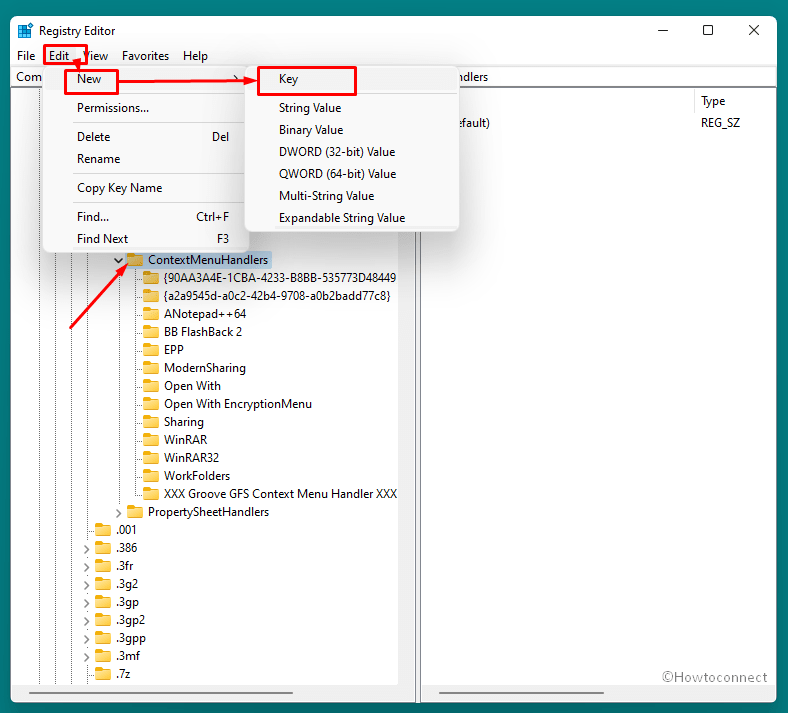
- Alternative, select an entry.
- Click on Edit from menu bar.
- Select New followed by Key.

- Provide a name to this key and in the last step close the registry editor.
You can see – How to Create a New DWORD Value in Registry Editor on Windows 10.
That’s all!!
