Hard disk accumulates all your data in itself whether it is installation file of windows, downloaded software, picture, apps and everything. CPU keeps these data running to fulfill your demand. But when you run heavy applications like games, multi dimensional high resolution videos, the processor is not so efficient to handle. However, the CPU has also a graphics (on-board) but they are poor.
When you purchase a good-range PC or Laptop it comes with integrated GPU and this works after fitting graphics chips. The Graphics load the heavy and great high resolution applications very smoothly. It has its own Control panel that recognizes an application to load. Windows 10 has gone more precise and included a Setting to Customize Graphics Performance Preference for Apps. Preferences may provide better app performance or save battery life.
This feature comes up after Windows insider build 17093 and will be included in the upcoming build of the original version. This is indeed a tremendous opportunity for the gamers. See the method
How to Customize Graphics Performance Preference for Apps in Windows 10
Step-1: Press Win+I shortcut keys and open Setting app home. Click on System.

Step-2: Scroll down and follow the link provided with option Advanced graphics setting.
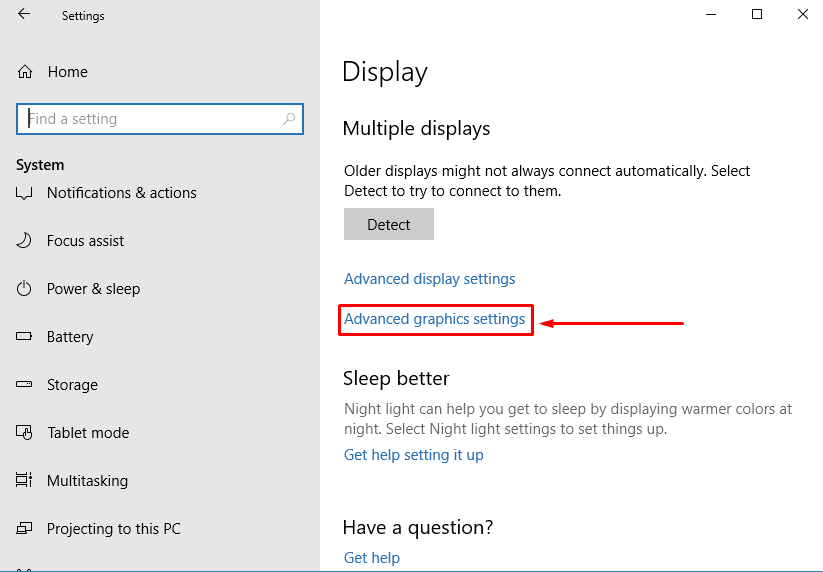
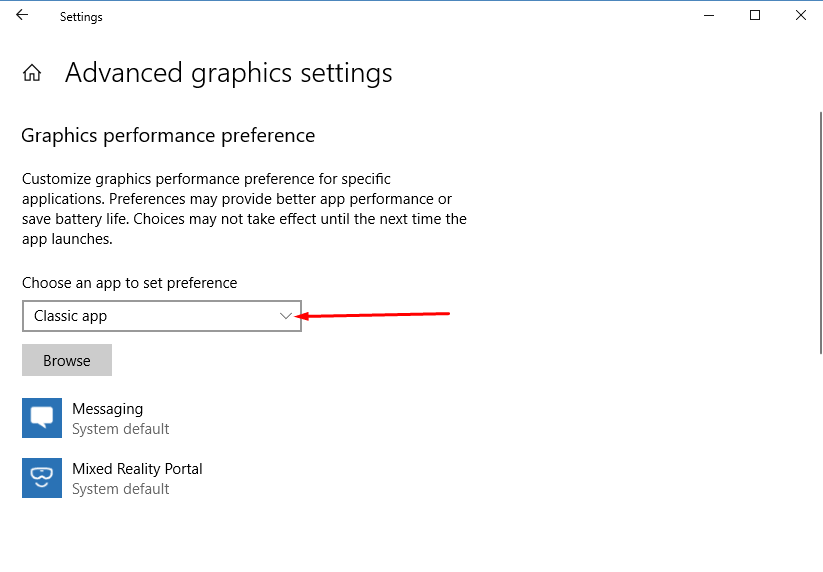
Step-3: You reach Graphics Performance Preference section click on the dropdown under Choose an app to set preference.
This list includes 2 options – Classic app and Universal app. Let’s see what both mean –
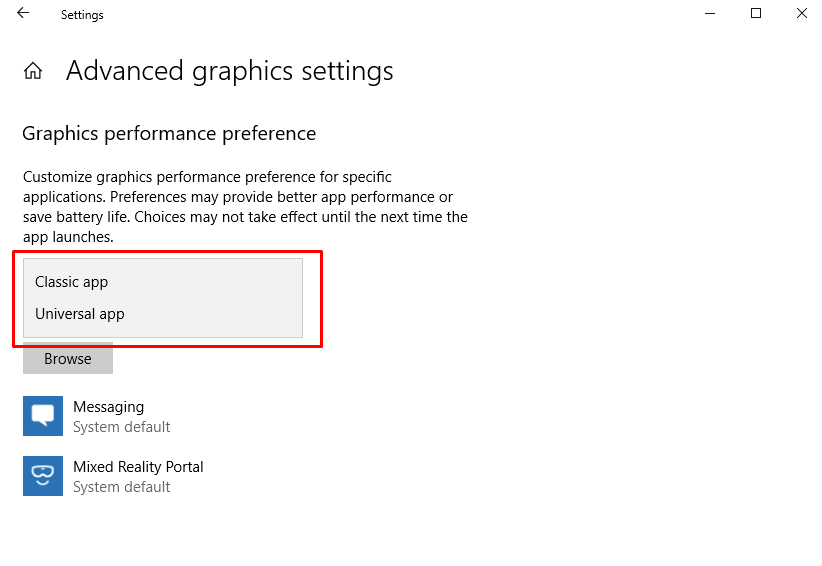
• Classic app – Orthodox Win32 desktop applications are placed in this group. The software you generally download from different websites comes under this category.
• Universal app– Programs downloaded or available using Microsoft Store. In usual words, the applications you can use on your PC and equally on a mobile device are recumbent in this option. But as you cannot use graphics on mobile phones so here the store apps will be considered as Universal apps.
Follow an interesting and helpful guide in detail – How to Make Windows 10 PC Fast for Gaming.
Choose Classic app to Set preference
To Customize Graphics Performance Preference for Apps in Windows 10 defined as Classic you have the freedom to choose a downloaded game from various sources.
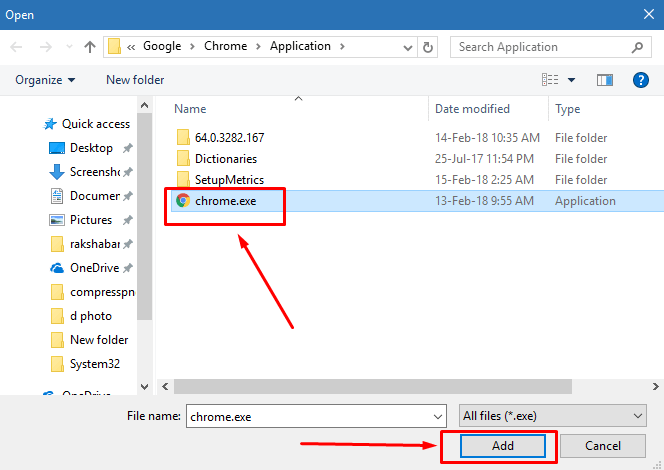
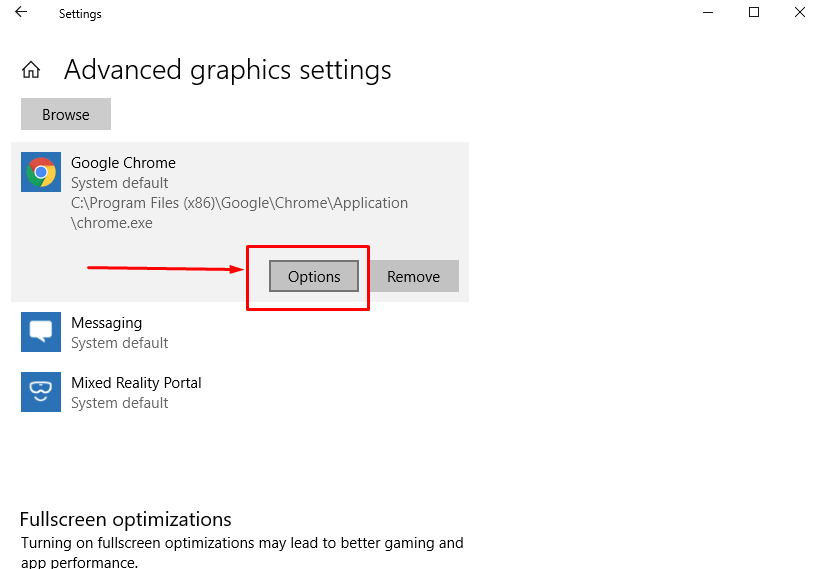
- Select Classic app from this list.
- Perform a click on Browse appearing below to locate .exe file to add for preference.

- Commonly these files are found in the Program files or data, so access the location, select one and click on Add.
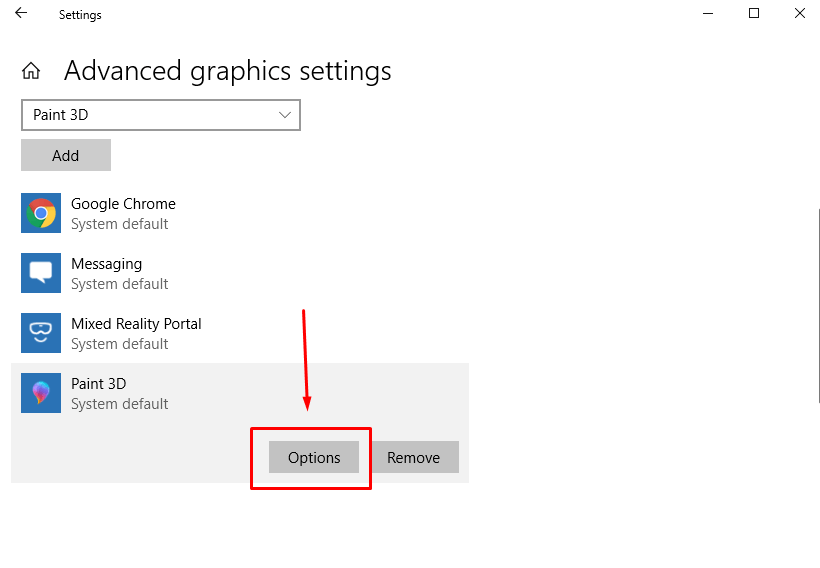
- Now click on the application and select Options from detail pane.
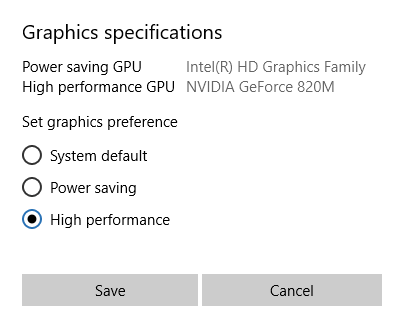
Here you find a Graphics specification pop up showing the graphics running on your PC along with 3 options – System default, Power saving, and High performance.
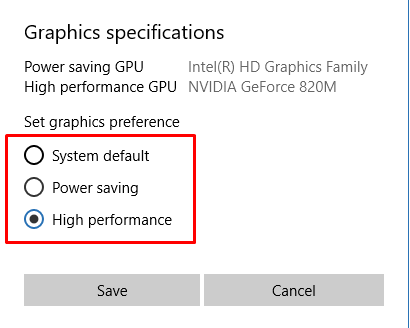
• System default– Going with the flow. Allowing the processor to decide which apps should be run in dedicated GPU automatically.
• Power saving– Only the applications run in GPU who consume minimum power. Usually, integrated graphics processor.
• High performance – Basically Discrete or external graphics processor who should be run on the most capable GPU.
- Click on the round cell checkbox and select Save.
Choose Universal app to set preference
This process will help you to Customize Graphics Performance Preference for Apps and games downloaded from Microsoft Store.
Perform a click on “Universal app” and allow another drop-down to appear. Hit on Select an app.
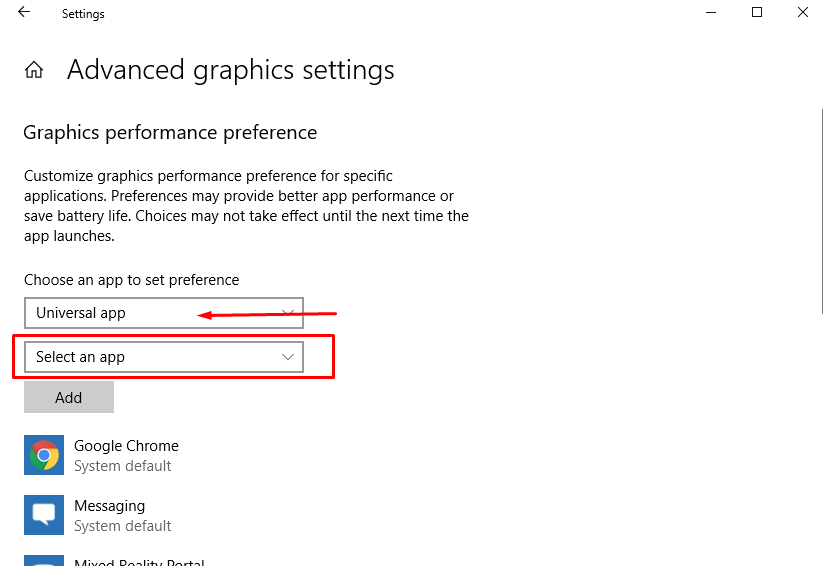
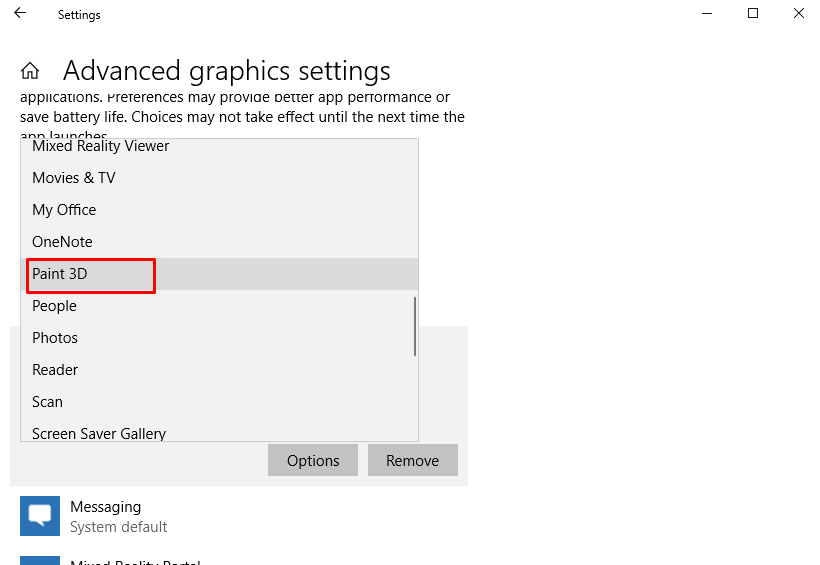
You will get a huge list of application from your system, click on your preferable.
Do a click on the added universal application and choose “Option” from the detailed pane.
From the “Graphics specification” popup, check the preference and Save.
Beyond the Frame
Developers nowadays are making apps usually uncontrollable by the users. Therefore, there are some stubborn apps those we cannot be forced to run in additional GPU even though you are having an NVIDIA or AMD chipset
For instance, Paint 3D and similarly some other applications mostly of Gaming genre prefer to use the Build in GPU rather than dedicated one. In that case, above guidance will go in vain. However, Microsoft is still working on it and probably the industry will see some drastic changes in next update regarding these apps.
Dedicated GPU
Graphics Processing Unit in short GPU coupled with Central Processing Unit (CPU) acts as a catalyst for better application performance, makes the analysis smooth. Even after that, users used to struggle for running games of higher configuration. A built-in GPU could always support high performance gaming that a dedicated one can. Manufacturers put their steps up providing dedicated GPU with the latest devices. This has become a must needed thing whenever we talk about Gaming in PC.
The way of work in additional GPU
Usually, NVIDIA or AMD chipset comes up with their own control panel in order to force the CPU using GPU. Processor decides by itself which applications are to be run in GPU as the devices huge amount of power accomplishing this task.
But now Windows 10 allows forcing the system to use games and 3D applications meeting with your need and preference. This means it’s the users who can decide which apps should transfer to GPU instead of the processor itself.
That’s all about how to Customize of Graphics Performance Preference for apps in windows 10.