How to Customize Mouse Wheel on Windows 10 – The PC users constantly exercise with the cursor when they browse pages, settings, consoles or anything else. To move the cursor rapidly mouse wheel is a very handy tool. Configuring it carefully meeting with your need can help to enhance work speed.
How to Customize Mouse Wheel on Windows 10
Settings App
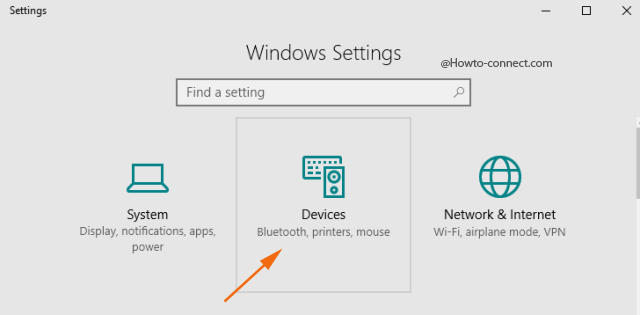
- Use the combination of “Windows + I” keys and from the outspread program, click or hit the “Devices” block.
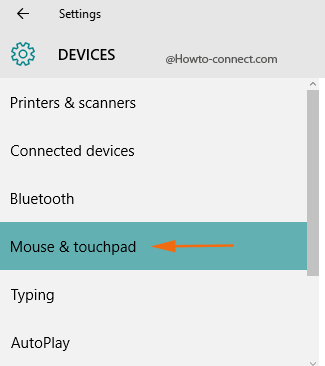
- On the next page, hit “Mouse & touchpad” from the left column.
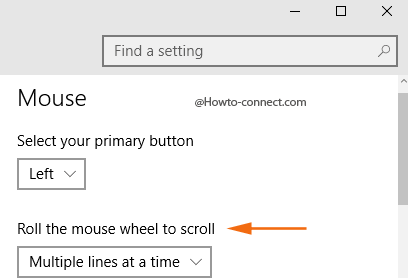
- Now, move to the other side and underneath the “Mouse” heading, you can find a setting labeled as “Roll the mouse wheel to scroll”.
- This setting has a drop-down menu attached to it and when you click on it, two sub-settings are displayed – “Multiple lines at a time” and “Once screen at a time”.
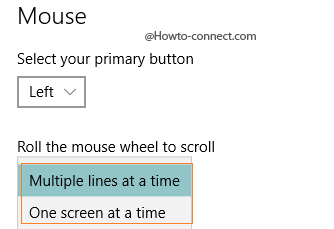
Multiple lines at a time – If you proceed with this choice, several lines will be rolled down with one notch of the wheel.
One screen at a time – If you go with this alternative, the entire screen of text will be scrolled at once with one single notch of the mouse.
- If you opt the first option, i.e “Multiple lines at a time”, you can observe that another setting gets activated that reads as “Choose how many lines to scroll each time”.
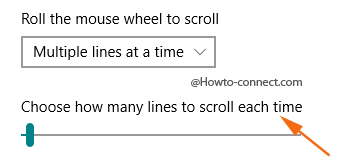
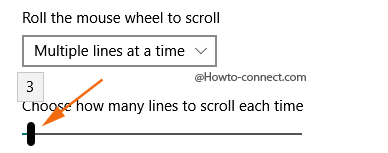
- A slider is associated with this setting and this will bestow you to decide how many lines you wish to roll with one notch. Hold the slider and start dragging to right or left and you can view the number on top; leave the slider on the number that suits you. For instance – if you choose “3”, then with one single notch, 3 text lines will be scrolled.
Mouse Properties
- Now, if you are eager to Customize Mouse Wheel on Windows 10 more precisely, navigate to the extreme down of the “Mouse & keypad” page and hit the link “Additional mouse options”.

- A separate box of “Mouse Properties” emerges on the screen and it showcases six tabs, shift to the tab that is entitled as “Wheel”.

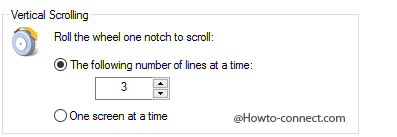
- Underneath this tab you can observe two sections – the first one is termed as “Vertical Scrolling” whereas the second one is entitled as “Horizontal Scrolling”.
Vertical Scrolling
Vertical Scrolling exhibits two radio buttons beneath one heading – “Roll the wheel one notch to scroll”.
The following number of lines at a time – In one single notch of the mouse wheel, the opted number of lines will be rolled down and in its corresponding box you can input your required number (this is the same that you see in Settings program).
One screen at a time – The entire screen will be scrolled at once with one single notch when this round cell is checked (this is also seen in the “Settings app”).
Horizontal Scrolling
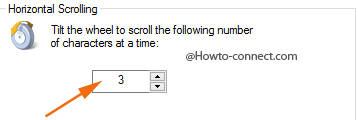
Horizontal Scrolling is the additional setting and underneath this section you can see one choice –
Tilt the wheel to scroll the following number of characters at a time – If you have a mouse that supports horizontal scrolling, then you can opt this choice and set the required number of letters you prefer to roll sideways with one single notch of the wheel.
- So, opt any of the settings as per your convenience and once done, click or hit “Apply & Ok” buttons to implement the modifications.
In this manner, you can boost browsing furthermore working momentum by altering the number of lines betwixt one notch while Scrolling.
The “Settings” app and the “Mouse Properties” have one setting in common – “Vertical Scrolling” but if you have a mouse that supports sideways scrolling, you need to head into the “Mouse Properties” otherwise you can modify rest of them in Settings app only.
