There are situations in Windows 10 when you experience messed up or distorted thumbnails for different files such as images, videos. And in order to resolve this problem, you need to delete and reset the thumbnail cache. In this article, you will learn 3 ways that will delete and reset thumbnail cache in Windows 10.
There are at times, Windows 10 displays you the messed up or crumpled thumbnails for distinct file types. Suppose, you have accessed to a folder where there is a list of images and videos. You choose to view them in thumbnails like small, medium or large icons. Now, File Explorer will start forming thumbnails for all the images and videos present in the particular opened folder. Instead of quickly showing you the thumbnails, you experience a messed up look. This problem arises when thumbnail cache gets corrupted.
What does Thumbnail Cache mean?
Windows 10 itself stores a copy of all your image, video, document, and folder thumbnails in a cache because they can be produced quickly at any time when needed without any delay. To store all the thumbnails, Windows 10 automatically establishes thumbnail cache file. In simple words, whenever you open a folder, Windows 10 displays you the copied thumbnails without any delay instead of manually and slowly searching them each time. And when this thumbnail cache gets corrupted you face problems with the thumbnails of all file types.
You may like to read:
How to Delete and Rebuild Icon Cache in Windows 10
Table of Contents
How to Delete and Reset Thumbnail Cache in Windows 10
We represent here three different ways to delete and reset thumbnail cache in Windows 10. Read all the methods and try out the one that suits you.
Method 1: Disk Cleanup
Windows 10 – How to Open and Use Disk Cleanup
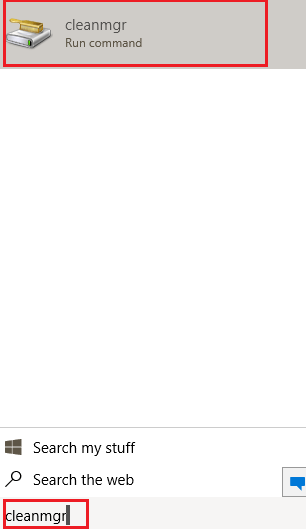
- Click the search box on the taskbar which leads to pop up Cortana.
- Type, cleanmgr in the text field and hit Enter button.
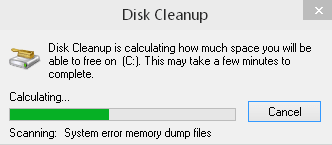
- A Disk Cleanup: Drive Selection small wizard pops up on the screen. Click the drop-down menu and choose the drive where your operating system is stored. Generally, users store it in “C” drive.

- Select the drive and click Ok button.
- It will take some time to open the main window of Disk Cleanup for the drive.
- In the Disk Cleanup window, under the section Files to delete uncheck all the option except Thumbnails.
- So, select the Thumbnails option and click Ok.
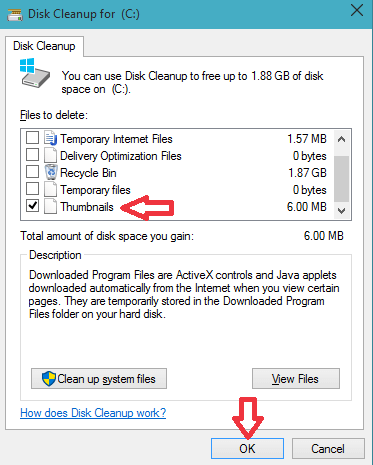
- Again the small window to select the drive prompts. Select the drive again and click OK button. After a while, Disk cleanup for the opted drive will appear. Check only Thumbnail option and hit OK. A confirmation pop-up displays. Again choose OK.
- This will delete the thumbnail cache and force Windows to reset it later automatically.
Method 2: Command Prompt
Windows 10 – How to Launch and Use Command Prompt
Tip: Using the Command Prompt to Delete and Reset Thumbnail Cache in Windows 10 is quite a long process. The thumbnail cache is hidden and you can find it in the following location:-
C:\Users\{user-name}\AppData\Local\Microsoft\Windows\Explorer (Replace the “user-name” with your actual user name of Windows 10)
As mentioned above, the thumbnail cache is hidden and you need to enable the hidden files and folders to navigate the above location. In case you don’t know how to enable hidden files and folders, follow the link and see how it is done in Windows 10.
Read the below steps to delete and reset the thumbnail cache using Command Prompt –
- Launch the Command Prompt using your preferred way.
- Here, with the help of cd command, navigate to the folder where the thumbnail cache is stored. To do so type the following command –
cd C:\Users\User-name\AppData\Local\Microsoft\Windows\Explorer (Substitute the “user-name” with your Windows 10 user-name)
Example: cd C:\Users\AUM SAI RAM\AppData\Local\Microsoft\Windows\Explorer
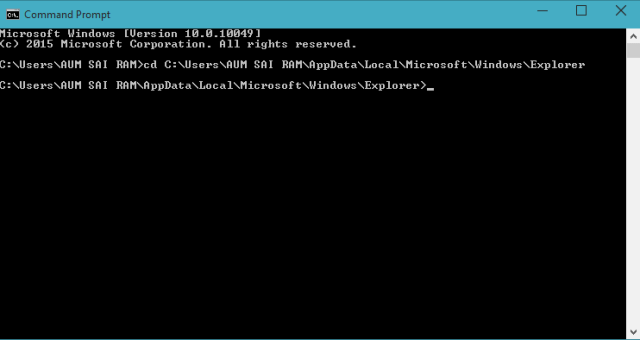
- Now, you need to check whether you are into the correct folder or not. So, type dir at the end of the folder path and hit Enter.
Example: cd C:\Users\AUM SAI RAM\AppData\Local\Microsoft\Windows\Explorer>dir
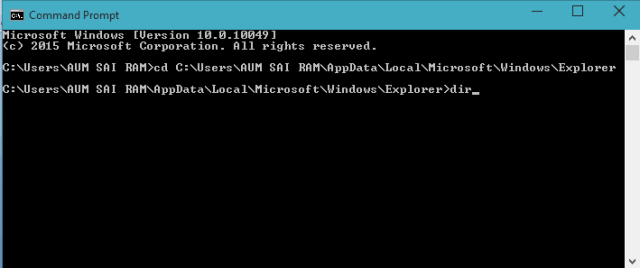
- You can view the list of thumbnail cache files in that folder.
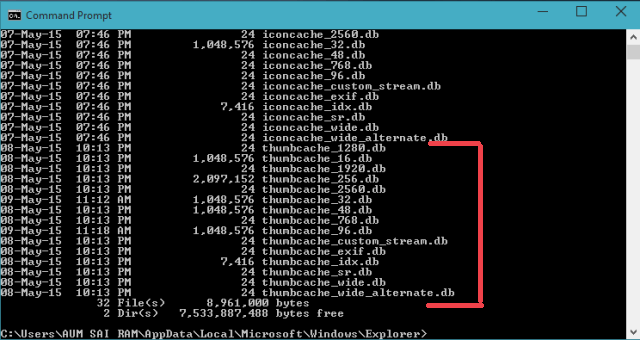
- Before you delete all the thumbnail cache files, you need to close everything which includes File Explorer also. To close File Explorer use the below steps –
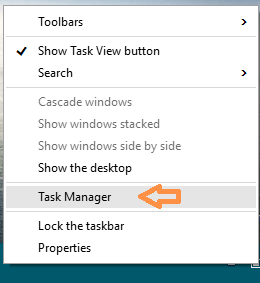
- Make a right click on Taskbar and choose Task Manager.
- Go to the Details tab of Task Manager.
- Find exe and execute a right click on it and click End Task.
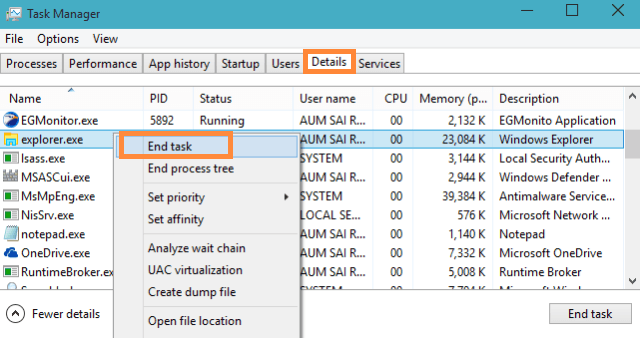
- This will remove everything from your desktop and taskbar.
- Remember to close all the programs you have opened.
- You can see nothing on your screen except the Task Manager and Command Prompt you have opened in the above steps.
- Only the Command Prompt should be opened. If you are unable to see Command Prompt, go to the Task Manager -> Processes tab -> Apps section -> Double click cmd. The running Command Prompt will pop up on your screen.
- Now, close the Task Manager window also.
- Get back to the running Command Prompt line and type del thumbnailcache* (the star mark after the command indicates all the thumbnail cache files should be deleted).
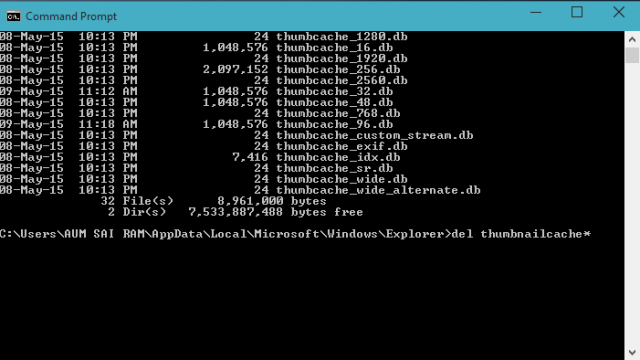
- Again take help of the dir command and see if any of the thumbnail cache files are still present or not. If you see any thumbnail cache still presents, it means any program is still left open whose thumbnail cache cannot get deleted.
- Now, jointly press Ctrl + Alt + Del keys. You can see few options listed.
- Click Sign out option.
- Get back to Windows 10 and see the thumbnails are repaired.
Method 3: BAT File
- You can quickly Delete and Reset Thumbnail Cache in Windows 10 file from the downloadable bat file.
- Click on the Download button below and download the bat file.
- After the download gets completed, double-click on the file to open and the Thumbnail cache will be automatically deleted and reset. After running this file, the file explorer will disappear. Restart File explorer with the help of this article How to Restart File Explorer Using Task Manager in Windows 10

Philip A. Stalkup
says:How do I disable the thumbnail cache in windows 10? In other words, STOP windows 10 from creating thumbnails altogether.