 System image backup is a great advantage on Windows 10 but to appropriately use this utility is also a big challenge. By default, the settings of image backup lead to clutter drive. Consequently, the destination drive needs to be cleaned every now and then. We are here to present a write up on how to delete Previous Image Backups to Free up Drive on Windows 10 furthermore customize the settings to prevent from accumulating extra backup files in the destination drive.
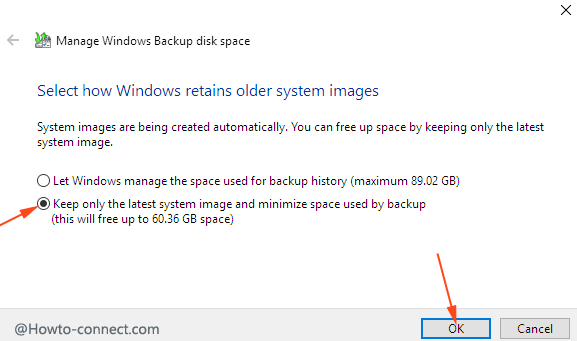
System image backup utility includes the Settings to store the copy of Files at a definite interval of time. On this stage, two options exist to Select how Windows retains older system images – first, Let Windows manage the space used for backup history and second, Keep only the latest system image and minimize space used by the backup. By default, Windows 10 uses the first choice.
Right in this way, Windows 10 by default schedules to take the backup after every 7 days. The result is after a few weeks, the destination drive to store the backup is stacked with the backup files. Excluding the latest backup, all other files in the drive are priceless and unnecessarily burdening on your PC.
To free up drive, on Windows 10 is the only solution to declutter the drive. Hence, in this article, we are going to interpret How to Delete Previous System Image Backups in Windows 10 targeting to vacate the drive.
For the Tablet user who possesses lower space, the situation is worse as the system image backup files fill up a great extent of space in the ratio of the available. So to delete Previous Image Backups to Free up Drive on Windows 10 tablet is a compulsory job.
How to Delete Previous Image Backups in Windows 10
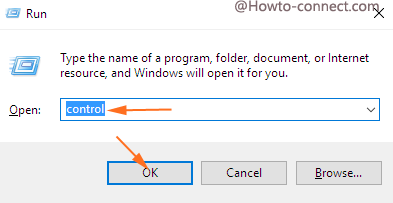
- Compositely hit Windows and R keys at a time to expand run dialog box. Write ‘control’ in the given space and hit ‘Enter’.
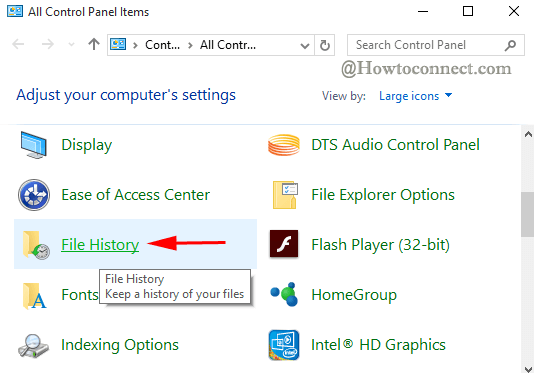
- On the expanded control panel on the screen press the link ‘File History’.
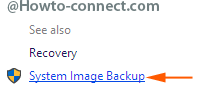
- On the left fringe at the lowermost segment of the File History window, hit the ‘System Image backup’ link.
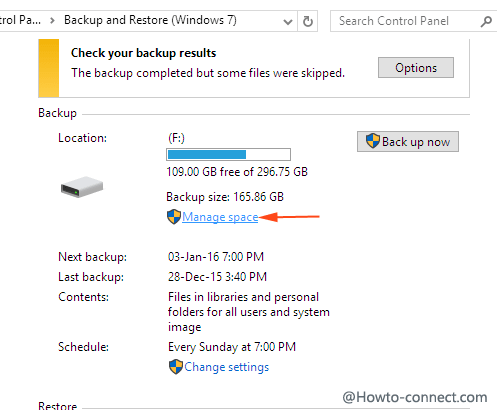
- On the right portion of the spread out window, within Backup section tap / hit ‘Manage space’ link.
- A square shaped tile of ‘Manage Windows backup disk space’ comes into view.
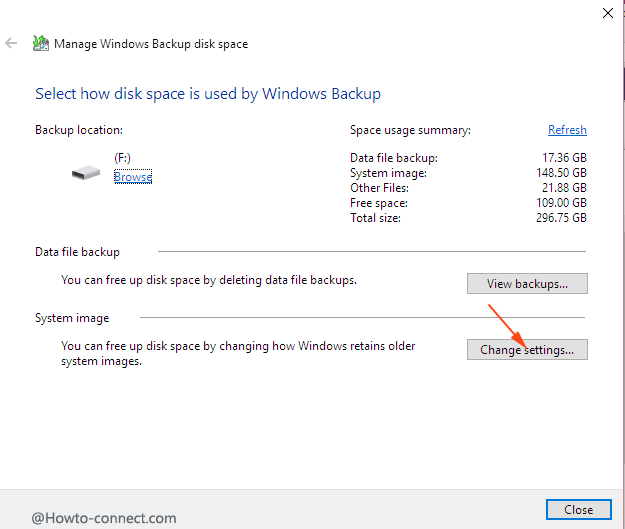
- At first, ensure to press the ‘Change settings’ button. This action leads to prompt ‘Select how Windows retains older system images’ rectangular tile. Check the radio button (tiny round cell) before the second choice which says ‘Keep only the latest system image and minimize space used by backup’ and hit the ‘Ok’ button.
- A small dialog box comes out to take your assurance.
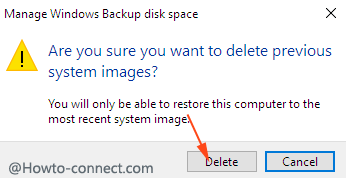
- Choose to click / tap the Delete button. A dialog box shows real time info with respect to Delete Previous Image Backups in Windows 10. This pick out will prevent further from stockpiling multiple backup files in the drive.
Manually Delete old backups
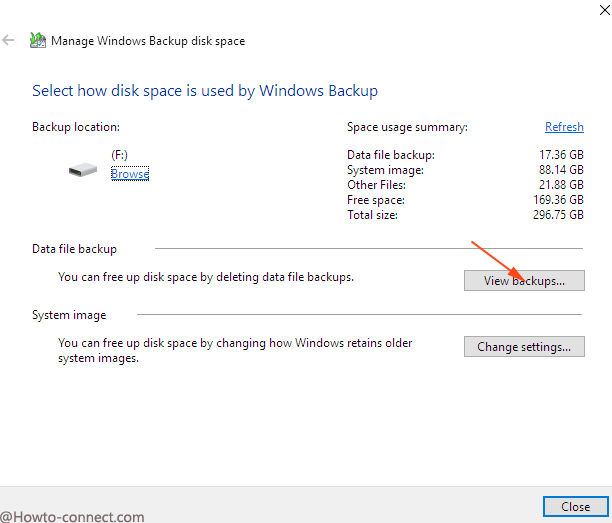
Manually Deleting is an additional privilege and authorizes to Delete Previous Image Backups in Windows 10 turn by turn incumbent upon your desire.
- Hit the button which is located comparatively in the upper area saying ‘View backups……’
- This step ejects a box ‘Select a backup period to delete’ comprising Backup period and Sizes in two separate columns. Hit on a backup and click ‘Delete’ button for each one.

- Hitting the delete button extrudes the confirmation information on a dialog box written ‘Are you sure you want to delete the most recent data file backup’. Click ‘Delete’.

- Upon a short span of time, you get the message Backup is deleted. Click Close.
- One thing worth remembrance is at the time of deleting the last backup click/tap ‘Delete and run backup now’ for saving a fresh one in your disk drive.
Another remarkable fact is that the selection of the second choice on the ‘Select how Windows retains older system images’ rectangular tile leads to keep only the latest system image and minimize space used by backup’. This selection will determine that a new backup is not stored, but overwrite the existing files you have edited between the scheduled period of time.
In this manner, files will be backed up appropriately and the drive space will remain unoccupied as well. This is the best choice for the users who are going to create System Image backup on windows 10 to hamper stacking the determined drive.