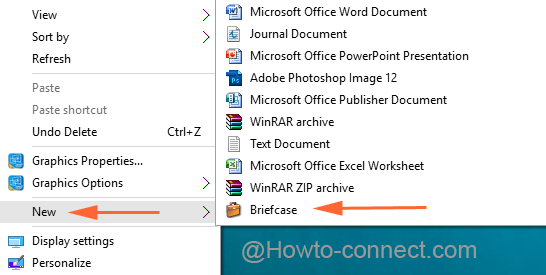
When you implement right-click on an unfilled area on the desktop screen in Windows 10 you feel the submenu Briefcase is not present. If you are also in the users who miss Briefcase, don’t worry, you could add it with a painless registry hack. We are rendering two downloadable .reg files one to disable and another to enable Briefcase. In this article, we will present how to Disable and Enable Briefcase in Windows 10 Context Menu.
The Briefcase is well known folder comprising the automatic synchronization characteristic where you can place your files. Apart from this, you are able to share briefcase between two or more systems. All the features are sufficient to spur you to Enable Briefcase in Windows 10. But before advancing towards the steps, ensure to hold the rights of an administrator and also the addition or removal of Briefcase is applied to total users of the machine.
How to Disable and Enable Briefcase in Windows 10 Context Menu
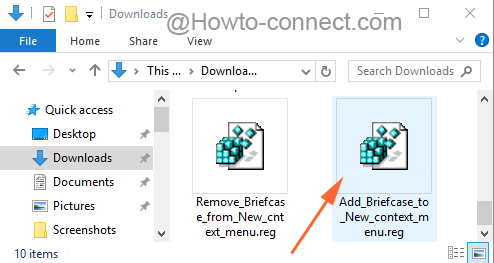
- To disable and enable Briefcase Click the underneath link which will lead download the .zip file.
- Extract the saved file.

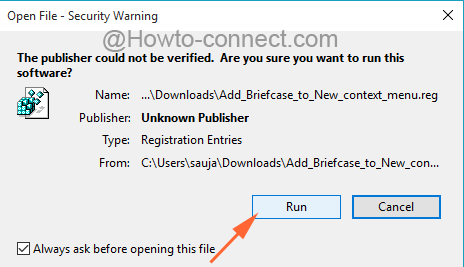
- Double click on Add Briefcase which leads to open a separate window of Open File- Security Warning will emerge, click on Run button.

- If UAC asks if you want to run the file considering the security measures, Click Y for affirmation.
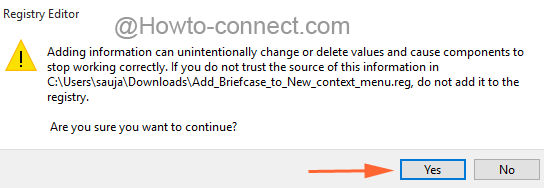
- Another separate warning pop up of Registry Editor will light up on screen and tell if you prefer to continue, and click Yes.

- Soon an endorsement pop up showcasing the successful change will be delivered to you.

- Give it a few seconds to get added. If it doesn’t come after a couple of minutes, reboot the machine.

- If you think to disable Briefcase from Windows 10 context menu in the future, reasonably run another file named remove briefcase it as explained in the above-written steps and confirm the removal.
In this way, Briefcase will be available only after running the .reg files to place requisite docs and data on your Windows 10 PC.

