By managing Data Execution Prevention (DEP) in Windows 10 and 11, you can provide an additional layer of protection to your computer from unknown scripts. By default, this Windows’ built-in security tool is enabled which safeguards all programs and services of Windows. Basically, this feature prevents harmful applications from executing unrecognized codes on the reserved locations of system memory.
DEP commonly works in the background but when it is turned on for all programs, you may confront issues with certain applications. In that case, you should add them to the execution list so that DEP will not scan them during the execution. You can also include some device drivers on the list because the OS may consider them as a threat due to digital signature status. So, let us advance to the sequence of steps in order to Disable/Enable Data Execution Prevention (DEP) in Windows 11 or 10.
Disable and Enable Data Execution Prevention (DEP) in Windows 11 and 10
Here is how to Disable/Enable Data Execution Prevention (DEP) in Windows 11 or 10 –
Via System Properties
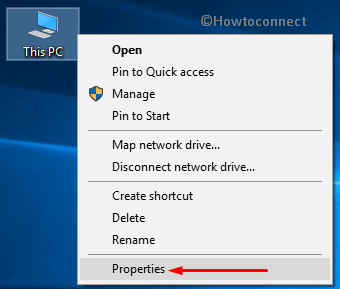
Step-1: Go to the desktop and make a right-click on This PC icon. From the context menu, select Properties. If needed see – How to Bring This PC icon on Windows 10 Desktop Quickly.
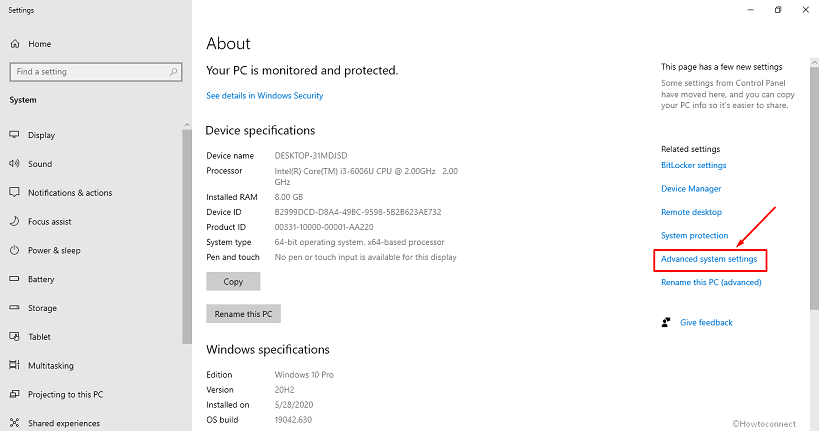
Step-2: From the Settings app that opens up, click Advanced system settings.
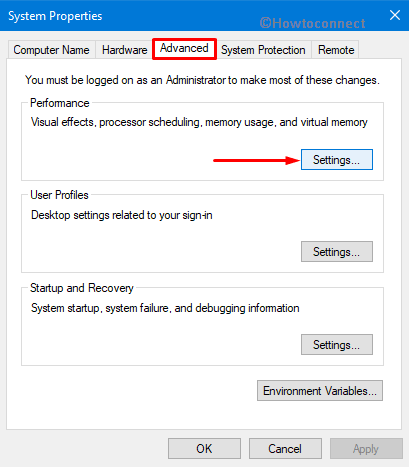
Step-3: On the System Properties dialog, switch to the Advanced tab. Moving further, hit the Settings button underneath the Performance section.
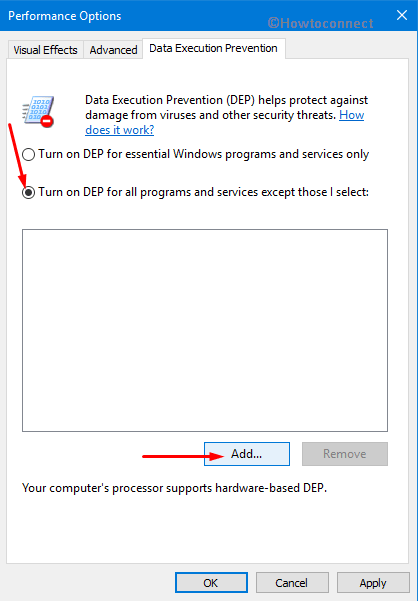
Step-4: This will open Performance Options dialog on the PC screen. Shift to the Data Execution Prevention tab. Here, you will see two options namely:
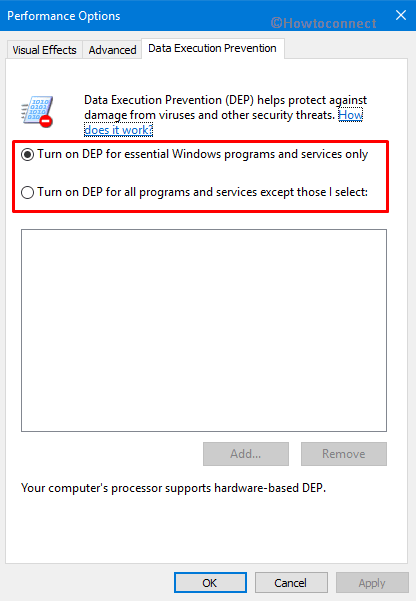
“Turn on DEP for essential Windows programs and services only“: This is the default setting. It will provide protection against threats and viruses for certain services and applications of Windows only.
“Turn on DEP for all programs and services except those I select“: It is the second option. Not just Windows processes only, this option will also enable the feature for all processes.
Step-5: So, depending on your requirement choose the DEP for services and programs accordingly.
Step-6: If you are having any problem with a specific program, prefer to check the second option. Then, click the Add button and browse to the location of that application’s executable file.
Using Command Prompt
Open Run dialog box by hitting “Win + R” hotkeys altogether. Here, type cmd and hit Ctrl + Shift + Enter.
When UAC prompts up, hit Yes to proceed ahead.
To Disable Data Execution Prevention
Now, on the Command Prompt window, type or copy/paste this given below command and then hit Enter.
bcdedit.exe /set {current} nx AlwaysOff
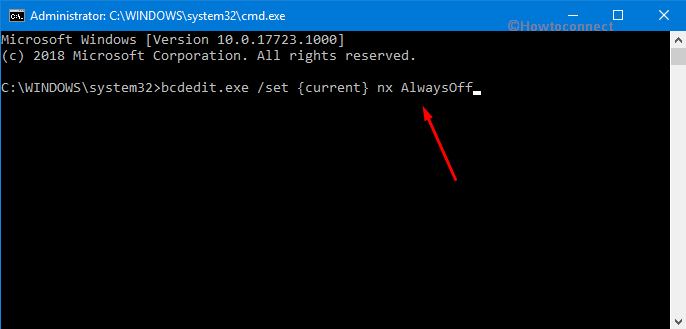
After executing the command successfully, close the window and start running a program.
To Enable Data Execution Prevention
Type cmd on Cortana and perform a right-click on Command Prompt Desktop app. From the menu that appears, choose “Run as administrator“. Click Yes when UAC shows up on the PC screen.
For reference, see How to Launch Elevated Command Prompt on Windows 10.
Next, copy and paste the below command and hit Enter to enable the feature.
bcdedit.exe /set {current} nx AlwaysOn
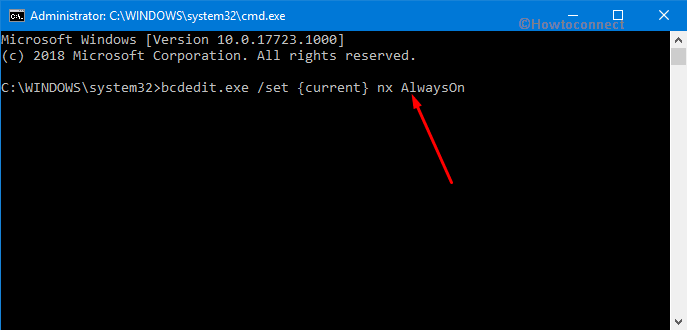
Finally, restart Windows 10 PC after executing the command to make effective changes.
Hopefully, you will be now available to Disable/Enable Data Execution Prevention (DEP) in Windows 10 pretty easily.