Microsoft developed an application Windows Defender Security Center and included five different protection tools in it. The first tool of the app is Virus & threat protection and it includes settings for Windows Defender. In case, you don’t prefer Windows Defender Antivirus to safeguard the PC, you can disable it. For the best safety, you can Add Scan with Windows Defender to Windows 10’s Right-Click menu.
So, in these tips, we will present the directions to Disable / Enable Virus & Threat Protection in Windows 10. In short, disabling or enabling Virus & threat protection is nothing but turning off or on Windows Defender Antivirus. To Disable / Enable Virus & Threat Protection in Windows 10, you have to take help of the setting Real-time protection. This setting basically finds and stops the threats and malware from running or installing on your computer. Well, you cannot disable the setting permanently as it turns ON automatically after a certain time. Hence, experts suggest leaving this setting enabled to protect your PC.
Disable / Enable Virus & Threat Protection in Windows 10
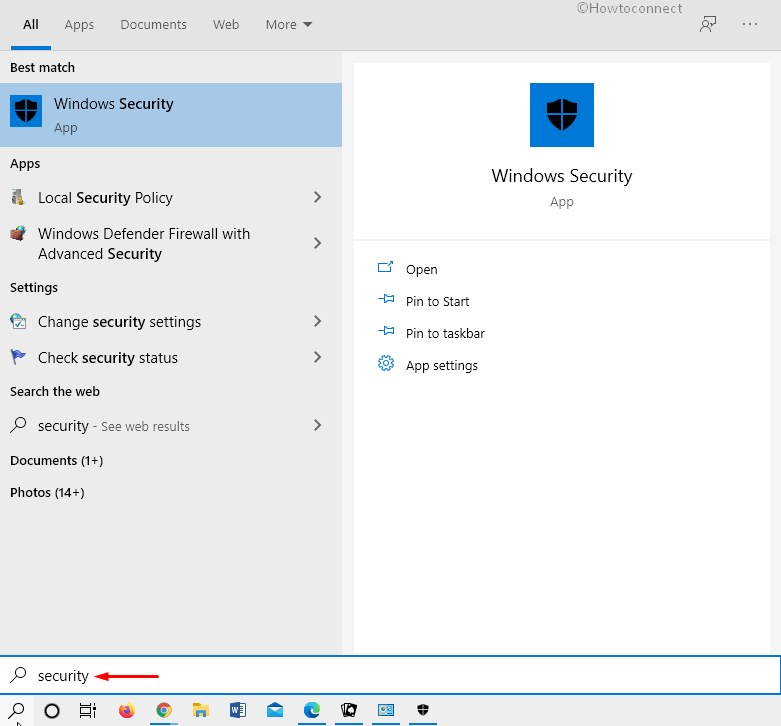
- On the taskbar search box, Type – security.
- Press – Enter.
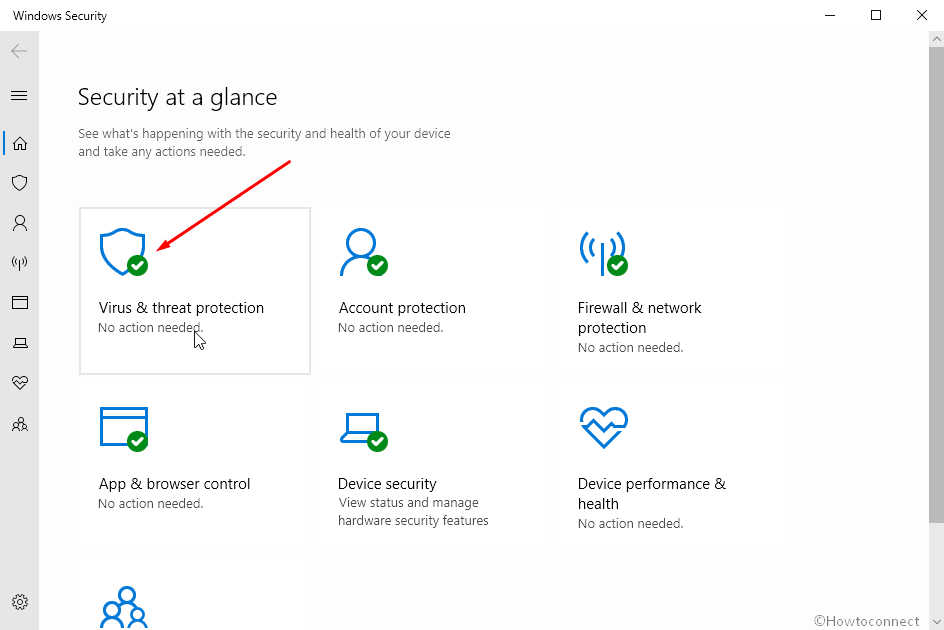
- Once Windows Security appears, click the – Virus & Threat Protection.
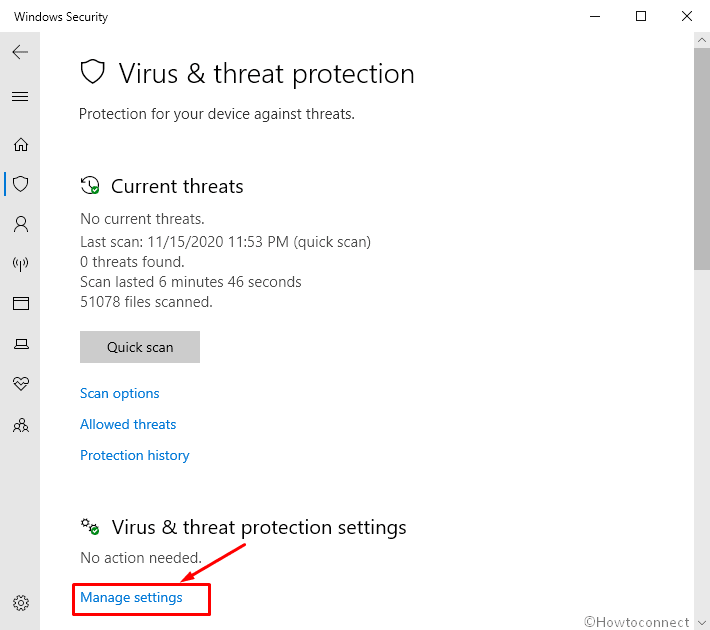
- Select the link – Manage settings.
Disable Virus & threat protection
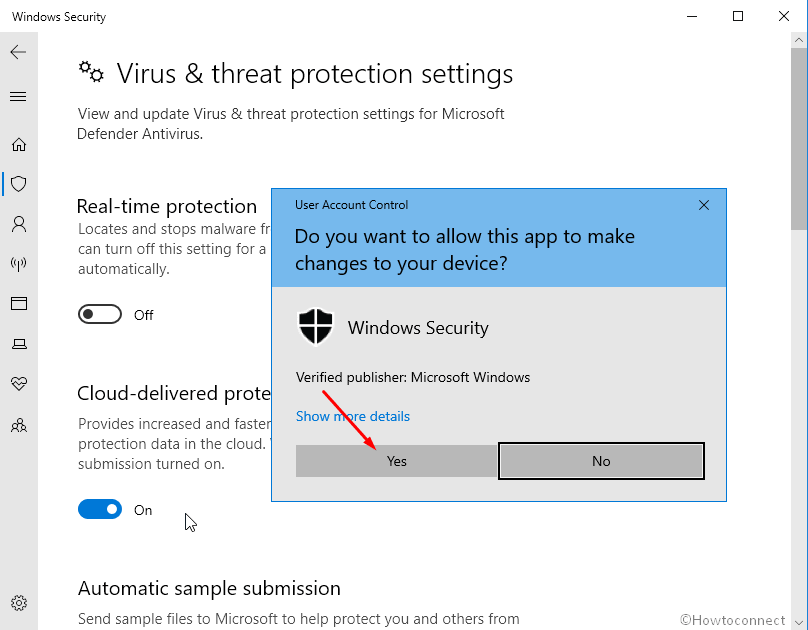
- Click the toggle switch under the – Real-time protection.
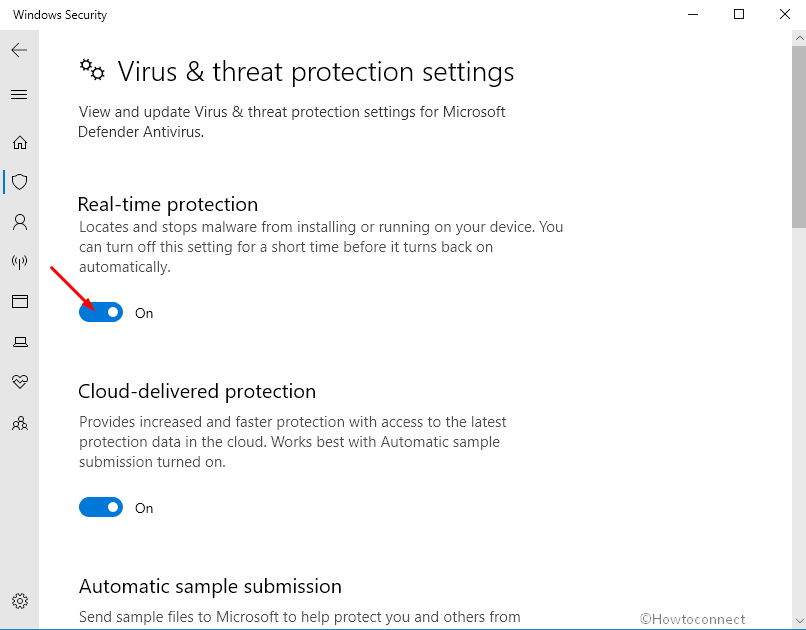
- When the User account control dialog appears, select – Yes.
Enable Virus & threat protection
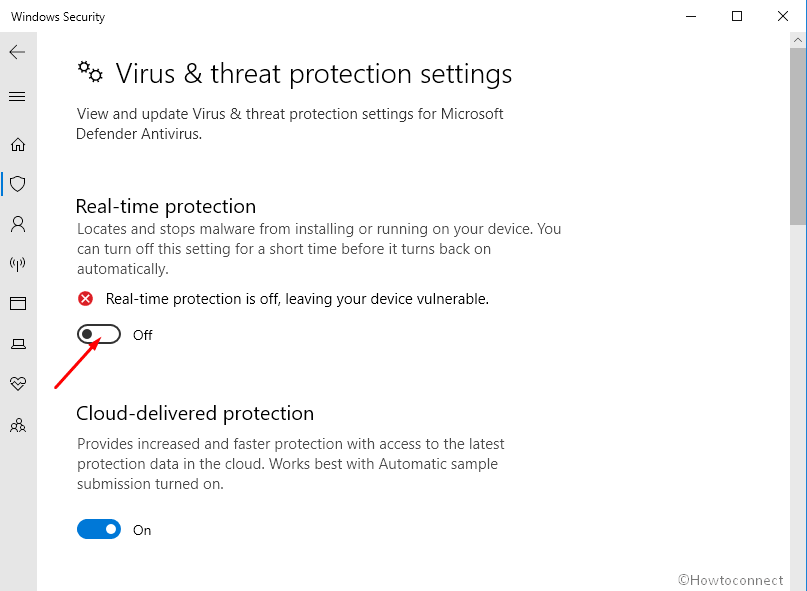
- Click the toggle switch under the – Real-time protection to enable Virus & threat protection.
Alternatively, open Control Panel => Security and Maintenance => Click View on Windows Security link under the option Virus protection. Now follow the above methods.
Windows 10 includes antivirus protection that periodically scans the PC and keeps it secure from any threats. This protection is commonly known as Windows Defender but in Creators Update things are a little different. All thanks to Microsoft that offered the application named Windows Security.
Conclusion
Finishing the above-mentioned directions will help you to temporarily Disable / Enable Virus & Threat Protection in Windows 10 pretty much easily. Well, if you don’t turn ON the setting after a short time, the OS will itself enable it again. Keeping it ON will continue scanning your device time and again for the presence of any malware and hence will protect it from the same.
1] For quick accessibility, Create Shortcut to Windows Defender Security Center on Windows 10.
2] How to Enable Limited Periodic Scanning in Windows Defender Windows 10
That’s all!!

How do i stop virus and threat protection from updating automatically
I have a problem for setting virus and threat protection which showing “you have limited permission contact it helpdesk or your virus and threat protection is control by system administrator