Sometimes while carrying a significant work on your system, some stuff gets deleted accidentally without your realization because Windows 10 OS does not take your confirmation before removing the items. The moment you hit the Delete key, the selected items vanish from the drive. This turns out to be of great upset for the users as the significant items get removed mistakenly. Hence, in this article, we will showcase How to Turn On/Off Display Delete Confirmation Dialog in Windows 10.
Adversely, getting frequent a confirmation pop up causes annoyance. In this circumstance, Windows 10 avails you a setting, tweaking which permits you to turn off the dialog box.
Properties Settings of the Recycle Bin holds a small checkbox playing all the big roles deciding whether you grant to demonstrate and hide the delete confirmation note or not. Move ahead and read the procedure targeting to How to Turn On and Off Display Delete Confirmation Dialog in Windows 10 to cast aside stuff from being accidentally eliminated without your realization.
How to Turn On/Off Display Delete Confirmation Dialog in Windows 10
Turn On Display Delete Confirmation Dialog
- Look for the Recycle Bin symbol on the screen and do a double click on it.
![]()
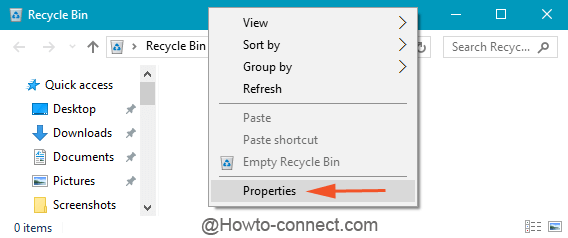
- Give effect to a Right-click on a blank space furthermore hit Properties on the context menu in the spread out Recycle bin Window.

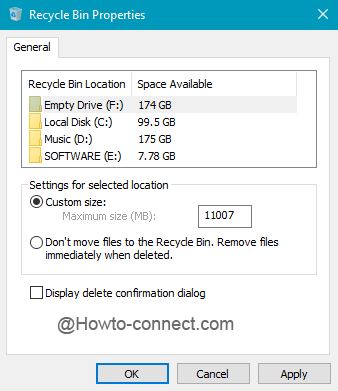
- A separate tiny box with all the available drives of your system and some settings will be observable on screen.

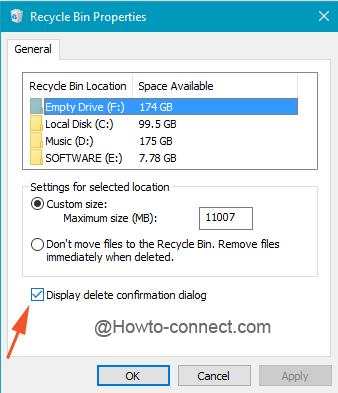
- Now, select the last cell – “Display delete confirmation dialog”.

- This setting will be assigned to all the drives of your computer.
- Now, to implement the changes tap Apply and Ok.
- Since now onwards whenever you attempt to remove any stuff from your system, you will be notified by Windows that whether you are sure to proceed with the discard procedure or not.

Turn Off Delete Confirmation Dialog
- Do the above steps to open up the Recycle Bin Properties box.
- The last square cell of Display delete confirmation dialog will be selected. Clear off its tick mark and implement the alterations by a click on Apply and Ok buttons.
This setting is very necessary to activate as it saves you from losing an important item. Give an attempt to this and keep yourself safe from losing an important item by accident. Well, in the end, it’s all about a personal choice to show the warning box or not. Let us know how this setting benefits you. Share your evaluation with us!!!
