How to Fix Duplicate and Deleted Emails Outlook 2016 – Many clients who are using Office 16 experience that their Mails either disappear from inbox or doublet. The users whose important stuff is gone from inbox are struggling to recover.
POP3 Protocol is the culprit for both kinds of troubles presented here on Outlook 16. After having this protocol, Outlook downloads the sender’s Emails on System and thereafter server eliminates them from inboxes. Another circumstance is the server creates an additional copy of the identical emails existing in mailboxes and each email becomes doubled whereas user does not take any initiative for this.
You can Fix both of the mess up if you change the Protocol or revert the version as well. Switching the Protocol from POP to IMAP will settle both the disorders whether it is concerned to vanish or duplicate Emails on Outlook 16. Let’ follow the steps for how to Fix Duplicate and Deleted Emails Outlook 2016 via Switch of the Protocol.
Before you begin to switch Outlook 16 to the IMAP protocol, don’t forget to store a backup of your precious data on your PC in .PST file.
Ways to Fix Duplicate and Deleted Emails Outlook 2016
1. Save the Backup of Outlook 2016 data
To have the Backup follow the path –
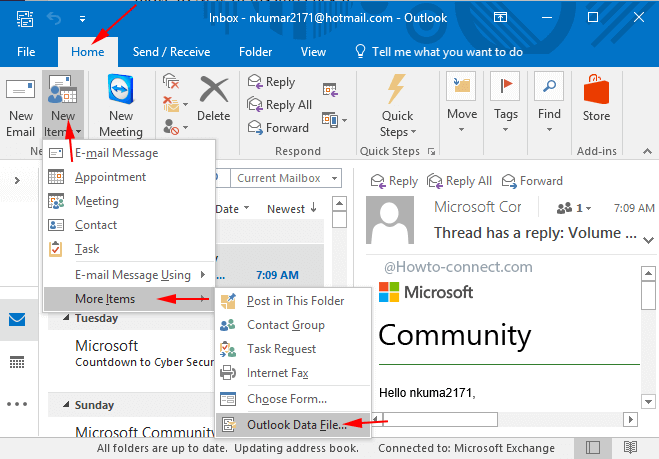
Home -> New Items -> More Items -> Outlook Data File
- Move to Cortana text field, write “Outlook” here and click the same on the result field at the top.
- Outlook 16 is now on your computer’s screen. Look for the”Home” tab which will be displayed by default in front of you. But move to “New Items” and click it. Hover the mouse on “More Items” and on the hanging sub menu select “Outlook Data Files”.
- Create or Open Outlook data files dialog box come up after the above actions are made, click the “OK” button after choosing a preferable location.
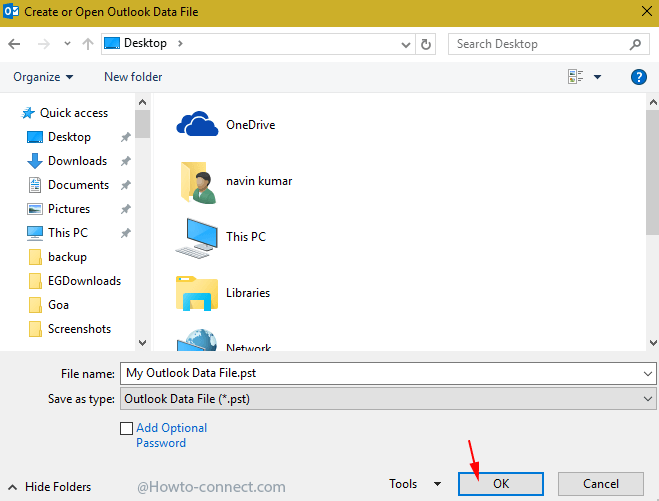
- The backup is accumulated in the location you have chosen.
2. Change the Protocol From POP3 to IMAP
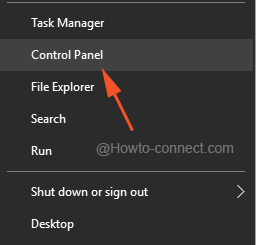
- Launch Control panel by hitting “Win+X” and striking “Control panel” choice lying amongst User task menu.
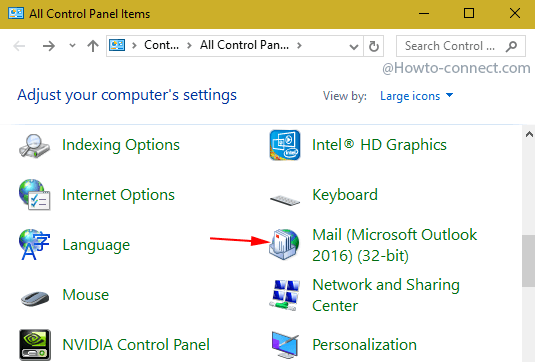
- Search the “Mail (Microsoft Outlook 2016 32-bit)” icon and link and perform a click on it.
- A small size Mail Setup – Outlook box arrives on the screen. Hit “Show Profiles” button, the lowermost present on the box.
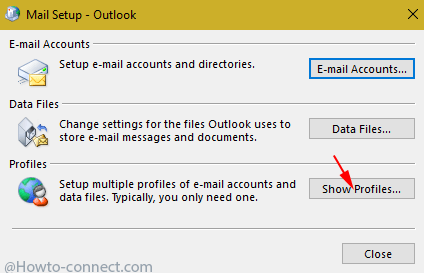
- Here you see the existing profiles and you need to add one. So hit “Add” placed underneath the profile showing box.
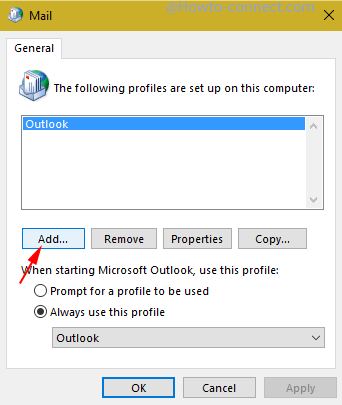
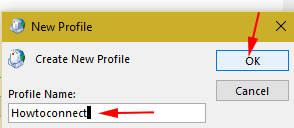
- Write a name in the tiny New Profile pop up in an appropriate place and click “OK”.
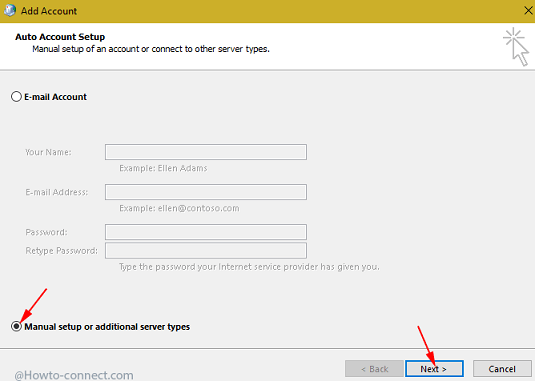
- Check the small round cell beside “Manual setup or additional server types” and click “Next”.
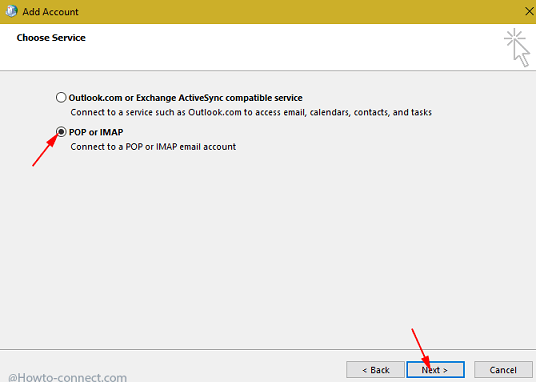
- Check the round cell before “POP or IMAP” and click Next.
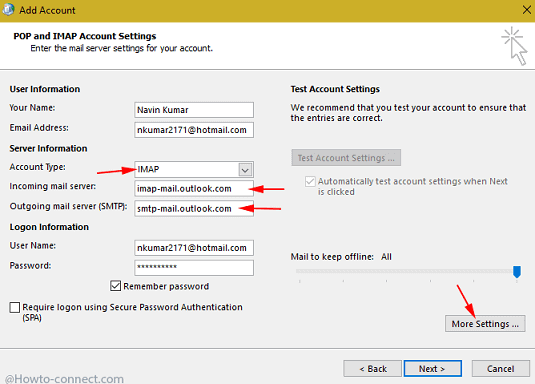
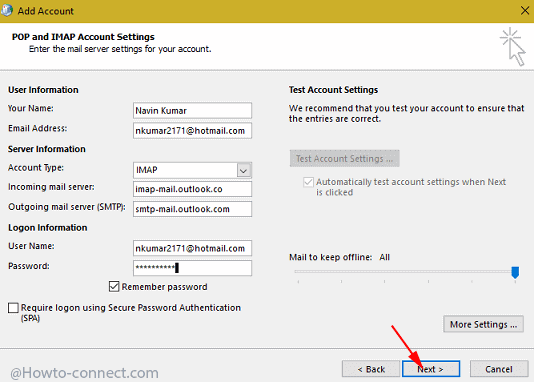
- Fill up the Server Settings Box carefully since this will decide to add the profile.
- At first, within User information segment write your “Name” and “Email id” and
- Follow what you need to enter in the Server Settings:
Under Server Information –
Account Type – Choose IMAP from drop down
Incoming mail server – imap-mail.outlook.com
Outgoing mail server (SMTP) – smtp-mail.outlook.com
- Within Logon Information segment, write Email id and password.
- The next action you need to perform is hit “More Settings…” button situated at the lower right area.
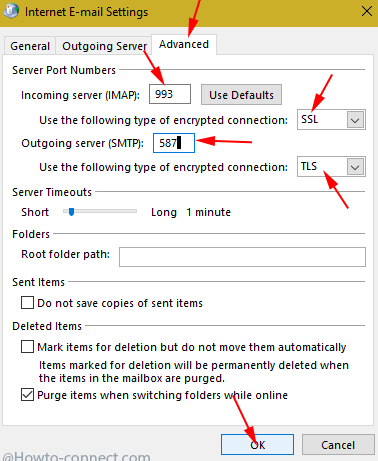
- Another box entitled Internet Email settings comes before you. Go to Advanced tab and again be extra cautious when you fill up the “Server Port Numbers” boxes. Follow what to fill up in the Server port number portion –
Incoming server (IMAP): 993
Use the following type of Encrypted connections – SSL
Outgoing Server (SMTP): 587
Use the following type of Encrypted connections – TLS or SSL
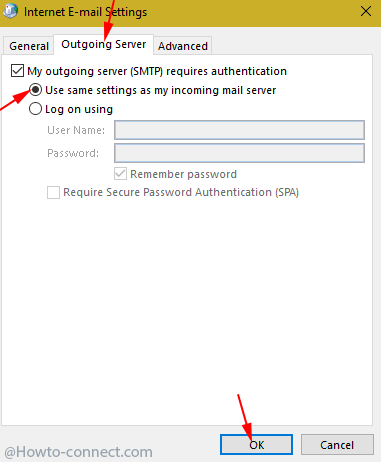
- After filling up the given data appropriately move to Move to “Outgoing server” Tab. Check Use same settings as my incoming mail server and click “OK”.
- Next task for you is to Press “Next” on “POP and IMAP Account settings” which will lead to begin investigating the correctness of the details you have submitted.
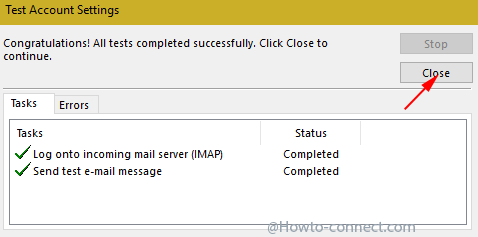
- The test for account settings starts and shows the status of what is going on on a pop up.
- After 3 or 4 minutes you will observe a congratulatory note, click ‘Close” button.
- Now you will return back to the “Add account” box where written You’re all set, hit “Finish” button.
- Examine the box within Mail wizard whether your user profile for which you have completed the tiresome exercise is added or not.
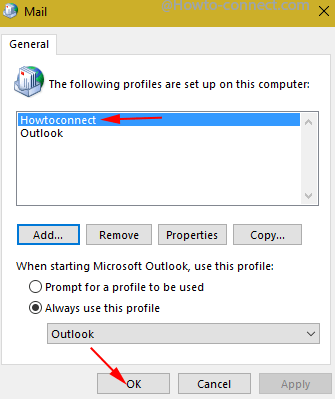
This is the complete process passing through which the Protocol is switched from POP3 to IMAP and fix Duplicate and Deleted Emails Outlook 2016.
Apart from Switching the Protocol, one more method is still available to Fix Duplicate and Deleted Emails Outlook 2016. See further
3. Return Back to the Earlier Version of Office 2016
Although you would not like to retrogress to the inferior edition, if you get stuck this is also a way to Fix Duplicate and Deleted Emails Outlook 2016.
- Launch Outlook 16 following the method elaborated earlier.
- Hit File succeeded with Office Account.
- On the right flank, Click Update Options, and then on Disable Updates.
- Click OK on UAC pop up to agree to it.
- Jointly strike Win and R, type cmd.exe in the text field and hit Enter to open command prompt.
- Copy the following placed command
C:\Program Files\Common Files\Microsoft shared\ClickToRun\officec2rclient.exe" /update user updatetoversion=16.0.6366.2068paste in the command prompt and click Enter.
You can change the version number by replacing the number after updatetoversion= on your own choice.
If you require any assistance read the statement of the earlier editions of Outlook by navigating to Versions.
Within a short period of time, the update procedure begins and after gets completed you catch sight of a message to close the application. Remember to save your work prior to closing Outlook.
Update: Microsoft has fixed this issue: Read
