Procedures to Dynamic Lock Windows 10 in easy steps. – You always ensure to lock your PC with a view to protecting it from unauthorized access when you are away from it. Concentrating on this locking requirement, Microsoft introduces a new special feature – Dynamic Lock. The latest Windows 10 build 15002 has brought this enhancement.
When you are away from your PC, this special setting Dynamic Lock will identify it and as an act of security, it will auto lock the device. However, there are no complete details from Microsoft about how this will exactly work but is estimated that this feature will lock the PC roughly after 10 minutes of you leaving the computer.
The most common way that users perform to lock the PC is either to press Windows key and L or configure the computer to auto lock it after a period of idle time. Moreover, users also Customize Screen Timeout Settings in Windows 10 and let the PC get into sleep mode. But, Dynamic Lock Windows 10 is specifically designed to make things much easier.
However, to auto lock the PC, you have to first turn on this new feature. There are two ways through which you can turn on or off Dynamic Lock. Let us see them one by one.
Dynamic Lock Windows 10
The first method is quite simple and Settings application allows you to make the change but the second one is a little tweaky. See
Method 1 – Settings App
Step 1 – To start the process, first of all, press Windows logo and I keys. This will make the Settings program appear on your screen.
Step 2 – On the Settings home page, select Accounts category.

Step 3 – Moving on, select Sign-in options on the left sidebar. Now, locate the setting Dynamic Lock on the right pane.
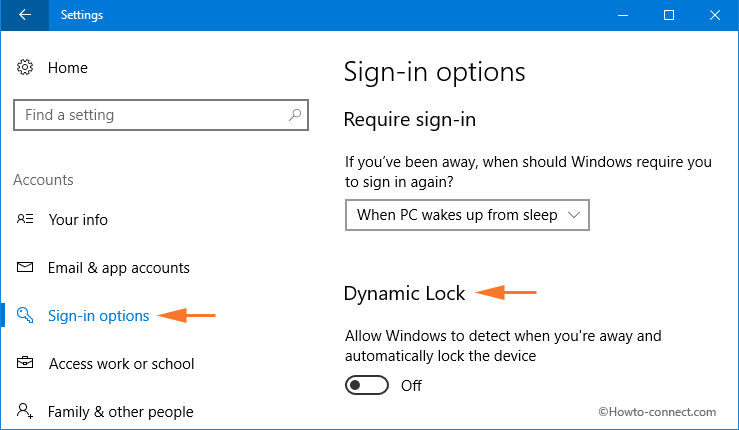
Step 4 – By default, Dynamic Lock is turned Off. So, pull the slider towards the right to use Dynamic Lock in Windows 10 and turn it On.
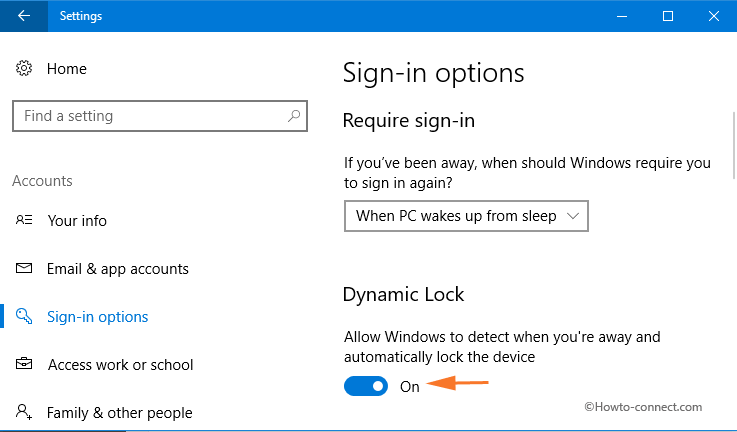
Now onwards, the OS will automatically lock your device approximately after 10 to 15 minutes of your leaving it.
Method 2 – Registry Editor
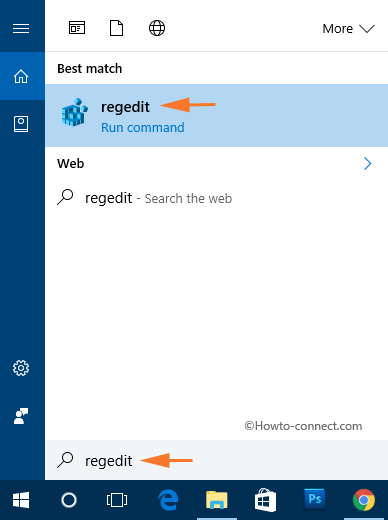
Step 1 – To begin with, click or select Windows logo icon and start typing regedit. Cortana will show up regedit Run command as the Best match, click on it.
Step 2 – This will evoke the UAC prompt on your screen, so, click Yes to move ahead.
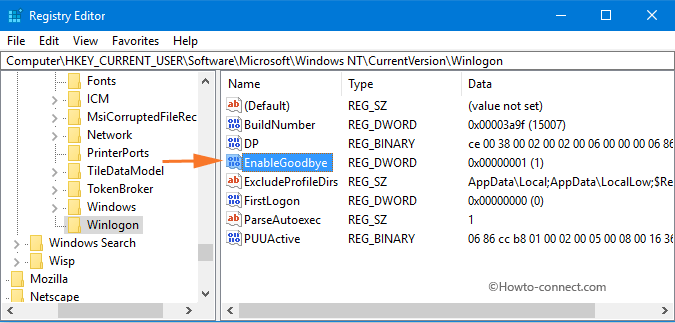
Step 3 – Now, on the Registry Editor, go to the following key. HKEY_CURRENT_USER\Software\Microsoft\Windows NT\CurrentVersion\Winlogon
Step 4 – Move to the right pane of Winlogon and find a DWORD with a name EnableGoodbye.
Note – If there is no such DWORD, then perform a right-click on the right panel of Winlogon key. From the list of options that pop-up, select 32-bit DWORD. Name this DWORD as EnableGoodbye.
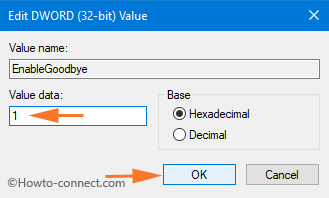
Step 5 – Now, make a double-click on EnableGoodbye DWORD. On its edit box, set its Value as 1 and select OK.
Step 6 – In future, if you ever wish to disable this Dynamic Lock with a registry tweak, then either assign 0 as the Value of EnableGoodbye DWORD or completely delete it.
The Microsoft team defines Dynamic Lock as Windows Goodbye. And that is the reason, the registry tweak includes a DWORD named as EnableGoodbye.
Well, as of now, there are 2 layouts that can be drawn from Dynamic Lock Windows 10 –
1. Dynamic Lock can be the Screen saver option. However, for the time being, there is no option to set the time period to lock the device as it is in Screen saver.
2. Secondly, it can be a part of Windows Hello. If this will be the case, then Windows will use the camera to detect the users’ presence. If no presence is detected, it will lock the device after a short time.
Winding Up
More on Dynamic Lock Windows 10 is yet to come and we don’t know how many more changes it will carry in the final Creator Update. If you know more about this new locking feature, use the comments form and write to us.