Windows 10 allows you Enable Controlled Folder Access to protect important data from malicious applications and threats like ransomware. This option lies in Windows Defender security center and makes you able to enhance the security of folders and apps. Controlled folder access keeps a watch on the changes that applications make to files in certain protected folders. If an app tries to make a modification to these files, and the app is blacklisted by the feature, you’ll get a notification about the activity. See one more guide to boost security – Configure Windows Defender SmartScreen Settings for App & Browser Control in Windows 10.
When you Enable Controlled Folder Access in Windows 10, it lets complement the protected folders with extra locations. Moreover, it permits you to add the apps that you want to allow access to those folders.
Go through a similar article – Allow Apps to Communicate through Firewall in Windows 10.
Sensing the growing threat of ransomware and other malicious attacks Microsoft has added this feature to Windows Defender security center with the build 16232. So if you are the member of insider and have at least the build 16232 then you can Enable Controlled Folder Access in Windows 10.
The new build of Windows 10 has now taken a better authority to enable Controlled Folder Access. In this build, it is pretty easy for the users to protect data from any sort of malicious apps and threats that harm the device such as the ransomware.
Follow this article to overcome security issues – Download Malicious Software Removal Tool 32, 64 Bit Windows 10.
Hook on to this article to know the method.
Enable Controlled Folder Access in Windows 10
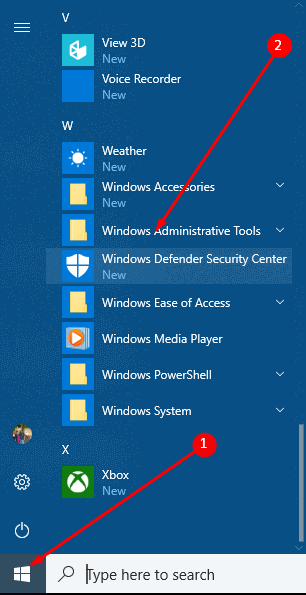
Step 1 – Click on the Start and access Windows Defender Security Center from W alphabet on the list. Or directly hit the Security Center icon from the system tray in the taskbar.
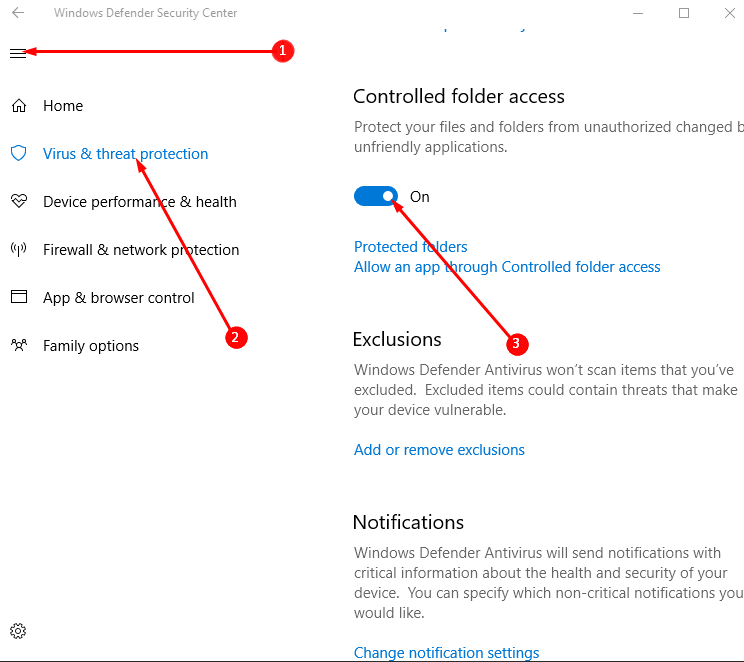
Step 2 – In the Windows Defender security center window, click on the Hamberger menu (3 line icon) at the upper left corner. Then select the option Virus & Threat Protection from the left pane.
Step 3 – Once the right pane brings all the options, locate Controlled folder access. This option is disabled by default nature of Windows 10. Toggle to turn on.
Step 4 – Select Yes on the UAC pop up prompted just after toggling.
Add a protected folder
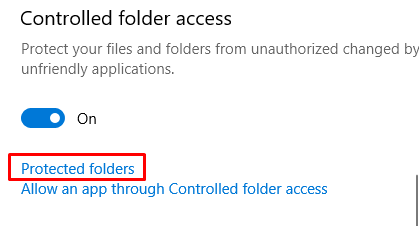
Step 5 – Now click the link Protected Folders. This action will carry you to Controlled folder access section.
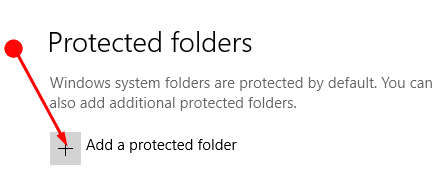
Step 6 – Protected folders section suggests that Windows system folders are protected by default. You can also add additional protected folders. Click on Add a protected folder.
Step 7 – Select folder wizard opens up. So highlight the folder want to add and press the Select folder.
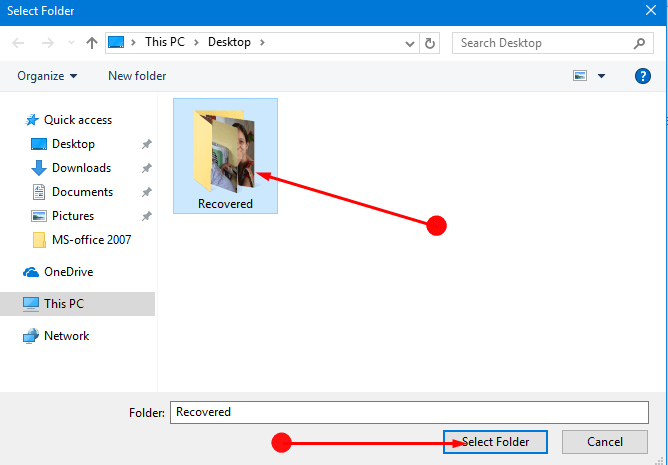
Step 8 – As you will click on Select folder, you will get User account control pop up. Select Yes on this pop up.
Allow An App through Controlled Folder Access
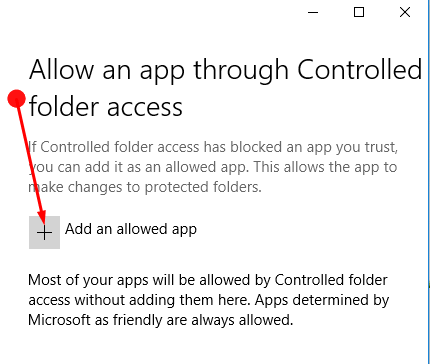
If Controlled folder access has blocked an app you trust, you can add it as an Allowed app. This allows the app to make changes to protected folders.
Step 1 – Click on Add an allowed app icon.
Step 2 – Once the Open Window comes into view, highlight the necessary app and click on Open. This will prompt a pop up.
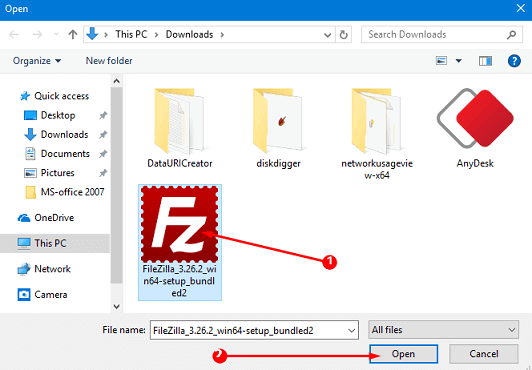
Step 3 – Click on Yes from the UAC prompt appearing after you select Open.
Windows Defender is the main seat for taking care of the health and security of the device. Therefore, Controlled Folder access will is the new tool to fight against the threats on the web. It protects the files and folders from unauthorized changes by any unfriendly applications.
Final Words
In this way, this guide helps you to learn how to Enable Controlled Folder Access in Windows 10. Moreover, you can Allow An App Through Controlled Folder Access if you want to get liberty for opening the folder usually. Microsoft is practicing with new tools very seriously to lessen the danger of ransomware and other malicious attacks. This addition is a big step in this concern. So follow the methods and stay safe.

The controlled folder access option isn’t there and the PC is prompting that be turned on for real time protection. It’s dumb that is a separate thing, when it should just automatically run.