Enable and Disable Clicklock in mouse on windows 10. – Proper customizations of settings of mouse enhance the efficiency and speed during working. But this component keeps certain very significant but minute settings you might be not known about. One such setting is ClickLock which put an effect on functions of the mouse. At first, it is necessary to know what this ClickLock is.
Clicklock is a great accessibility feature to have better ease of control on the functional elements on Windows PC. It proves useful while clicking and dragging items on your Windows 10 device. Once Clicklock is active, a single click of the mouse is enough to lock the selected item instead double click. The selection remains locked until you click it afresh. No more click and drag the whole while! In order to TurnOn/Off ClickLock on the mouse in Windows 10, go through the remaining portion of the post.
How to Enable and Disable ClickLock in Mouse on Windows 10
Using Mouse Properties
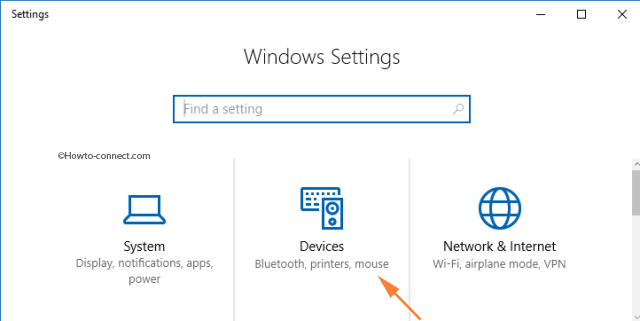
Step 1 – First of all, launch the Settings program by hitting Win+I keys.
Step 2 – In the home screen of Settings, various icons are present, click or hit Devices icon.
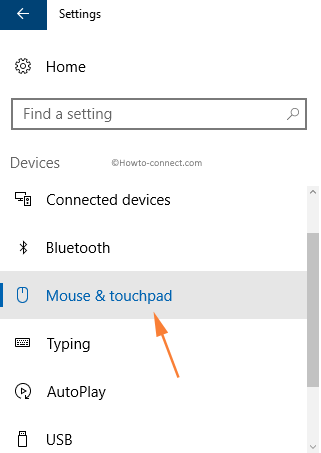
Step 4 – Click on Mouse & Touchpad on the menu available on the left portion of Devices interface.
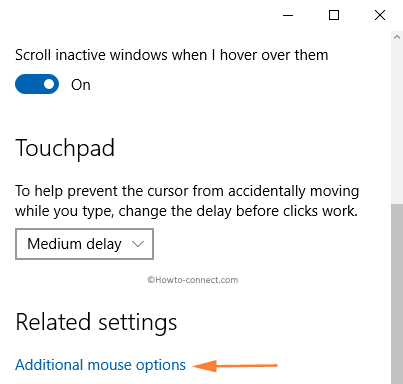
Step 5 – Scroll down to the Related Settings section on the right panel of the window. Click or hit on the Additional Mouse Options to open up a dialog box.
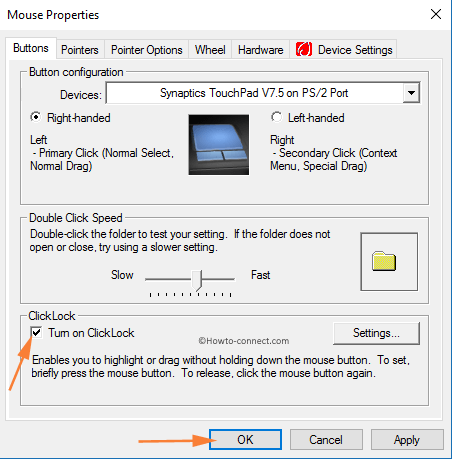
Step 6 – Under the Button tab in the dialog, go to the ClickLock block and follow the steps as mentioned as per your requirements.
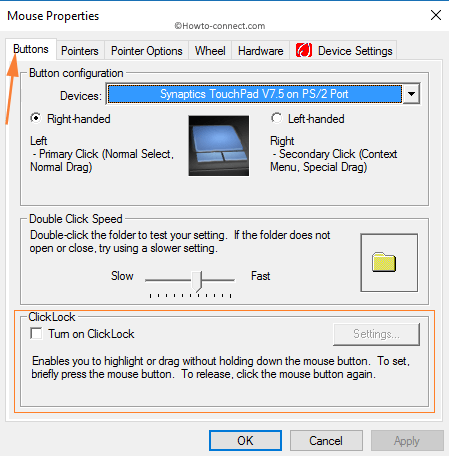
To Enable ClickLock
Step 6a – Click on the box with the Turn on Clicklock name alongside. A tick mark should appear in the box. Go to Step 7.
To Disable ClickLock
Step 6b – Click or hit on the box with the Turn on Clicklock title alongside. In the box, the tick mark should disappear and the box must become empty. Go to step 7.
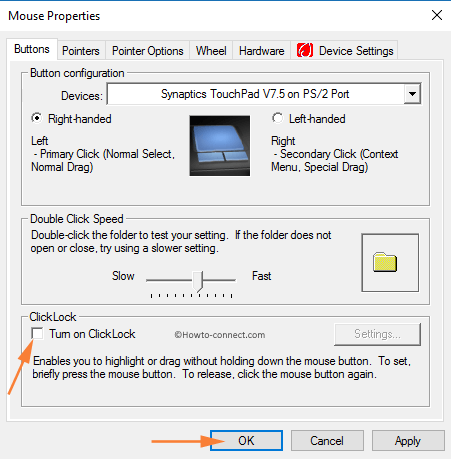
Step 7 – As the last step, click OK.
Using Registry Editor
There is no key specifically dedicated to ClickLock feature. Hence, using the Registry Editor to turn on/off the ClickLock feature is highly complex. Because of the association of the key to various other features, it is recommended to observe great caution.
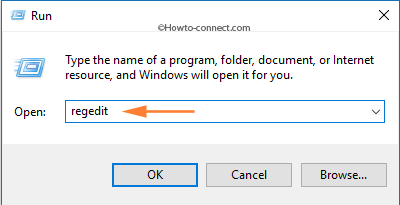
Step 1 – To start with, open the Run box by hitting Win+ R keys on the keyboard.
Step 2 – Type in regedit in the given text space and click or hit OK.
Step 3 – A UAC pop-up will come up, click Yes to go to next step.
Step 4 – In the Registry Editor, navigate to the path specified below
HKEY_CURRENT_USER\Control Panel\ Desktop
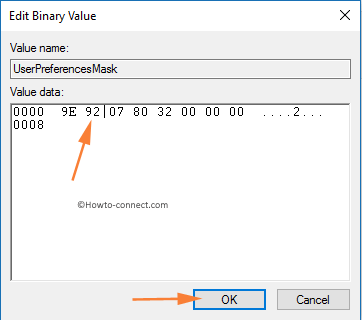
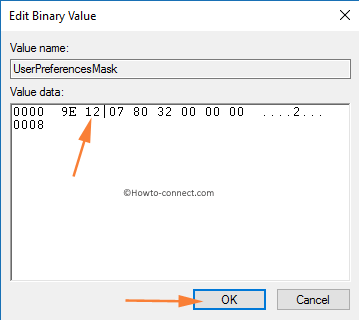
Step 5 – Once done, scroll down to UserPreferencesMask in the right pane of the editor and click on it to open a dialog box.
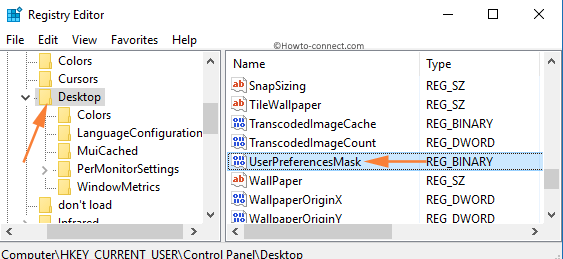
Step 6 – This value data is a binary value. Edit the second number as per requirements.
To enable ClickLock: 9e 92 07 80 12 00 00 00
To disable ClickLock: 9e 12 07 80 12 00 00 00
Note – Do not alter any other number except the second number. The other numbers are for different features.
Step 7 – Click OK.
The above-written steps will work like a charm if you are eager to Enable and Disable ClickLock in Mouse on Windows 10 forasmuch you may clutch certain segment subsequent to the implementation of mere a single click.
How can I lock the curser during gameplay? everything I look at is for multiple monitors I have one, But I don’t know very much about them. Please help me out, before I give up altogether