NetBIOS is a program that lets applications run on different computers to communicate over a LAN but on Windows 10 TCP/IP is rather more usable. Full form of NetBIOS is Network Basic Input/Output System and it does not support routing technology. Windows 10 is by default set as a DHCP client so you might need to Disable NetBIOS over TCP/IP.
The default setting in Windows 10 allows using NetBIOS Setting from the DHCP server. In case, static IP address is in use or the DHCP server doesn’t render NetBIOS Setting, so you may have to enable it. However, turning off the same might help the OS to access the network more seamlessly.
Enable and Disable NetBIOS over TCP/IP on Windows 10
Here is how to Enable or Disable NetBIOS over TCP/IP in Windows 10 –
1] Using Control Panel
- Press – Windows + S.
- Type in – network status.
- Hit – Enter.
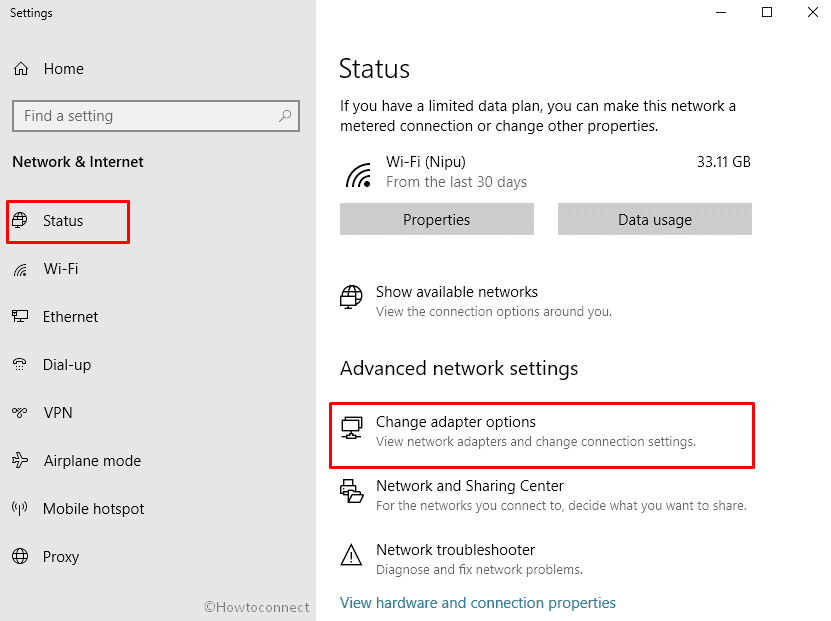
- From the right pane, click – Change adapter options.
- Right-click on your network and choose – Properties.
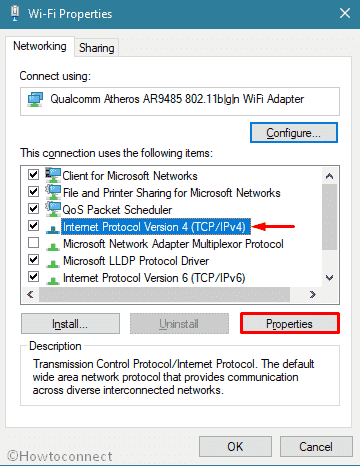
- Select – Internet Protocol Version 4(TCP/IPv4).
- Click – Properties.
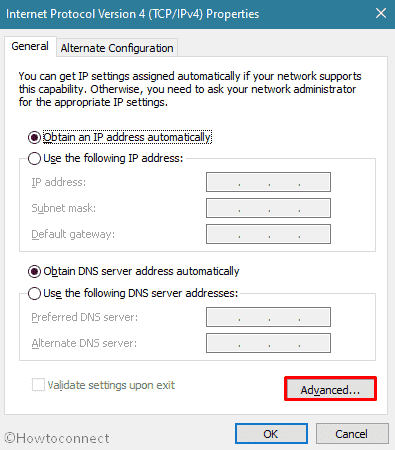
- Once in the new window, hit – Advanced.
- Select – WINS tab.
- Choose either Enable NetBIOS over TCP/IP or Disable NetBIOS over TCP/IP.
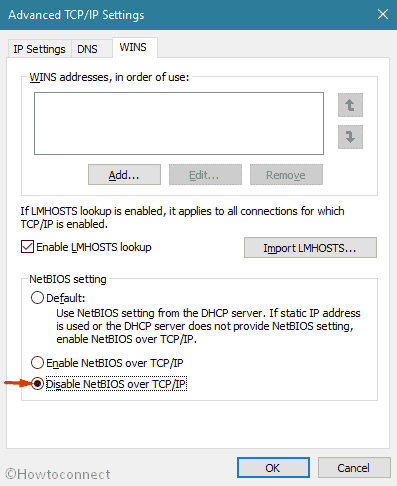
- Click – OK.
2] Via Registry Editor
- Press Windows key and type – regedit.
- Select – Registry Editor.
- For appearing User Account Control, click – Yes.
- Navigate the following directory –
HKEY_LOCAL_MACHINE\SYSTEM\CurrentControlSet\Services\NetBT\Parameters\Interfaces
- Select the first interface GUID.
- Move to the right pane.
- Double-click – NetbiosOptions.
- In the Value data box, put 2 if you want to disable NetBIOS over TCP/IP.
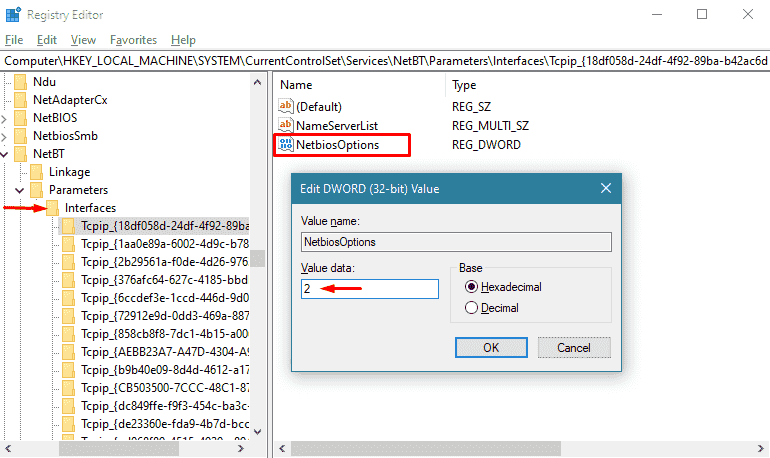
- Set the value to 1 if you wish to enable.
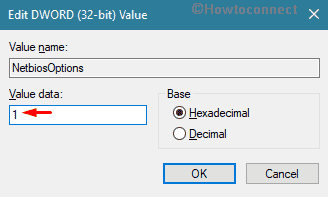
- Click – OK.
- Similarly, Visit every GUID present under Interface.
- The GUID has a NetbiosOptions, set their value accordingly.
Methods list
1] Using Control Panel
2] Via Registry Editor
THat’s all!!