Windows 10 provides you an option to Adjust Taps Sensitivity so that you can manage the finger gestures for precision Touchpads. But most users often find problems with PalmCheck as the cursor doesn’t move while typing. So, here, we will show you the ways including steps to Enable / Disable PalmCheck on Touchpad in Windows 10.
Sometimes, this touchpad feature causes mess up by moving cursor unnecessarily. However, disabling is not a good idea as it increases the sensitivity with every touch of your palm. But when you enable PalmCheck on Touchpad and set it to maximum, and decreases the sensitivity. If you are a regular and basic user, you can opt for Mouse Properties to manage this. In case, you are an advanced user, go with Registry Editor.
2 ways to Enable / Disable Palmcheck on Touchpad in Windows 10
Way-1: Using Advanced Settings of Touchpad
Way-1: Using Advanced Settings of Touchpad
Step-1: Make a combined press “Win+I” hotkeys to launch Settings in Windows 10.
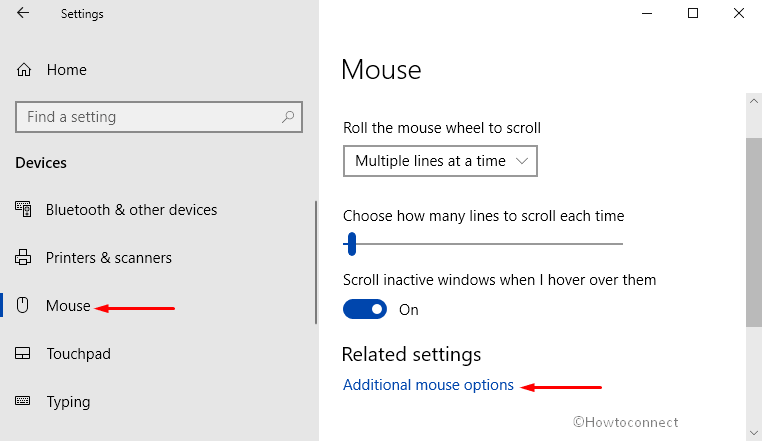
Step-2: Click Devices category on the main interface of the application. Select Mouse section on the left column of the following page.
Step-3: Shift to its corresponding right pane and click the link namely Additional mouse options (See snapshot).
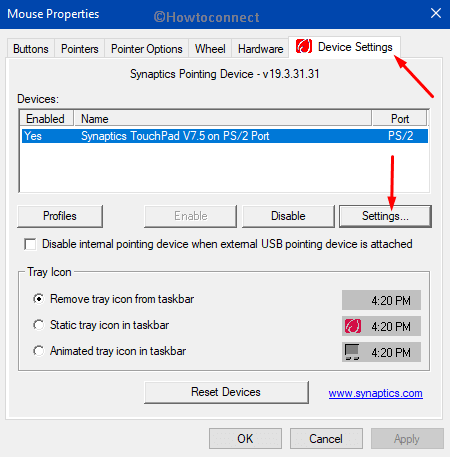
Step-4: Now, from the Mouse Properties popup, go to the Device Settings tab. Here, perform a click on the Settings button as shown in the given image.
Step-5: Once the Properties for Synaptics TouchPad opens, expand “Pointing” and hit click on the cog icon beside PalmCheck-Enhanced.
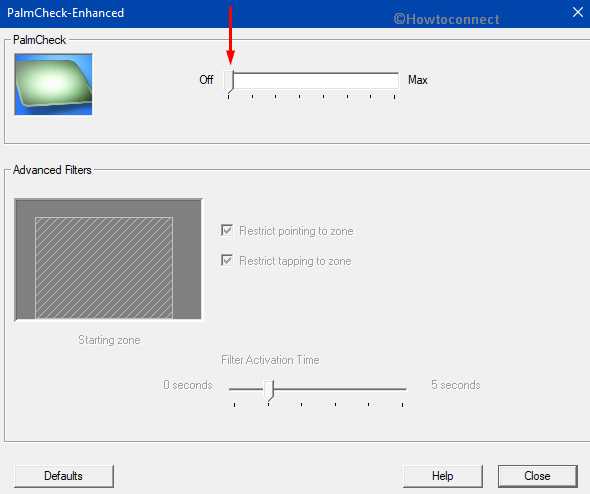
Step-6: From the following window, move the slider under PalmCheck to Off position. Finally, click Close button from the bottom to Disable PalmCheck on Touchpad in Windows 10.
Step-7: But to enable PalmCheck on Touchpad in Windows 10, move the slider towards Max but it is advisable to keep the pointer somewhere in between.
Lastly, head back to the previous window, hit the OK button to save the changes.
Way-2: Via Registry Editor
Note – This method involves the modification of registry keys that might affect your Windows if anything goes accidentally wrong. Therefore, you need to be extra careful and export Registry Editor on Windows 10 before proceeding to the task.
- Perform a click on the Cortana search box and type Regedit in it.
- With Registry Editor appearing at the top, select it to proceed. If a UAC prompt shows up, click Yes to move ahead.
- On the following window, navigate to the following paths in the left navigation pane one after the other.
Computer\HKEY_LOCAL_MACHINE\SOFTWARE\Synaptics\SynTP\TouchPadComputer\HKEY_LOCAL_MACHINE\SOFTWARE\Synaptics\OEM\TouchPad- Slide aside to right side and make a double-click on the DWORD PalmDetectConfig to edit.
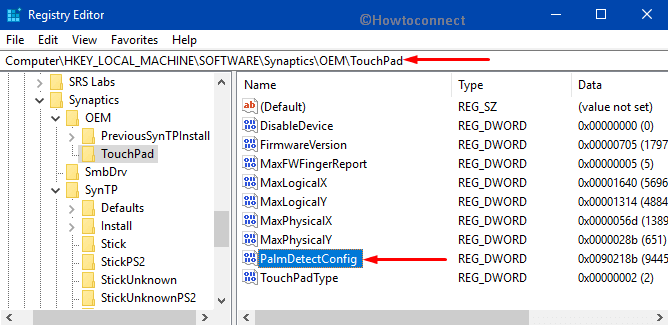
- Once the popup appears, change the value from 0 under Value data and hit the OK button to save the modification.
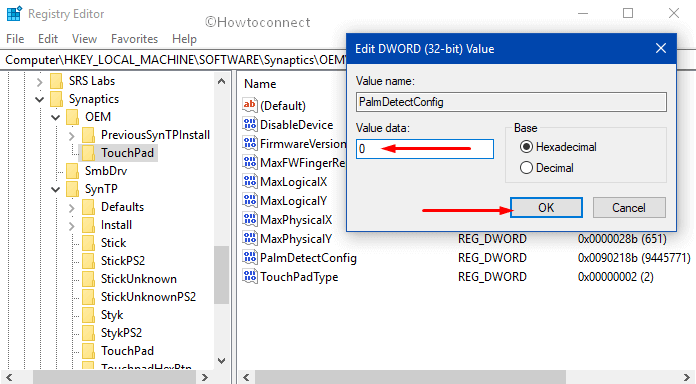
Note – Before changing the value, keep a note of the default value somewhere safely. Doing so will help you to enable the feature later on by inputting the default value.
Therefore, you can enable or disable Palmcheck on Touchpad in Windows 10 using Registry also.
That’s all about the ways to Enable / Disable Palmcheck on Touchpad in Windows 10.
WORKED PERFECTLY! THANKS