How to Enable Internet Connection Share, WiFi hotspot in Windows 8 – It is the most concerned recent issues that ‘how to enable Internet Connection Sharing & Create WiFi hotspot in Windows 8’. Once in a while, you could not succeed to enable Internet Connection Sharing in Windows 8, you get desperate to fix. Though similar act has been successfully done via Network and Sharing Center on Windows 7. To ease up enabling Internet Connection Sharing in Windows 8, I am about to demonstrate the way in the remaining part of the particular article.
The way of enabling Internet Connection Sharing in Windows 8 begins with accessing command prompt with administrative rights. If you have prior administrative right then go with successive steps:
How to Enable Internet Connection Share, WiFi hotspot in Windows 8
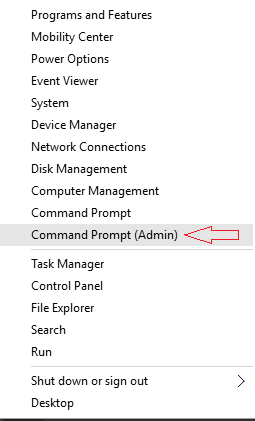
- Open Win+X menu then go to Command Prompt (Admin) option.
- In Command Window, put following commands and click enter button:
netsh wlan set hostednetwork mode=allow ssid=DellNet key=asdfg12345
while putting command, you may put either name instead DellNet and assign own 8 character password.
- After then put another command in existing CMD windows as following:
netsh wlan start hostednetwork
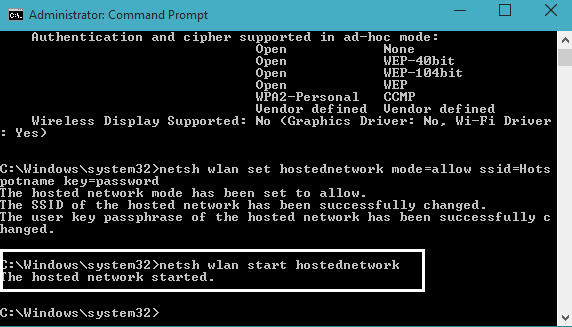
Once these commands put simultaneously the Wireless hosted network started automatically.
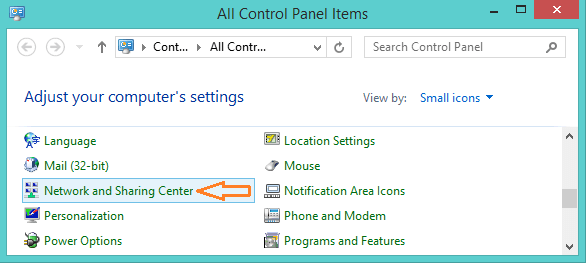
Remaining issue to create a WiFi hotspot in Windows 8 could be addressed now. For this, you have to en-route to Control Panel -> All Control Panel Items -> Network and Sharing Center.
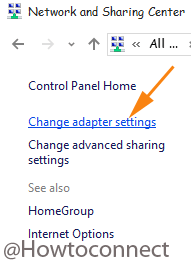
- Now, click on Change adapter settings that will display all your Network Connections.
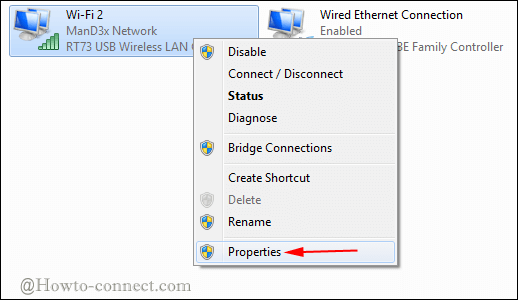
- In above Network connection window, you see a newly created network connection. Just right-click on the connection you are using currently and select properties.
- Then click on Sharing Tab in properties box and select ‘Allow other network users to connect through this computer’s Internet connection’ and click OK.
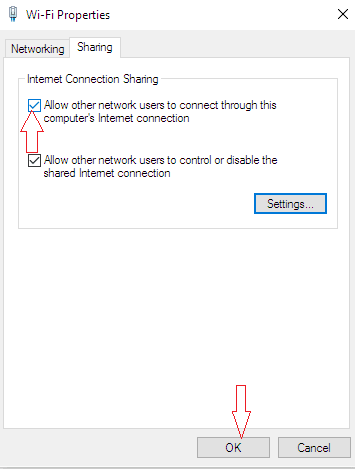
- Such act will allow creating WiFi hotspot of your Windows 8.
