When you buy a WiFi Modem and establish internet access in this, the next task is to share Internet on your Computer. So it is contemporary that I share with you how to enable WiFi Internet Sharing in Windows 8.
After buying WiFi device, you configure it first. Now proceed further Process to Enable WiFi Internet Sharing in windows 8 via WiFi devices.
How to Enable WiFi Internet Sharing in windows 8
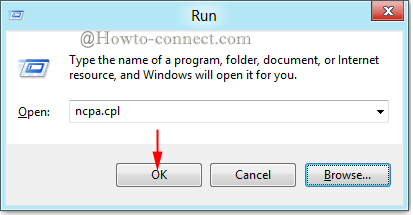
- Press shortcut (Windows key + R) to introduce RUN command.
- Type command – ncpa.cpl and click on the Ok button.

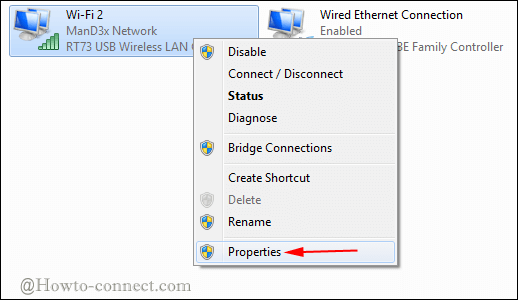
- Now you get the network connection window. Right click on the active wireless device and choose its properties.

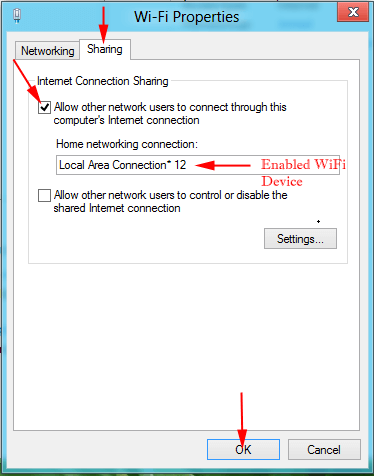
- Click on the Sharing tab at the top side of selected WiFi device properties.
- You have to check this box – Allow other………… internet connection.
- Then select the enabled wireless device under Home networking connection drop-down list tab.
- At last, click on the OK button.

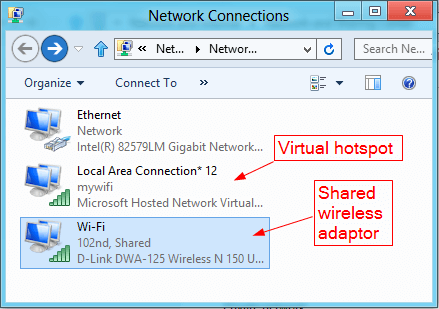
- When you go back around the network connections window as a result, WiFi device is showing as shared.

Once the sharing of internet connection in wireless mode will be completed through the above process, you can browse Internet on your Windows 8 computer.
