Technology is reaching a different height with so many innovations and facilities that the general users are receiving every now and then. With so many happenings in the technology world, users are likely to explore the internet world and most of them opt for the wireless mode.
In Windows 10, one superlative feature is to filter wireless networks so that the users can establish a list to allow or block specific network as per their requirement and can individually decide which wireless networks they should filter out.
Let us see this with an illustration – whenever your system is connected to a WiFi network, a clustered list of all the SSID names that are within the range will be visible at the network tile on taskbar and WiFi in the Settings area. You can filter those networks to add to a list in order to block or allow them. Thereupon you can see only your own network since you have blocked all those networks which do not belong to you. In this post, we will represent you the steps for How to Filter Networks to Show or Hide Them on Windows 10 either at the flyout on the Taskbar or WiFi flank of Settings application by creating a list.
How to How to Filter Networks to Show or Hide Them on Windows 10
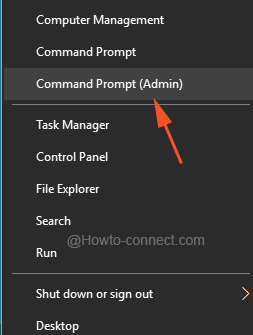
- Permit the power user menu to appear on screen with the combination of Win and X keys.
- From the appeared list, select the entry entitled as Command Prompt (Admin).
To Show Networks
- To display the required WiFi networks by adding it to allowing list on your system, copy the underneath typed command, paste into the command and punch Enter –
netsh wlan add filter permission=allow ssid="YOUR SSID HERE" networktype=infrastructure
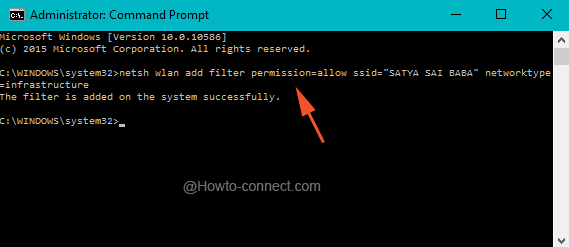
- “YOUR SSID HERE” should be replaced with the name of your WiFi network.
- There might be more networks that you use regularly, so repeat the above command and one by one put them on the white list.
To Hide Networks
- To block a specific wireless adapter by adding them to block list that you don’t own, put this command in the elevated Command Prompt and thereupon hit Enter –
netsh wlan add filter permission=denyall networktype=infrastructure
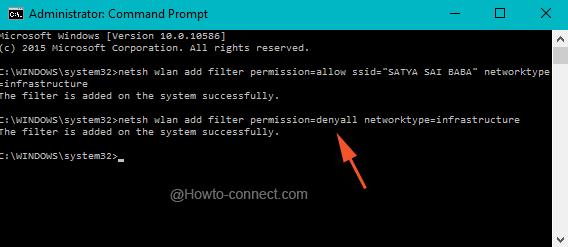
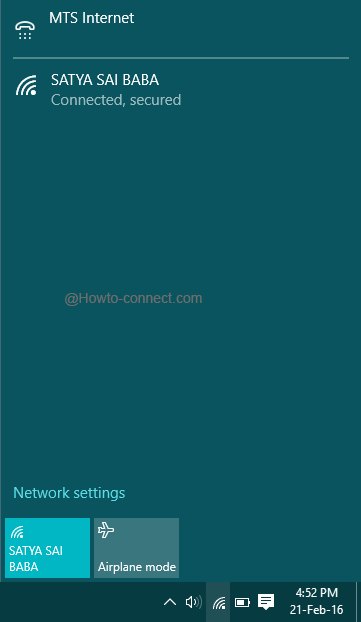
- After executing this command line, the networks you wished to show will be displayed and the rest that you don’t own will be blocked.
Revert the Changes
- In future if you prefer to revert the settings to the original state, put this command line into use in the elevated command Prompt and hit Enter
netsh wlan delete filter permission=denyall networktype=infrastructure
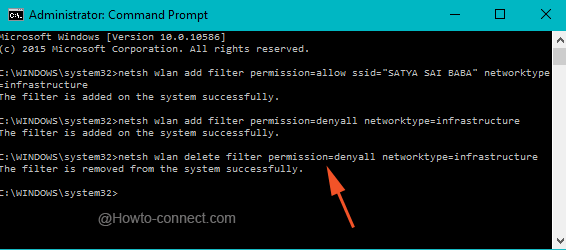
- This will erase off the assigned filter settings from your system and thus you will receive all the networks again.
If you travel a lot with your laptop and use the wireless adapters to scan for networks in different places, it is recommended to not set up the deny filter because you will not catch sight of those connections also which you want to use.
