Do you also confront with 0x80070bc2 Update Error on your Windows 10 or 11 System? Many users face this specific issue right after they installed KB4074588 Cumulative Update for Fall Creators Update. Here, we provide you with potential solutions that can bypass stop code.
A few reasons that cause this problem are unstable operating system, damaged system files as well as outdated drivers. However, 0x80070bc2 Update error is well fixable by running Windows Update Troubleshooter, resetting Windows Update elements, updating outdated drivers, performing a clean boot, using System Restore, moreover by removing certain troublesome registry entries. See ahead –
How to Fix 0x80070bc2 Update Error in Windows 10 and 11
Workaround-1: Running Windows Update Troubleshooter
For Windows 10 –
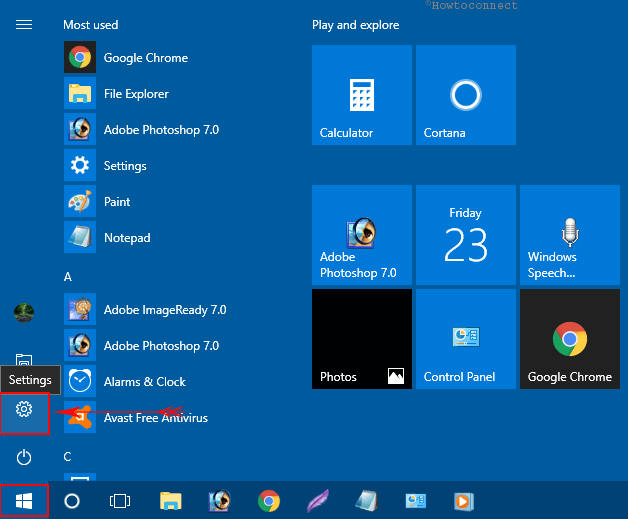
Step-1: Open “Start Menu” and click on the gear icon to launch Windows Settings, the built-in application.
Step-2: Click on Update & Security.
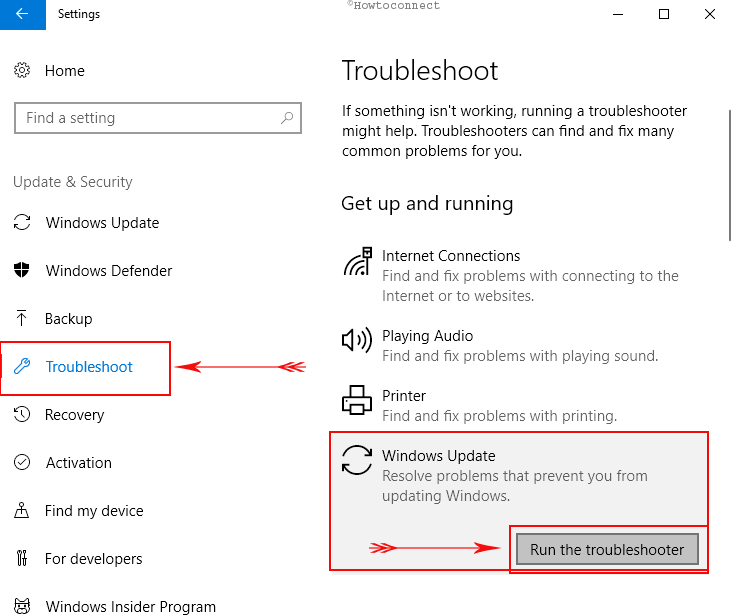
Step-3: From the following page, select Troubleshoot option on the left pane.
Step-4: Click on Windows Update.
Step-5: Select Run the troubleshooter button from the expanded pane.
For Windows 11 –
- Press the – Windows logo key & I.
- Click on – Troubleshoot.
- Select – Other troubleshooters.
- Find Windows Update and click Run from that section.
Therefore, the system will initiate detecting for the errors as well as troubleshoot them. Hopefully, this simple troubleshooter will resolve 0x80070bc2 Update error code. If it doesn’t fix the issue, continue with the next resolution.
Workaround-2: Removal of Problematic Entries Manually
- Press “Win+R” to open Run dialog box.
- Now to access Registry Editor, type regedit in the text field and select OK.
- From the next window, navigate to the following key in the left pane.
HKEY_LOCAL_MACHINE\COMPONENTS\
- Once you reach, find the below-given entries and “Delete” them one after another on the right pane.
AdvancedInstallersNeedResolving
PendingXMLIdentifier
NextQueueEntryIndex
- Upon removal of the entries, Restart Windows 10 to put this action into effect.
Workaround-3: Performing a Clean Boot
- Press – Win+S.
- Type or copy-paste “msconfig” in the search and hit Enter.
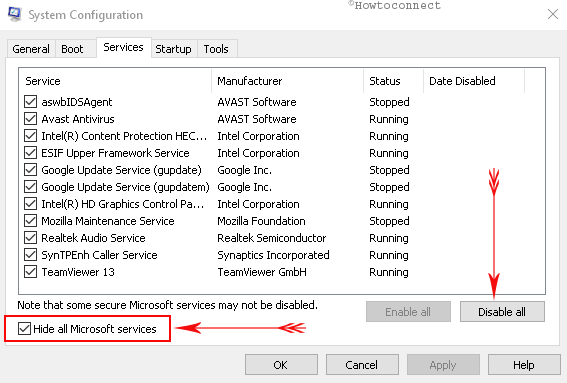
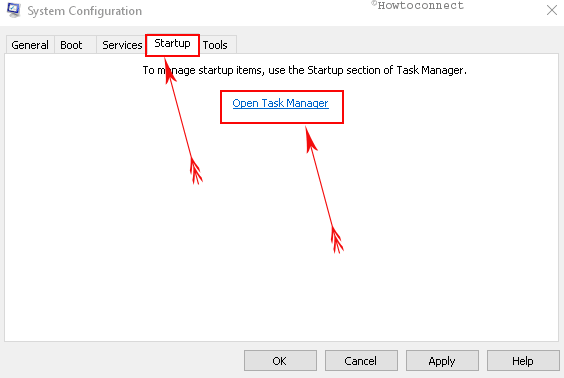
- On the following window, switch to the Services.
- Check the box beside the option “Hide all Microsoft services” and click “Disable all” button.
- Now, shift to the Startup tab and click on the link “Open Task Manager“.
- When “Task Manager” shows up, select all the Startup items one at a time and click the “Disable” from the bottom (see screenshot).
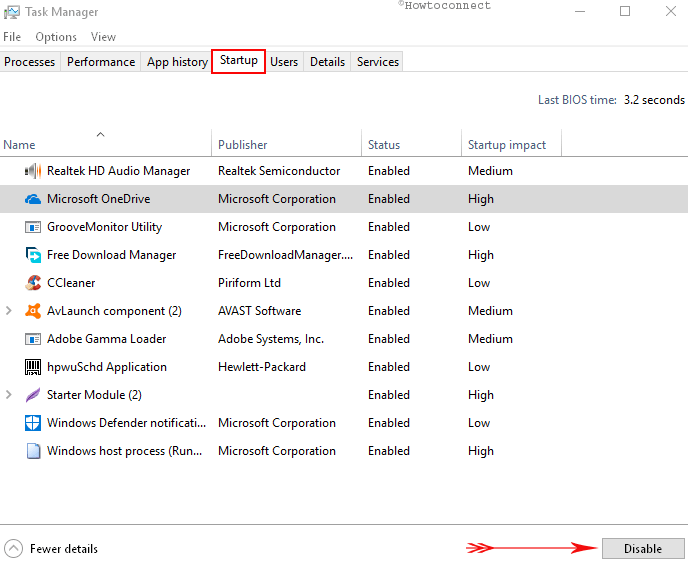
- Leave the Task Manager window and click OK on the System Configuration. Finally, restart your PC.
Workaround-4: Resetting Windows Update Components
- Click on the Search and type in Cmd there.
- Once Command Prompt appears in the result, right-click on it and select “Run as administrator”.
- Type or copy-paste the given list of commands one by one and press Enter after each.
net stop bits
net stop wuauserv
net stop appidsvc
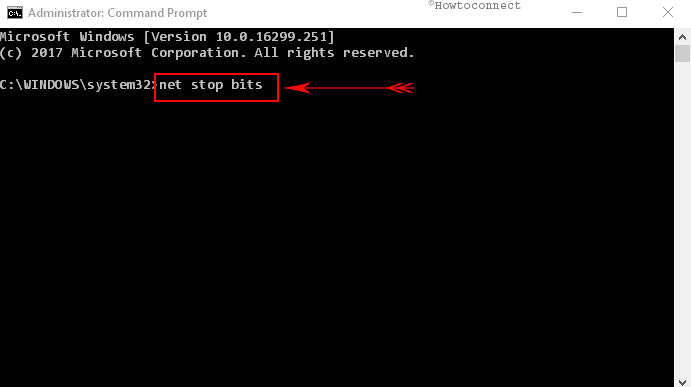
- After running the above commands, type the below one and hit Enter in order to delete “qmgr*.dat” files.
Del“%ALLUSERSPROFILE%\\Application Data\\Microsoft\\Network\\Downloader\\qmgr*.dat”
- Next, execute the below command and hit the Enter button.
cd /d %windir%\\system32
- It’s time to re-register BITS and the Windows update files. To do so, you need to type the following commands and press Enter from the keyboard after each of them.
regsvr32.exe atl.dll
regsvr32.exe urlmon.dll
regsvr32.exe mshtml.dll
regsvr32.exe shdocvw.dll
regsvr32.exe browseui.dll
regsvr32.exe jscript.dll
regsvr32.exe vbscript.dll
regsvr32.exe scrrun.dll
regsvr32.exe msxml.dll
regsvr32.exe msxml3.dll
regsvr32.exe msxml6.dll
regsvr32.exe actxprxy.dll
regsvr32.exe softpub.dll
regsvr32.exe wintrust.dll
regsvr32.exe dssenh.dll
regsvr32.exe rsaenh.dll
regsvr32.exe gpkcsp.dll
regsvr32.exe sccbase.dll
regsvr32.exe slbcsp.dll
regsvr32.exe cryptdlg.dll
regsvr32.exe oleaut32.dll
regsvr32.exe ole32.dll
regsvr32.exe shell32.dll
regsvr32.exe initpki.dll
regsvr32.exe wuapi.dll
regsvr32.exe wuaueng.dll
regsvr32.exe wuaueng1.dll
regsvr32.exe wucltui.dll
regsvr32.exe wups.dll
regsvr32.exe wups2.dll
regsvr32.exe wuweb.dll
regsvr32.exe qmgr.dll
regsvr32.exe qmgrprxy.dll
regsvr32.exe wucltux.dll
regsvr32.exe muweb.dll
regsvr32.exe wuwebv.dll
- Moving ahead, For resetting the Winsock, insert these commands and press Enter.
netsh winsock reset
netsh winhttp reset proxy
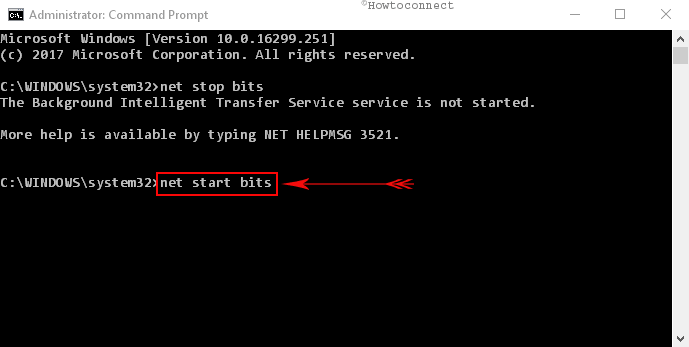
- Finally, execute these commands in order to reset the services namely “BITS, Windows Update, MSI Installer and Cryptographic”.
net start bits
net start wuauserv
net start appidsvc
net start cryptsvc
In most cases, this error got resolved when users Reset Windows Update components. If the issue continues to persist, go through the following resolution.
Workaround-5: Setting Windows Update services to Automatic
Launch elevated Command prompt by following above guidelines.
- Type the following commands and hit Enter one after another.
SC config wuauserv start= auto
SC config bits start= auto
SC config cryptsvc start= auto
SC config trustedinstaller start= auto
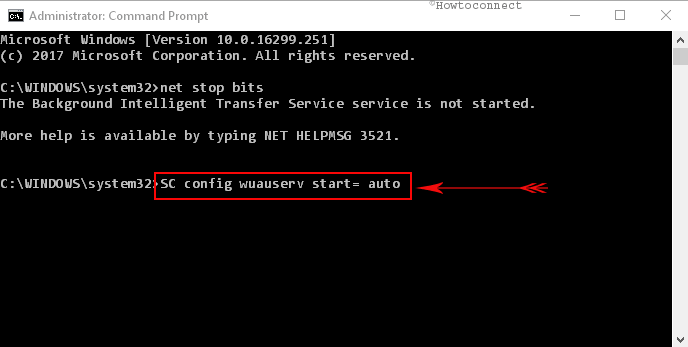
After successful execution, restart the Windows and check for the occurrence of 0x80070bc2 Update error code.
Workaround-6: Perform Reboot to Windows from Command Prompt (Admin)
- Launch the “Command Prompt (Admin)” using any of your methods.
- Type the below command line and press Enter key.
SC config trustedinstaller start=auto
Restart Windows after running the Command to bypass the 0x80070bc2 Update error code.
Workaround-7: Making VSS Copy Service to Automatic
1) Go to the taskbar Search box beside Start menu, type services in it, and press Enter.
2) Here, scroll down and double-click on the service “Volume Shadow Copy“.
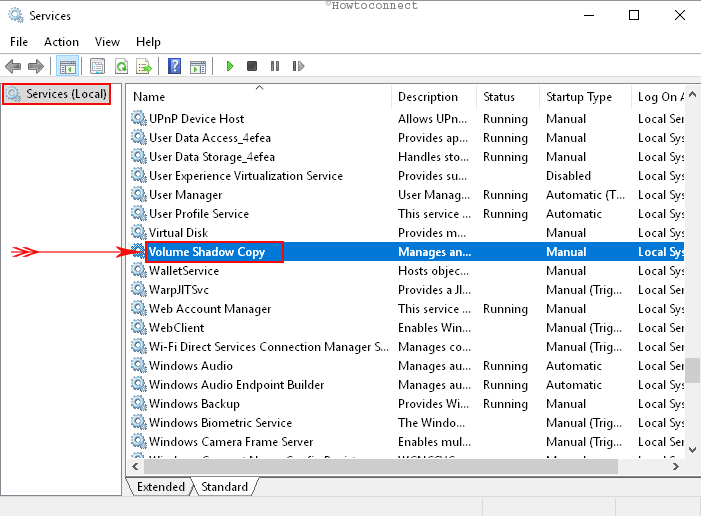
3) Upon opening the Volume Shadow Copy Properties popup, proceed to the drop-down menu beside “Startup type” and select “Automatic” option.
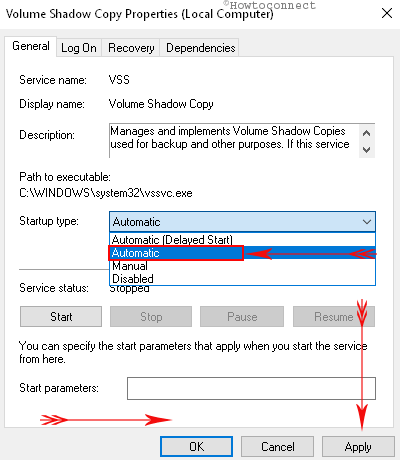
4) Now, select the Apply button then Ok to implement the modifications.
Workaround-8: Disable Third-party Anti-virus tools
Third party antivirus tools sometimes cause the 0x80070bc2 Update error to occur. Therefore, disabling those is only the solution to resolve this error. Windows 11 or 10 comes up with the most powerful “Windows Defender Security Center” for this purpose. This is safe, secure, and far way better than any third-party one. It is always suggested to use the default one to avoid unwanted circumstances.
Workaround-9: Perform a System Restore
- Restart Windows and get into the PC with all admin rights.
- On search, type system protection and select the result that appears.
- Once “System Properties” opens in a new popup, switch to the System Protection tab.
- Click on the “System Restore” button as shown in the given screenshot.
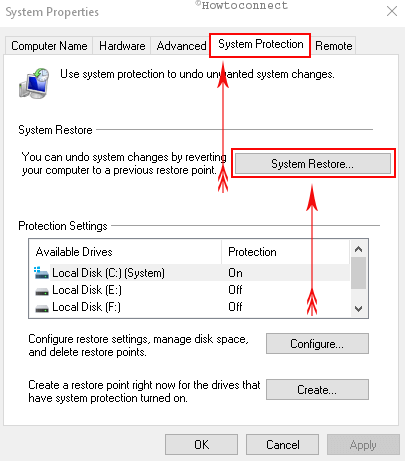
- Select the Next button.
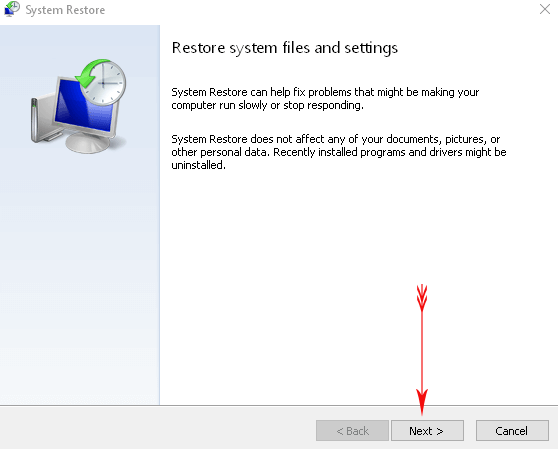
- Choose the system restore point that is created recently and henceforth hit the Next button.
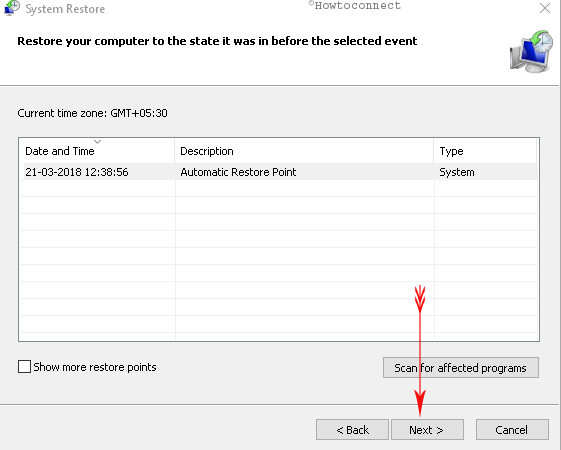
- Finally, select Finish.
Therefore, after successful System Restore, the 0x80070bc2 Update Error will likely no more occur.
Here, you may also like to learn How Run System Restore Using Command Prompt (CMD) in Windows 10.
That’s it! These are the workarounds you need to follow carefully for resolving 0x80070bc2 Update error in Windows 10.
Workaround-1: Running Windows Update Troubleshooter
Workaround-2: Removal of Problematic Entries Manually
Workaround-3: Performing a Clean Boot
Workaround-4: Resetting Windows Update Components
Workaround-5: Setting Windows Update services to Automatic
Workaround-6: Perform Reboot to Windows from Command Prompt (Admin)
Workaround-7: Making VSS Copy Service to Automatic
Workaround-8: Disable Third party Anti-virus tools
Workaround-9: Perform a System Restore

