Antimalware Service Executable is specified by a process MsMpEng.exe that you can see in Task Manager. Being one of the major components of Windows Defender, it consumes huge CPU usage for a longer period of time. The reason is pretty simple, Antimalware Service Executable is always busy in scanning viruses and threats. We will get know about the ways to fix it up from taking high CPU usage in this plot.
What is Antimalware Service Executable?
Antimalware Service Executable is an associated program of Microsoft’s latest security inclusion Windows Defender security center. You know Windows Defender performs multiple kinds of scanning to protect your system. Some of these are real-time, scheduled scan and full scan.
When the Windows Defender executes real-time protection to stop cyber attacks and malicious intruders it needs to utilize the largest portion of CPU that finally ends up making the Windows to perform slower. This usage goes even higher when the user connects to a wireless device, start downloading an item from the internet. Moreover, when you attach an external hard disk drive to your system the processor eating also goes high.
Changing Windows Defender Schedule Full Scan Windows 10, limiting the CPU usage for MsMpEng.exe manually, stopping the Defender from scanning its own directory, stopping Windows Defender from performing might help to fix this issue. Of course, this is one of the biggest issues we need to pull our socks up and resolve.
Few more reasons responsible for antimalware service executable Windows 10 that increases CPU usage are:
Infection of system files due to malicious intruders.
Outdated and inadequate Windows Defender Security system.
When Windows Defender performs the scan in its own directory.
Corrupted and malfunctioning registry entries of Windows Defender Security Center
Space cutting short on the Hard Disk drive.
Note- In order to observe the CPU usage, you can open the Task Manager pressing Ctrl + Shift + Esc hotkey combinedly.
How to Fix – Antimalware Service Executable in Windows 10
Workaround-1: Limit the CPU usage for MsMpEng.exe manually
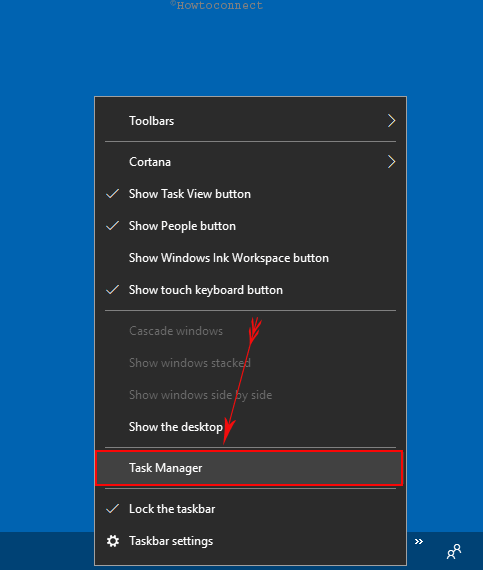
Step-1: Make a right-click on a vacant location in the Taskbar and pick Task Manager.
Step-2: Once opened, do a click on “More details” from the bottom left.

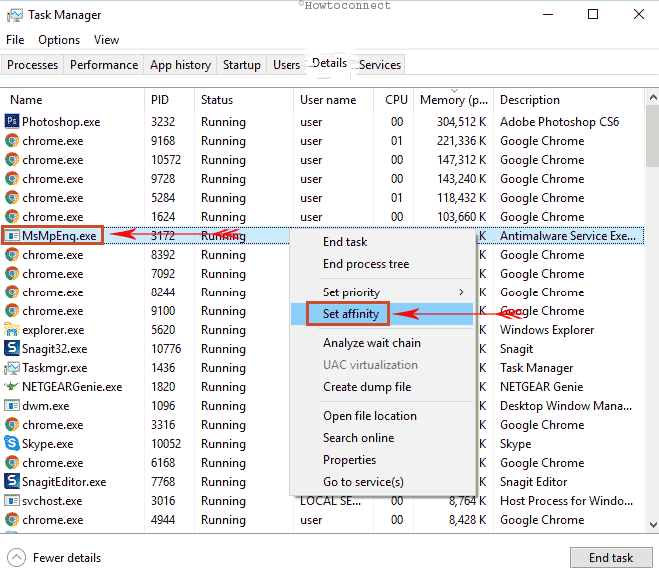
Step-3: Select the “Details” tab and reach out to MsMpEng.exe file and perform a right click on it. Select Set affinity option from the list.
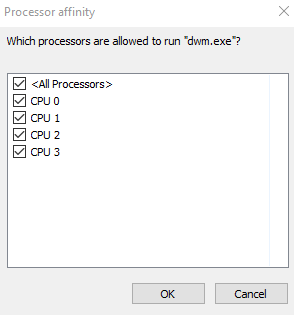
Step-4: Finally, select “CPU limit threshold” and leave the Task Manager.
Workaround-2: Change the Schedule of Windows Defender in Windows 10
Step#-1: Make a click on the Cortana Search box and type “Task Scheduler” in it. Once appears in the result, select it to launch on the desktop.
Step#-2: Make a double click on Task Scheduler Library on the left navigation pane.
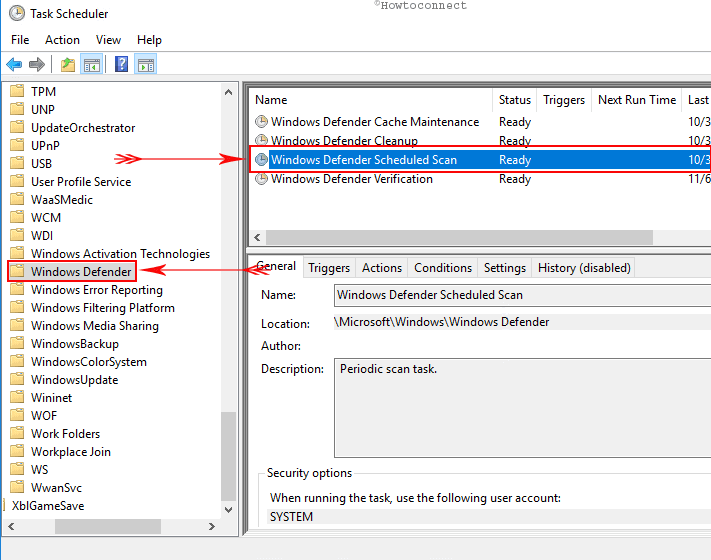
Step#-4: Expand the pane and navigate to the following path:
Library/Microsoft/Windows/Windows Defender
Step#-5: Once reached, jump aside to the middle pane and put a double click on Windows Defender Scheduled Scan under Name column.
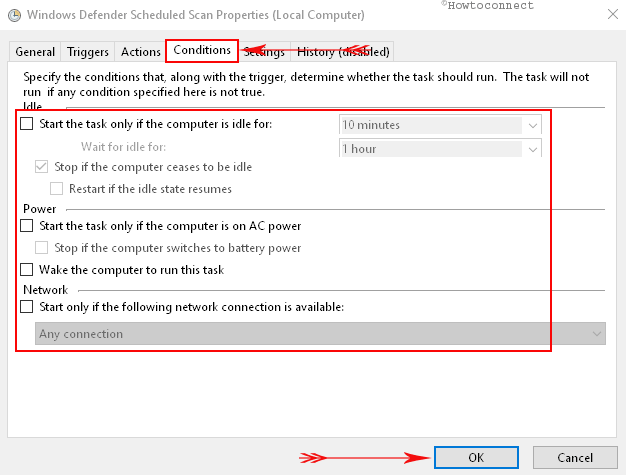
Step#-6: Open the Conditions tab from following popup window and uncheck all the options.
Step#-7: Select the OK option from the bottom to clear scheduled scan.
Remainder – Scheduled scan is dedicated to protecting your Windows from unlimited threats on a regular basis. Therefore, you need to reschedule this in such a way that does not affect the CPU usage much.
Making a new schedule for Scan.
1. Follow the same procedure to reach up to Windows Defender Scheduled Scan and make a double-click on it.
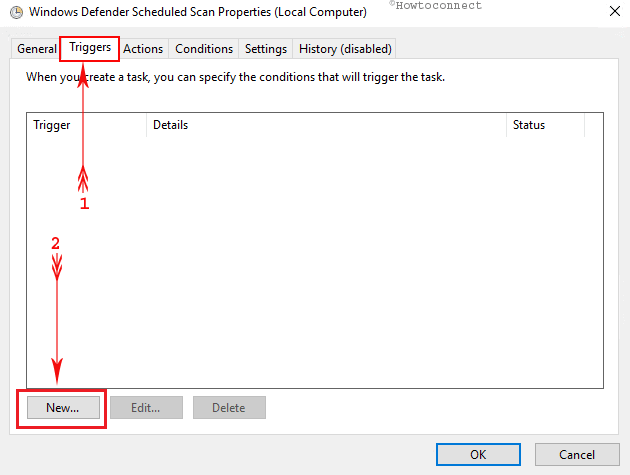
2. Open the “Trigger” tab from the popup and perform a click on “New”.
3. Select a preferred scan schedule from settings.
Note- The selection of a schedule should make a balance between the need for the device and CPU usage as well. A weekly scan should be the right choice.
4. Select a day and check “Enabled” option.
5. Hit the Ok button on the bottom to save the changes.

6. Now, repeat the same procedure for the other services: “Windows Defender Cache Maintenance”, “Windows Defender Cleanup”, “Windows Defender Verification” from the middle pane after navigating to the path mentioned above.
Workaround-3: Limit Windows Defender from scanning Antimalware Service Executable
Since, Antimalware Service Executable is already pressurized to take huge workload, reducing some sort of burden may work too. In this case, the Exclusion list is provided in Windows Defender to do so. You can add a file, folder, process here and Windows Defender will no more scan that. The guideline is as follows:
a. Press Win+I hotkeys to open the default Windows Settings app.
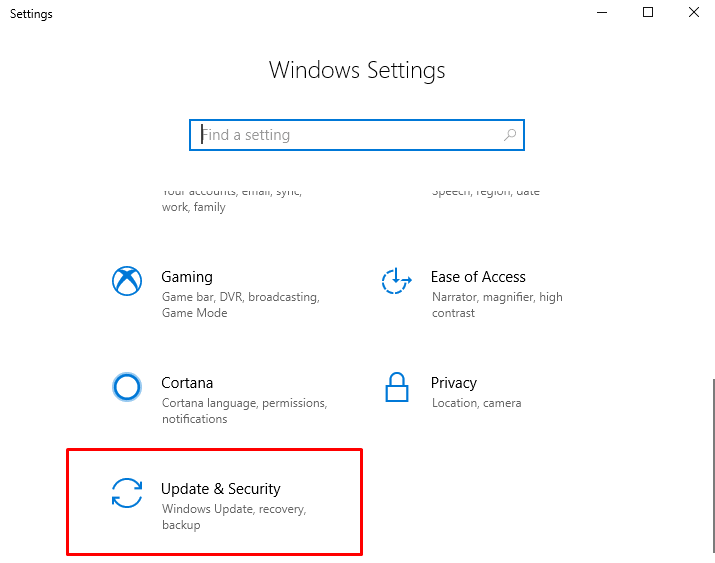
b. Navigate to “Update & Security” and put a click on it once highlighted.
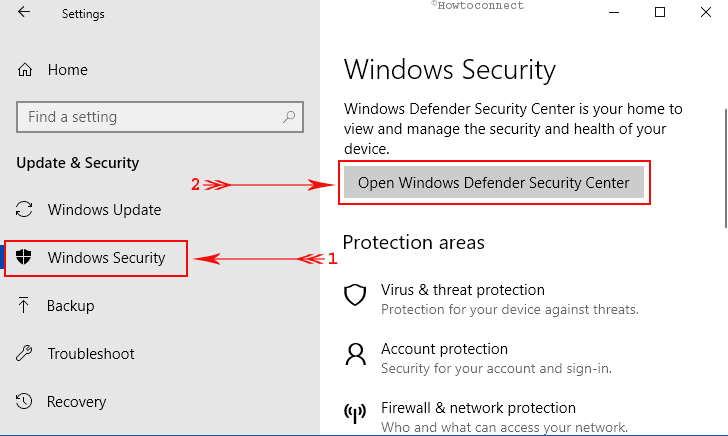
c. Select Windows Security from the left pane and jump up to the adjacent right side.
d. Follow the link provided with “Open Windows Defender Security Center” and be guided to the Windows Defender page.
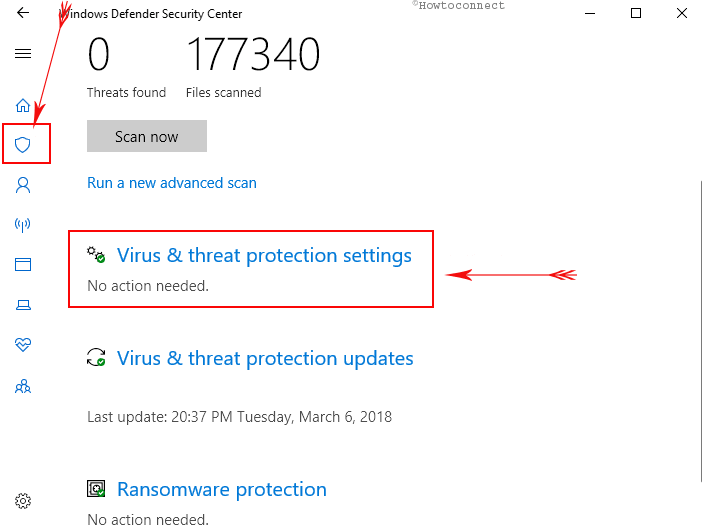
e. Perform a click on Virus & threat protection thumbnail and move forward to additional settings.
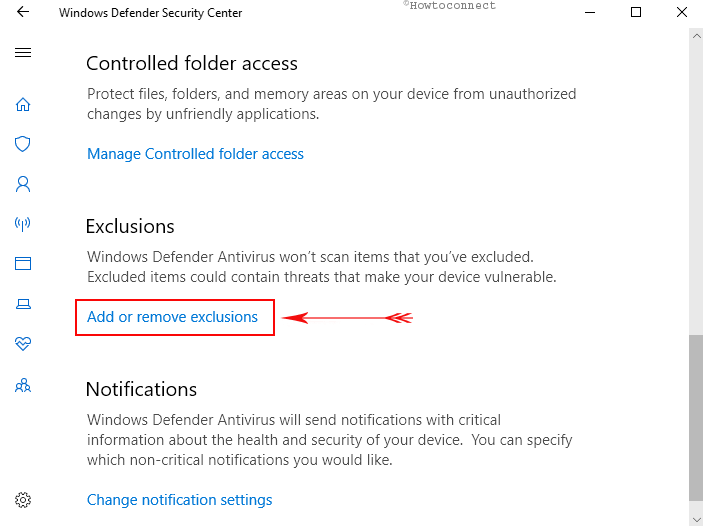
f. Hit a click on the “Virus & threat protection settings” and scroll down to “Exclusions” from the following page.
g. Make a click on “Add or remove exclusions” option and select File. On the next page, click “Add an exclusion” button and select File.
h. Browse to the Antimalware Service Executable (MsMpEng.exe) and select “Open”. Commonly this file available on C:\Program Files\Windows Defender\MsMpEng.exe.
That very file will be added to the exclusion list and will never be scanned further.
Workaround-4: Disable Windows Defender
Turning Off Windows Defender have solved the problem for many people. This one is a default program of Windows and it needs some registry hack to disable it. However, disabling it might be completed in two different ways:
From Registry Editor:
Step-1: Press Win+R shortcut keys and invoke the Run dialog.
Step-2: Type “Regedit” in the search box and press Enter button. This will open the Registry Editor.
Step-3: From the left pane of this window, navigate to the following path:
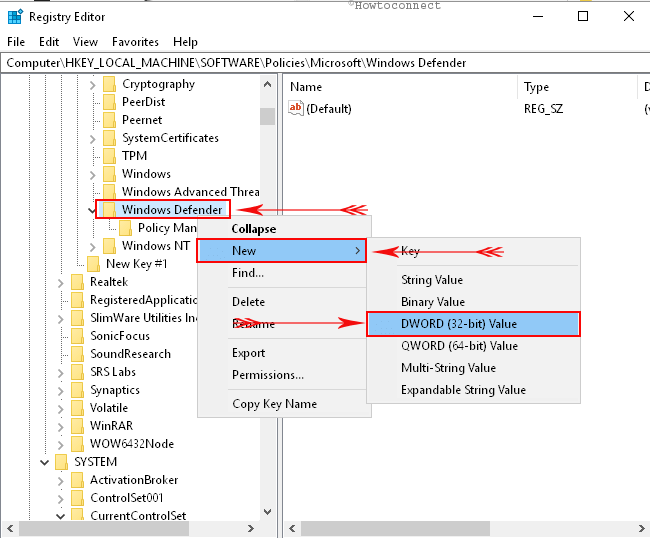
HKEY_LOCAL_MACHINE\SOFTWARE\Policies\Microsoft\Windows Defender
Step-4: Upon reaching to the targeted path, slide down to the right side and check if an entry named “DisableAntiSpyware” is present or not.
Step-5: If it is not present, perform a right click on “Windows Defender” from the left pane and select “New” and then “DWORD (32 bit) Value”. This will create a new registry DWORD on the right side pane.
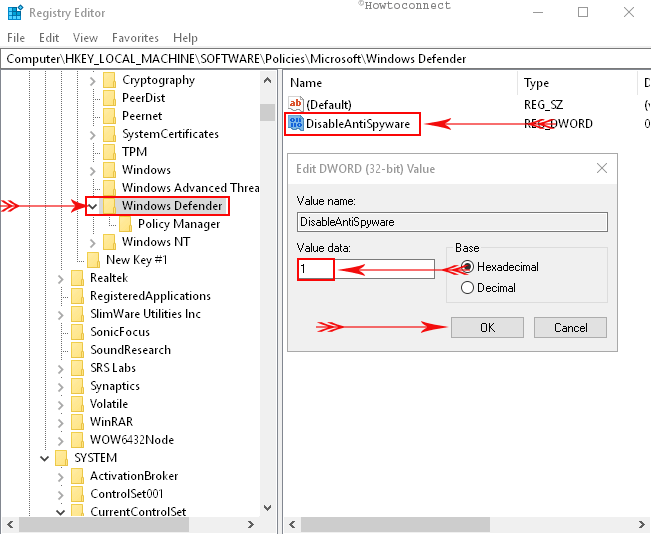
Step-6: Rename the DWORD to “DisableAntiSpyware” and press Enter button.
Step-7: Now make a double-click on the entry and put 1 under Value data.
Step-8: Select “Ok” option from bottom in order to save the changes.
This will disable the Windows Defender from your Windows.
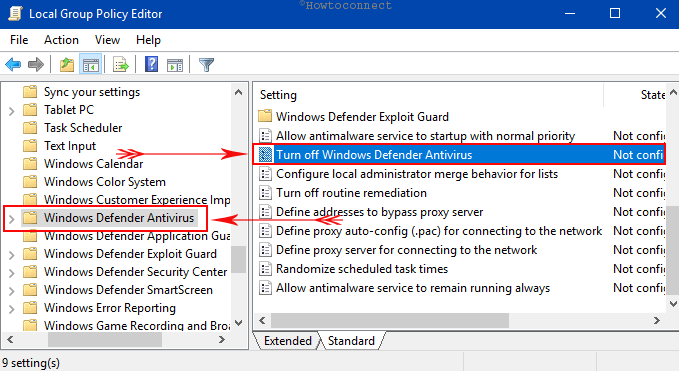
From Local Group Policy Editor:
a) Open the Run dialog following the above instruction and type “gpedit.msc” in the search box.
b) Pressing Enter button will guide you directly to Local Group Policy Editor.
c) From the left pane of this window, navigate to the following path:
“Computer Configuration => Administrative Templates => Windows Components => Windows Defender Antivirus”.
d) Once reached to Windows Defender Antivirus, shift to the right side pane and reach out to “Turn off Windows Defender” under Settings.
e) Make a double click on it and select Enabled option.
f) Select “Apply” and then “Ok” options to turn Off Windows Defender.
If it isn’t disabled instantly, perform a restart to put the changes into action.
Workaround-5: Scan for Malware attack
Malicious invaders are also responsible for the antimalware service executable high CPU. Therefore, a full scan will be a great aid to resolve the issue. Perform a scan and resolve any threat if found. If you have already disabled the Windows Defender, try an efficient good 3rd party free Antivirus tools to complete the same task.
That’s all about fixing of Antimalware Service Executable in Windows 10. Pretty simple and easy if you have keenly abide by the instructions provided.
August 26, 2020, time to update the page the latest news from the Microsoft is that the antimalware eats most of your computer and will run constantly, yes constantly unless you install a third party Anti Malware program then it will disable itself unless you delete that third-party app then it will automatically start up again. So Microsoft has effectively become the thing they are claiming to stop. I still don’t believe it’s any kind of protection App it’s more for spying on us to sell us marketing than anything else. so the long and short of it is all these little tricks don’t work. you have to have major hacking skills to even access the program that is the problem. someone needs to write a program that tricks the beast into thinking you have a third party program to stop it from breaking people’s computers, just saying you really suck Microsoft….. you really do.