Error 0x8024a206 in Windows 10 usually appears when users attempt to update the operating system. Microsoft releases regular updates in order to fix the latest issues as well as bugs and few more issues. Unfortunately, such errors actually obstruct the updating process.
However, this problem is rather easy to resolve by accessing troubleshooter; resetting Windows Update cache, and performing System File Scan. We will discuss all these solutions in detail here in this segment.
How to fix Error 0x8024a206 in Windows 10 while Windows Update
Run Windows Update Troubleshooter to Fix Error 0x8024a206 in Windows 10
For Windows 10 –
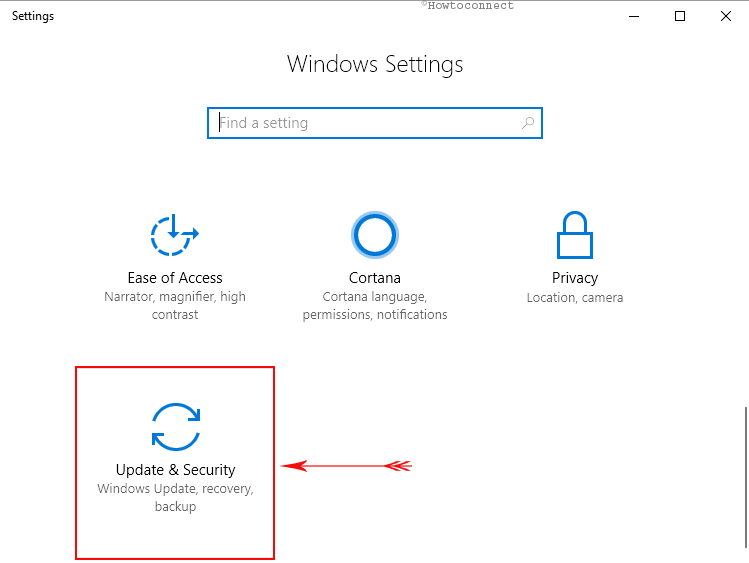
Step-1: Press Win+I and access the Windows Settings application.
Step-2: Click on Update & Security.
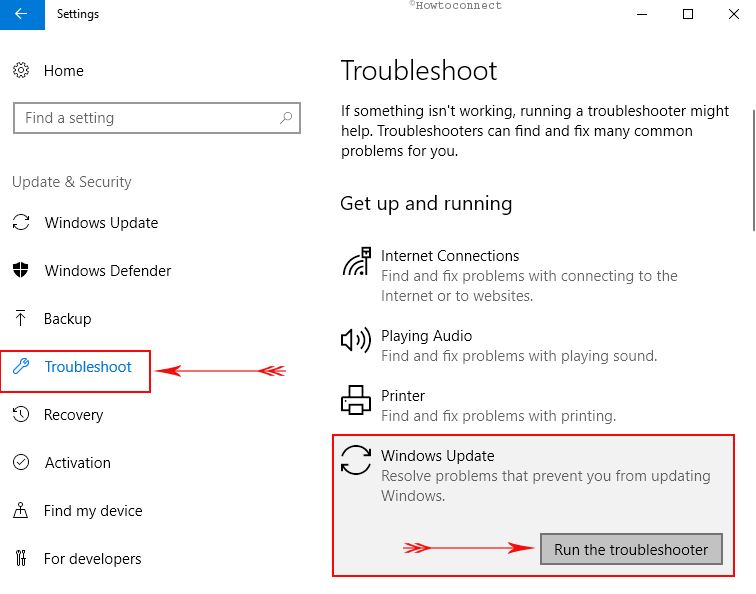
Step-3: On the following page, select Troubleshoot.
Step-4: Scroll down and perform a click on Windows Update.
Step-5: Click Additional troubleshooters. Select ‘Windows Update’ and click on Run the troubleshooter as shown in the given screenshot.
For Windows 11 –
- Press the – Winkey & I simultaneously.
- Select the – Troubleshoot.
- Go with – Other troubleshooters.
- Choose – Windows update click – Run.
Now, Windows will start detecting the errors. It will also repair them if it discovers any and will make an attempt to bypass Windows 10 update problems.
Also, follow another similar tutorial to Use Common Windows Update Troubleshooter on Windows 10, 8.1, 7.
Fix Error 0x8024a206 in Windows 10 using Windows Update Cache Reset
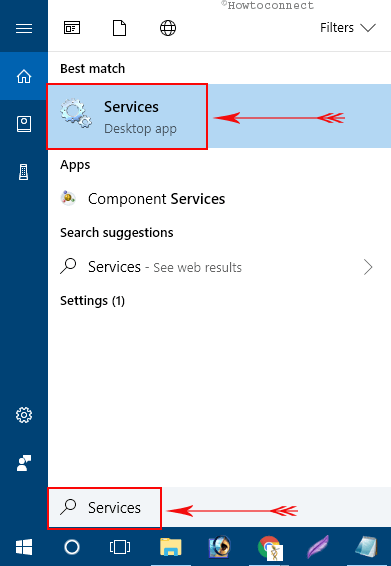
- Click on the Search and type Services.
- Press – Enter.
- Reach out to Background Intelligent Transfer Service. Right click on it and select Stop.
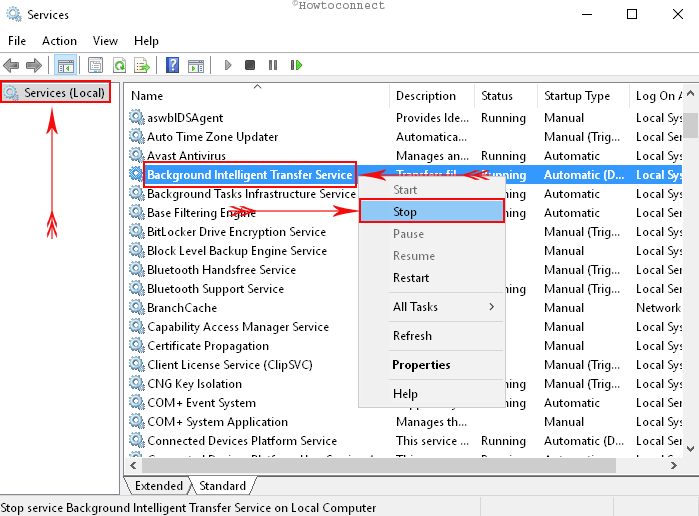
- Look for the service – Windows Update.
- Stop this service in the same way we advised above.
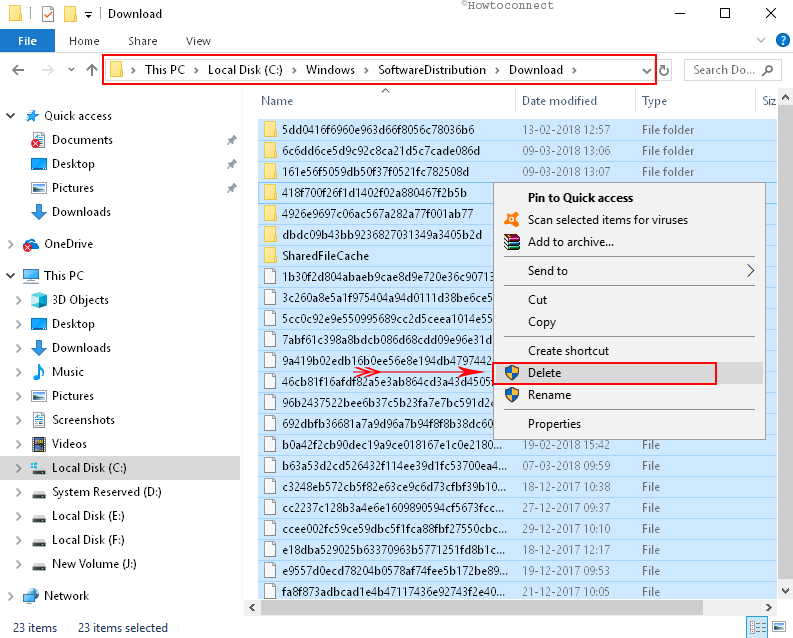
- Now, press Win+E and navigate to the folder – C:\Windows\SoftwareDistribution\Download.
- Hit “Ctrl+A” to select all the items there. Press – Delete. Alternatively, you can also right-click and select Delete.
- Again head to the Services window.
- Right-click on “Background Intelligent Transfer Service” and “Windows Update” one after the other and click Start.
You should no longer see Error 0x8024a206 after putting this process into effect. Furthermore, you can also go for checking the corrupted system files in case of failure to resolve the issue.
You may also like to read our tutorial on How to Reset Windows Update to Default in Windows 10.
Perform SFC Scan to Resolve Error 0x8024a206 in Windows 10
- Type CMD in the taskbar search.
- Once Command Prompt is under Best match, right-click on it.
- Select “Run as administrator”.
- Click Yes when UAC prompt comes up.
- Now, type the given command and press the Enter – sfc /scannow.
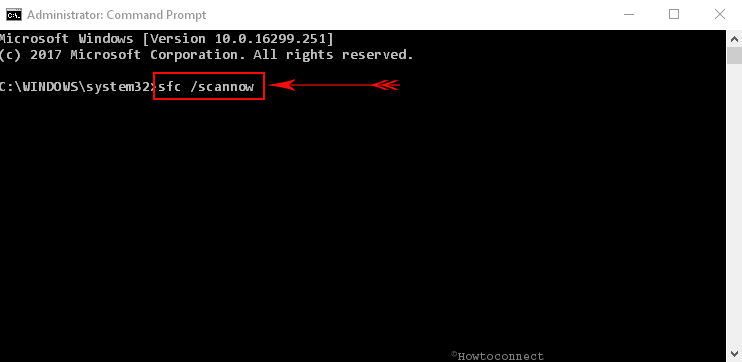
- With this, Windows will start detecting the presence of any faulty moreover defective files in the system. If it discovers any such file, it will immediately try to resolve it. See SFC /Scannow, DISM.Exe, CHKDSK Windows 10.
That’s all about the fixing of Error 0x8024a206 in Windows 10. Hopefully, the above solutions helped you in getting back the smooth updates.