Webcam is one of the most used tools on the computer nowadays and any disturbance in this is intolerable. But this is really frustrating to get an error like Windows 11 Camera not working on a device. This webcam issue occurs in the laptop of every brand whether it is Lenovo, Asus, HP, Dell, HP, or other. After upgrading the Operating System to Windows 11, the issue has become widespread. Although Windows 11 recognizes and configures most cameras in the machine automatically, we cannot hope there will be no trouble at any instance. If you are here looking for a solution to this trouble, there is always a way out.
Windows 11 Camera not working can happen for so many reasons varies from one device to another. For some people, Windows oftentimes fails to detect the built-in camera and throws this error on display. But the most common reason to cause this is, there must be some driver issues, likely it can be outdated. Some other reasons like recent system updates, privacy settings restricting permission to access, hardware issues can also cause this trouble. However, we can fix the error easily using some common workarounds. We are here to discuss them and make the camera app working.
Windows 11 Camera not working
Here is how to How to Fix Windows 11 Camera not working –
1] Ensure Windows detected Camera app properly
Windows 11 usually detects the peripherals like camera app automatically. Nevertheless the detecting accuracy of the Operating System, we may have errors too. The reason, the system may fail to recognize the webcam app due to any sudden change.
To resolve this error, make sure the Operating System has detected the webcam of the device properly. For that, follow the below instructions –
- Press – Winkey and R.
- In the Run dialog box, type in – “devmgmt.msc”
- Press Enter key to open up Device Manager.
- In the app, reach to Camera device and expand this branch.
- If the camera is not showing in Device manager, look for any of the Imaging devices, Sound, video, and game controllers branches.
- If Windows 11 has detected your webcam, it will appear in the list under any of these devices.
- In case the built-in Camera is not listed under any of the devices, click – Action from the top bar.
- Select – Scan for hardware changes.
- The camera should appear this time in the list.
If Windows 11 fails to detect the webcam of your computer even after completing the above procedure, disconnect it right away. Restart the OS and check once more time. If this is connected via USB cable, try interchanging the ports to ensure USB port is okay. Furthermore, you can also try connecting the camera directly if you are using a USB hub.
In case of repeated failure, try checking the webcam with other devices to check it is working fine. If not, you might need to replace the camera and or renew it immediately.
2] Check and adjust the Camera app privacy Settings
With respect to enhancing the productivity of Windows 11, the OS oftentimes limit the use of default camera for applications like Microsoft Teams, Zoom, and Skype. This may also happen when you have selected and enabled the privacy-sensitive option while setting up the machine. In both cases, you will get the Windows 11 Camera not working error message while trying to use those apps.
If the same happens to you, there is a simple solution to settle down the camera error only by reversing the Privacy Settings. In order to allow the applications to access the default camera, follow the below steps –
- Hit – Winkey+I.
- From the Settings app, click – Privacy & Security.
- In the right pane go down to App permissions section and click Camera.
- Turn on Camera access (Anyone using this device can choose if their apps have camera access when this is on).
- And also turn on Let apps access your camera.
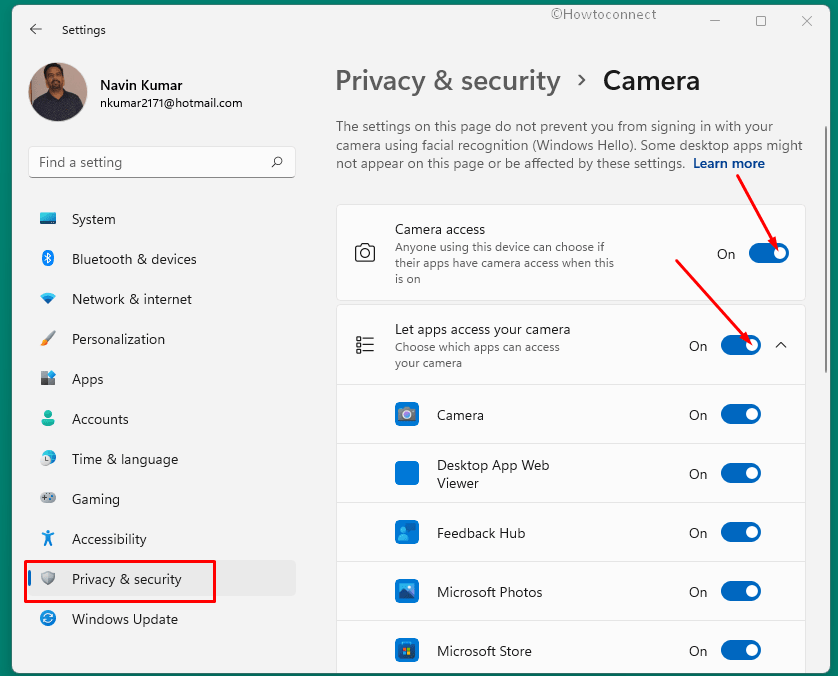
- From the “Choose which Microsoft Store apps can access your camera” area, Turn on the switch alongside the apps for which you want to allow the camera. For example – Camera, Skype, Zoom, Microsoft Team, etc.
- Restart the Windows 11 PC and check if the error appears while accessing those programs.
In case the same happens, you have to allow access to the webcam for the desktop apps as previous settings were only for the Store Applications. For that,
- Come down at the bottom of the previous Settings page.
- Turn On the slider from the Allow desktop apps to access your camera.
- Now, Restart the OS and try checking for the error again.
3] Update the Webcam driver to the latest firmware
Most of the hardware accessories give trouble due to driver incompatibilities. Drivers are manufactured to ensure and maintain interaction and communication well between software and external hardware devices. If you are getting Windows 11 Camera not working, the first thing that comes to mind is driver outdated.
Windows 11 has easier ways to update any driver thereby settling down the compatibility issues right away. Here are the guidelines to update your webcam driver –
- Right-click on the – Start.
- Select – Device Manager.
- From the app homepage, look for Camera device.
- Click it to expand the branches.
Note – if you are unable to find the Camera, locate Sound, video, moreover game controllers and double click to expand the ‘Imaging’ section.
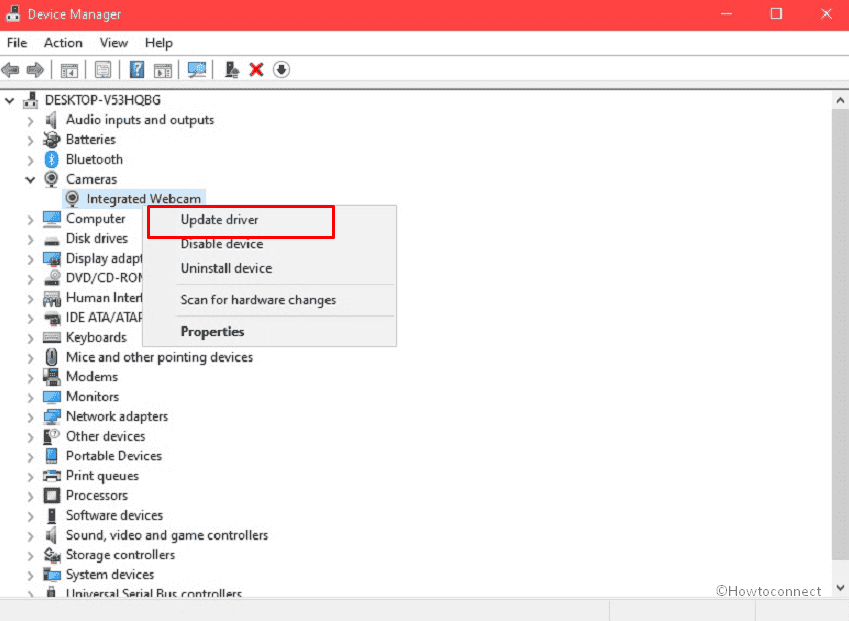
- Right-click the – Camera driver.
- Select – Update driver.
- Click on – Search automatically for drivers.
- System will start looking for compatible drivers from here on, ensure the device has stable internet connectivity.
- Follow the on-screen guidelines until the updating ends.
- Restart the Windows 11.
4] Re-install or roll back problematic Webcam driver
Driver compatibility issues don’t disappear sometimes by simply uploading them. In some cases, Windows 11 Camera not working can keep coming on after upgrading to the new rollout of the Operating System. Nevertheless, all the drivers are updated, you can have such issues in the system. The reason is, driver manufacturers or vendors like Microsoft releases buggy updates quite often. Installing them in the system will cause additional problems rather than resolving an existing issue.
However, Device Manager in Windows 11 provides an option to Roll back a driver to its default update. This way, you can negotiate a buggy update and resolve the error. In case that fails, the best idea is to uninstall the problematic driver and reinstall the same from vendor’s official site. To complete these tasks for reinstall camera driver Windows 11, follow the below instructions –
- Press – Win+X.
- Click – Device Manager.
- Access – Camera.
- Expand the branches.
- Right click the default camera listed.
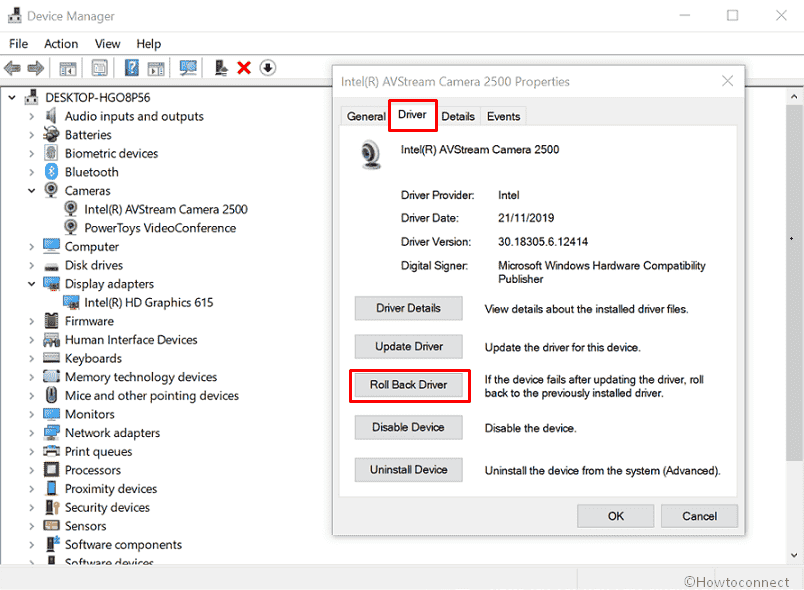
- Select – Properties.
- Enter – Driver tab.
- Click – Roll Back Driver.
- Follow the on-screen guidelines to complete the task.
- For uninstalling a problematic driver, click – Uninstall Device.
- Once the process ends up after following the stepwise guidelines from display, Restart the Windows 11.
- Download and Install the latest & compatible camera driver from trusted site.
- Check if the error is resolved by now.
5] Install the Camera driver in compatibility mode
At times it may happen that, the Windows 11 Camera not working error persists even after reinstalling the camera driver in usual method. In that case, installing this driver in compatibility mode found to deal with the error effectively.
To carry out this workaround, follow the below guidelines –
- Download the latest camera driver from its maker’s website.
- Right-click the Setup file of the downloaded driver.
- Select – Properties.
- Enter into Compatibility tab.
- Check the box that reads – Run this program in Compatibility mode.
- Select the Operating System from the drop-down list.
- Once the driver is installed, check the functionality.
- Restart the computer and check for the error once more time.
6] Remove problematic System updates
Microsoft often releases some rollout containing small bugs in them. These update patches sometimes are incompatible to run peripherals properly. If you are encountering the Windows 11 Camera not working error after installing a new patch in the OS, uninstall the update straightway.
Uninstalling a problematic update does not only resolve the evolved issue like camera not working, it will also save the device from greater damage. Here is how you can remove a troublesome update file from the system –
- Open – Settings (Win+I).
- Select Windows Update from the left pane.
- On the right side, click – Update history.
- Click – Uninstall updates link.
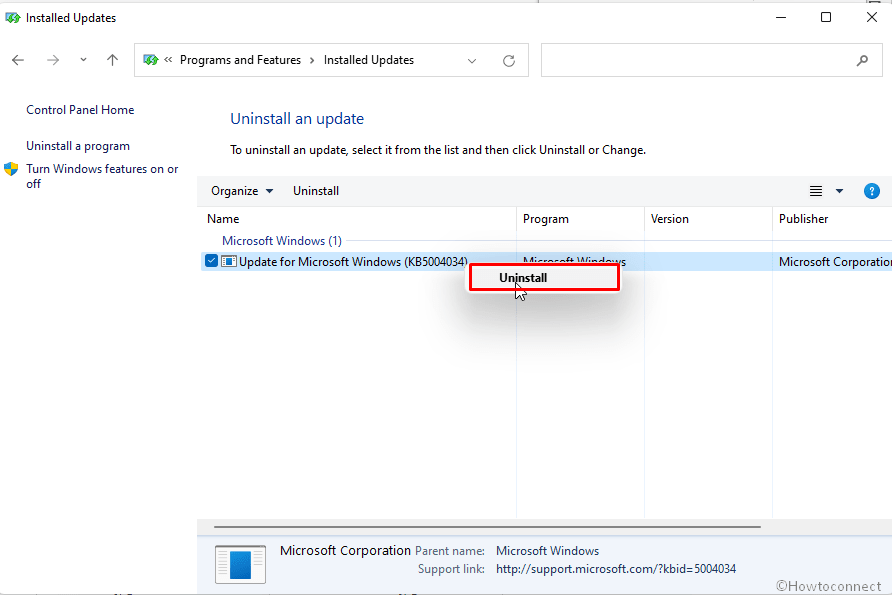
- On the new window, look for the recently installed patch.
- Right click the same and select – Uninstall.
- Click – Yes when prompt.
- Restart the computer once the uninstalling ends successfully.
Check for the error in the system, Hope it will resolve now. Don’t be afraid to uninstall a problematic update from the system anytime. Windows 11 has this amazing utility to turn back the old state of OS without making sleek changes to the device.
7] Reset Camera Application
In some devices, Windows 11 Camera not working error appears even after having everything alright. Since the exact reason is unknown, you can try Resetting the Camera app.
In most cases, this simple workaround has become completely effective to deal with the error. Here are the instructions to follow for Resetting Camera app –
- Press the – Windows key.
- Type – Apps and features.
- Scroll down to reach Camera
- Click on the 3 dots menu and select – Advanced options.
- In the next page, scroll down to reach Reset area.
- Click – “Reset”.
- From the popup dialog box, again click – Reset.
- Restart the Computer after completing this method.
- Check if the error is gone by now.
8] Readjust the Privacy Settings from Third party anti-virus suits
Oftentimes it so happens, third party anti-malware suits override permission of few applications. This is because of some security reasons of course. At times, the third party anti-virus program can also impose the restriction on the usage of webcam for certain applications. While trying to use the camera for that specific application, you will encounter Windows 11 Camera not working error on display.
If this happens to your case, open the anti-virus suit and check in the permission section if there is any. You can also change the setting to default if no such thing is available. Not to mention, Windows 11 doesn’t need a third-party anti-malware program in it. Windows Security is the most popular app to deal with all virus components with its robust contraction and strong security layer. If you feel it unnecessary to have such programs, uninstall it using the below instructions –
- Open Run dialog (Win+R).
- Type – appwiz.cpl.
- Click – Ok.
- From the Program and Features window, look for the culprit application.
- Right click it and select – Uninstall.
- Click Uninstall once more time when a prompt is out.
- Restart the Windows after completing all steps from on-screen guidelines.
Hopefully, the error will not appear in the next session.
9] Run the Hardware and Device Troubleshooter
Webcam in a laptop or a desktop computer is a hardware device and they can anytime end up giving trouble. With respect to this probability, Windows 11 has Hardware and Devices Troubleshooter in the Operating System. This utility is a method of identifying and diagnosing operational or technical issues related to a hardware accessory. By running the tool, any physical or logical error can be settled down easily.
Windows 11 Camera not working error can also be triggered when the webcam runs into trouble. We will try running the Hardware and Devices Troubleshooter to negotiate this issue within the system. Here are the steps to run the tool –
- Press – Win+R.
- Type the below command –
msdt.exe -id DeviceDiagnostic
- Hit the – Enter.
- Click Next when the Hardware and Devices Troubleshooter prompts.
- When you see a list of devices having issues by the utility, select – Camera.
- Click the – Next.
- After the utility traces out some problems, click – Apply this fix.
- Select – Next once more.
- Restart the Windows once troubleshooting ends successfully.
Check for the error now, hopefully, it will not come to display anymore.
Methods list:
1] Ensure Windows detected Camera app properly
2] Check and adjust the Camera app privacy Settings
3] Update the Webcam driver to latest firmware
4] Re-install or roll back problematic Webcam driver
5] Install the Camera driver in compatibility mode
6] Remove problematic System updates
7] Reset Camera Application
8] Readjust the Privacy Settings from third-party anti-virus suits
9] Run the Hardware and Device Troubleshooter
That’s all!!