Do you also find Winword.exe High CPU Usage in Windows 10? Many users also experience the rapid consumption of CPU when they launch Microsoft Word file. Though it is the legitimate executable file of Microsoft Office Word, in certain cases, it acts as a malware or virus attack. The cybercriminals or malware attackers execute different types of malicious programs. They name it as winword.exe which eventually corrupts the software or hardware of the system.
For some users, the issue occurs when Word is active but for others, the high CPU by the winword executable file happens even when it is running in the background. So, you need to first confirm the location of the file. If it is located in the correct directory, you need to troubleshoot compatibility of the file. In case you find the location is incorrect, conduct a full scan of the system. Hence, try out the below workarounds and see which one helps you to reduce the CPU usage of the winword.exe file.
Solutions to Winword.exe High CPU Usage in Windows 10
Here is how to fix Winword.exe High CPU Usage in Windows 10 –
Troubleshoot Compatibility
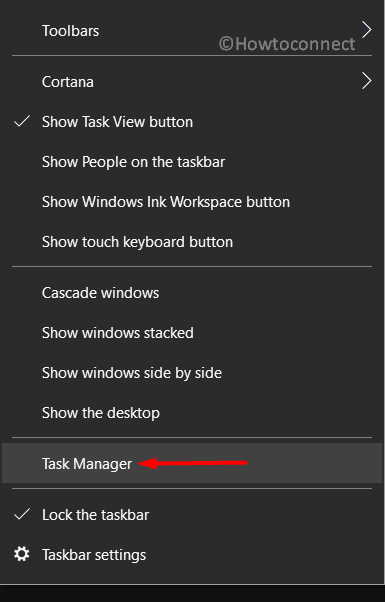
Step-1: Right-click on the taskbar and select Task Manager from the menu that shows up (see screenshot). Alternatively, you can also press Ctrl + Alt + Del hotkey to launch the same.
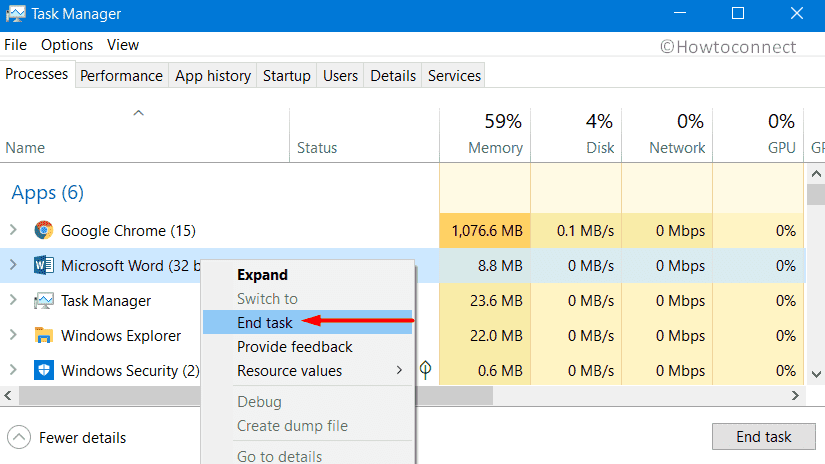
Step-2: Find Winword.exe (Microsoft Word) in the Processes tab.
Step-3: Once you see it, right-click on the process and click End task. After ending the process, you need to locate the winword.exe file on your system. You will find it in the following directory:
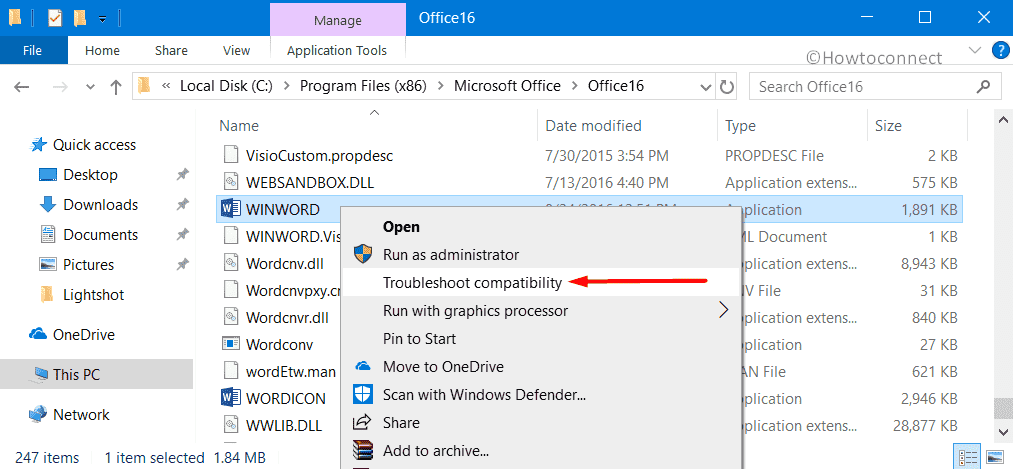
C:\Program Files (x86)\Microsoft Office\Office16
Step-4: Scroll down to WINWORD and perform a right-click on it. Click the option namely Troubleshoot compatibility from the context menu.
Step-5: The troubleshooter will guide you to complete the procedure. Windows will make an attempt to detect issues and set the compatibility mode accordingly. It may ask you to Start the program.
Step-6: Moving ahead, you may come across a UAC prompt to confirm the changes, click Yes.
Step-7: Once you save the changes, you will not get Winword.exe High CPU Usage in Windows 10.
Alternatively, you can follow the instructions here – How to Run Program Compatibility Troubleshooter on Windows 10 After Creators Update.
Perform a Full Scan
If the location of winword.exe is not correct, you should conduct a full PC scan to determine if it is the malware or virus that is consuming high CPU. The best way to do this is by using the built-in security tool Windows Security. It will check all the files and running programs on your hard disk. This can take more than an hour to complete but will be a great workaround.
- Click the shield icon on the system tray to launch Windows Security app.
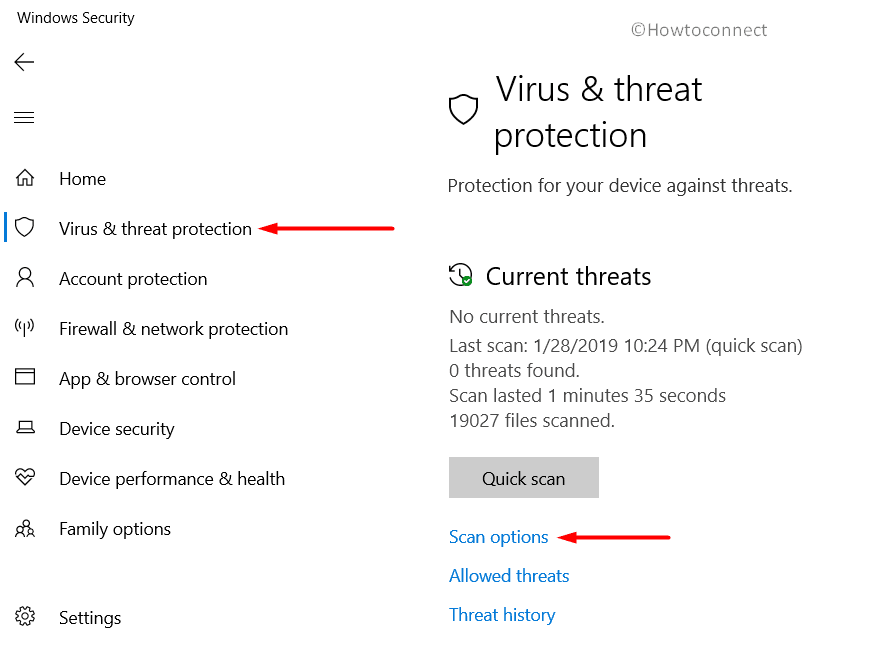
- Once it shows up, go to the Virus & threat protection area. Switch to the adjacent right side and click Scan options.
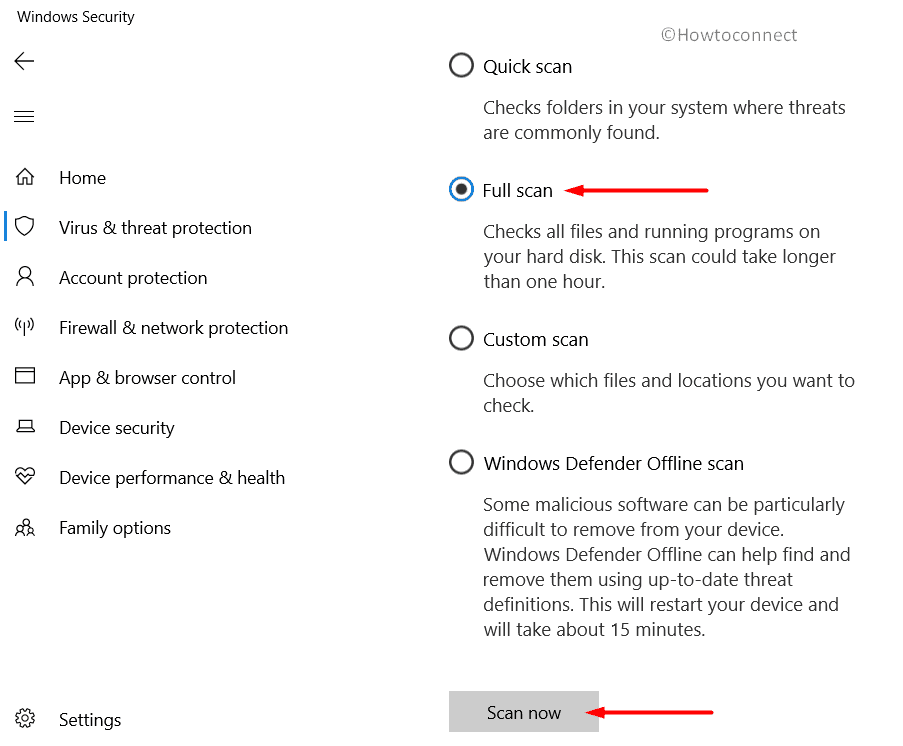
- On the next page, select Full scan radio button followed by a click on Scan now button. Wait for the scan to gets over, take the necessary action and then check for the occurrence of Winword.exe High CPU Usage in Windows 10.
See – How to Run Windows Defender Full Scan in Windows 10.
Uninstall third-party antivirus
Sometimes, a third-party antivirus on your system can also cause Winword.exe High CPU Usage in Windows 10. So, it is best to uninstall the software and check for the winword.exe process.
- Right-click the Start icon and from the Win+X menu choose Apps and Features. Once the Apps Settings page opens up, locate and select the third-party antivirus.
- Click Uninstall. Follow the removal instructions of the software and click Uninstall again.
Run System File Checker
Another possible solution that you can carry out is to run the System File Checker to trace out the corrupted and repair files.
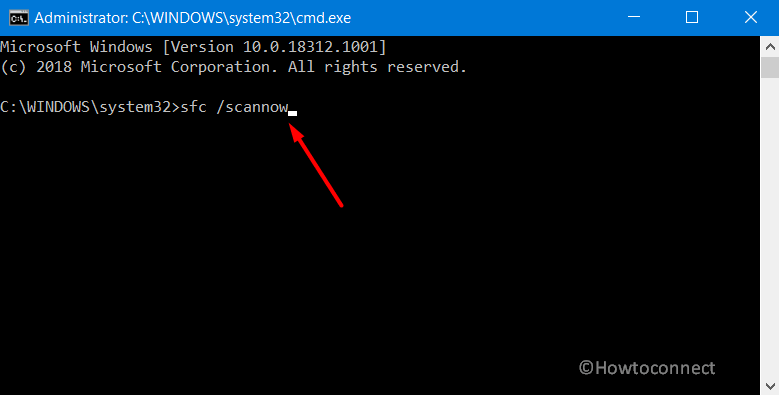
- Open Run dialog box by jointly pressing “Win + R” hotkeys altogether. Here, type in cmd and hit Ctrl + Shift + Enter to access elevated Command Prompt.
- Click Yes on the prompt of UAC.
- Now, type in or copy-paste the given command and hit Enter to trace out and repair the faulty or corrupted system files.
sfc /scannow
Install Windows Update
Microsoft constantly updates and improvises Windows system files that are related to winword.exe. So, installing the regular updates may fix the corrupted files of Word.
- Make a hit on “Win logo + I” hotkeys to open Windows Settings.
- Click Update & Security.
- On the right-pane of the following page, click Check for updates. Install the updates and see whether the high CPU consumption by the Winword.exe is fixed or not.
That’s all!!!

