Samsung has presented Android 4.1. 2 XXDMA6 Jelly Bean firmware update for Galaxy Note 2 N7100 series. The firmware is present for some countries. It is estimated to carry an improvement over performance and repair a little bug issue through this update. The XXDMA6 Jelly Bean firmware can be installed in any way – by Samsung KIES or OTA update message.
After installing latest Android 4.1.2 XXDMA6 Jelly Bean firmware on Galaxy Note 2 N7100 device, this guide will help you to how Samsung user will root their device?
Basics requirements before starting root Galaxy Note 2 N7100 on Android 4.1.2 XXDMA6 Jelly Bean:
- To start Root process, at first, install USB driver of Samsung Galaxy Note 2 on your computer. Click Samsung Galaxy Note 2 USB drivers to download
- Next launch USB Debugging Mode. To do it, tap on Menu and choose Settings. Next, tap on Applications and choose Development option. Here check the box of USB Debugging to enable it.
- Make sure to back up all the essential data of the Samsung Note 2 device.
- Samsung Note 2 device should be fully charged to avoid any damage.
- After rooting process, service warranty will not be covered by the Note 2 manufacturers.
- The below-given tips describe only about roots. Users are informed to install custom recovery such as CWM recovery individually in order to install custom ROMs.
How to root Galaxy Note 2 N7100 on Android 4.1.2 XXDMA6 Jelly Bean
First Step
- Download CF-Auto-Root zip file through below link in your computer. Extract the downloaded zip folder to search for .tar.md5 file.
- Next download the Odin 3.07 zip file from below link and extract it to search for Odin3 v3.07.exe.
Download Odin 3.07
- Switch off the Samsung Note 2 device then put it in Download mode. To do, push and hold the Volume Down, Home and Power buttons simultaneously. A warning message will prompt. Then press the Volume Up button again to enter Download Mode
Second Step
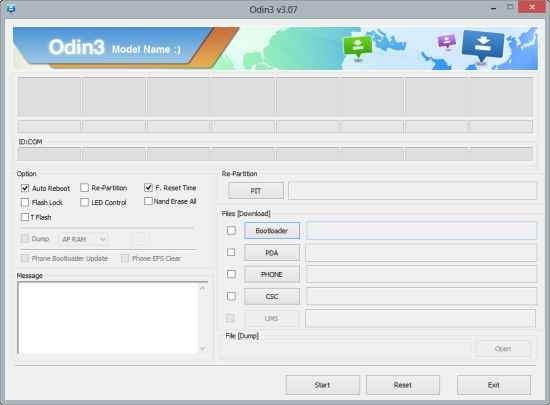
- Launch Odin3 v3.07.exe on your computer. Next connect the Samsung Note 2 and the computer with the USB cable.
- In Odin interface, click the PDA tab and choose CF-Auto-Root-to3g-to3gxx-gtn7100.tar.md5 file.
- Confirm that the check boxes of Auto Reboot and F.Reset Time are checked in Odin interface.
- Now click on the Start button in Odin interface to start installation method.

- Once the installation process is finished, the Samsung Note 2 restarts automatically. Then a message with green background will prompt on the left side at the top of Odin window.
- Now disconnect the USB connection from the computer.
Thus root process is finished successfully in Samsung Galaxy Note 2 N7100 running on Android 4.1.2 XXDMA6 Jelly Bean. To taste out the root method is running accurately, install Root Checker app from Google Play Store.
Note –
How to Connect will not be responsible for any harm to the device during the rooting process. Users are recommended to authenticate the model number of their Android device before going on. This tips work only with Samsung Galaxy Note 2 N7100 device.