Today we are here to discuss something very new related to OneDrive. What do you do when you have files or documents to get sync with? You simply drag and drop them in the OneDrive folder. Do you really think that it serves the purposefully? Of course not! Many times it had been found that this drag and drop method is not convenient for the beginners. So we will describe here the ways to include OneDrive in Send to Menu in Windows 11 or 10
Once you add, the item you need to place in the OneDrive folder will go there only after right-clicking and selecting OneDrive in the Send to extended menu. What do we usually do when we have to send a file to a USB? We simply perform a right click on it and choose Sent to and select the USB name from the context menu to transfer stuff to the device. If this process also applies to the OneDrive, it will be so easy to send files or documents to the OneDrive. Well, don’t worry then! We bring you the process by which you can add the OneDrive option to the context menu of Send to option. Let us walk through the simple steps and see how it is done!
Way to Include OneDrive in Send to Menu in Windows 10 and 11
The method to Include OneDrive in Send to Menu in Windows 11 or 10 is here –
Step-1: Bring the Run box on your screen by using the combination of Windows and R keys. Now, type the following command and hit the Enter key to proceed.
shell:sendto
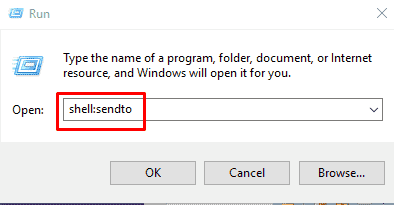
SendTo folder will open after applying the above command.
Otherwise, to get at the location you can also navigate using the following path in the address bar of your File Explorer:
%APPDATA%/Microsoft\Windows\SendTo
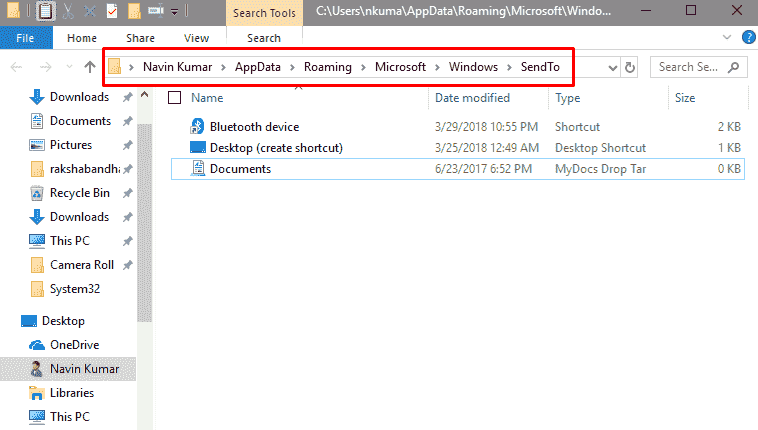
Now, this folder contains the shortcuts which are available in the context menu of the Send to menu.
Step-2: As you want to include OneDrive, right-click on a vacant space here and choose New followed by a Shortcut.
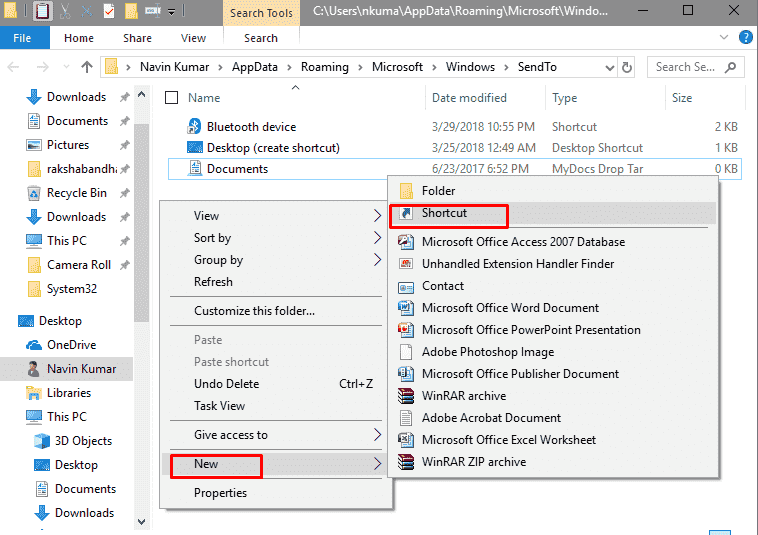
Step-3: Once the Create Shortcut window arrives, perform a click on the Browse button.
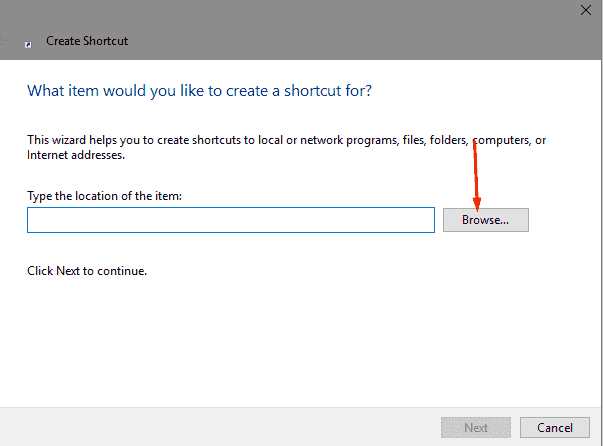
Step-4: A small box to Browse for Files and Folders box will prompt. Find and choose the OneDrive and then press Ok button.
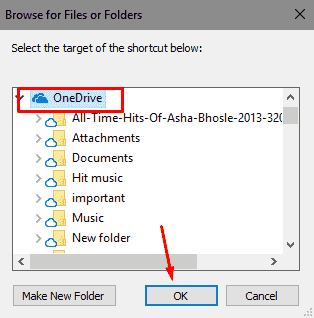
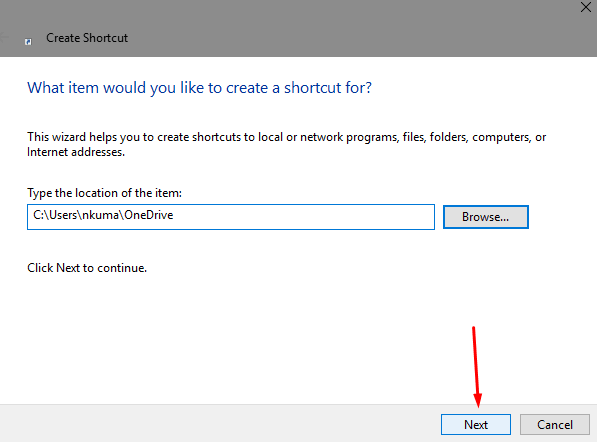
Step-5: Click on the Next button to see the next step.
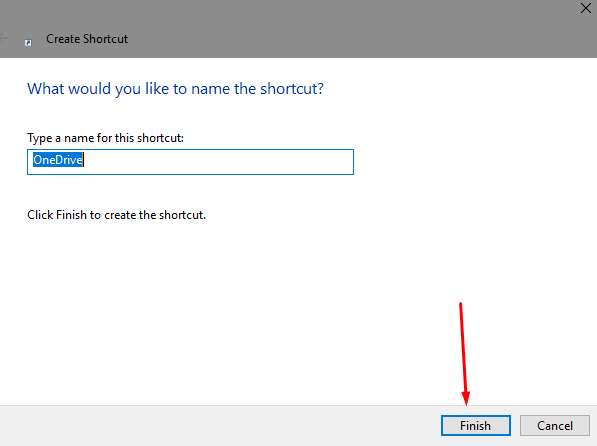
Step-6: Now, the name for the newly created shortcut needs to be provided. By default, it will come as OneDrive in the Type a name for this shortcut box but at the same time, you can change it as per your preference. When done, click Finish.
Step-7: It’s done! You can view a OneDrive icon in the SendTo location.
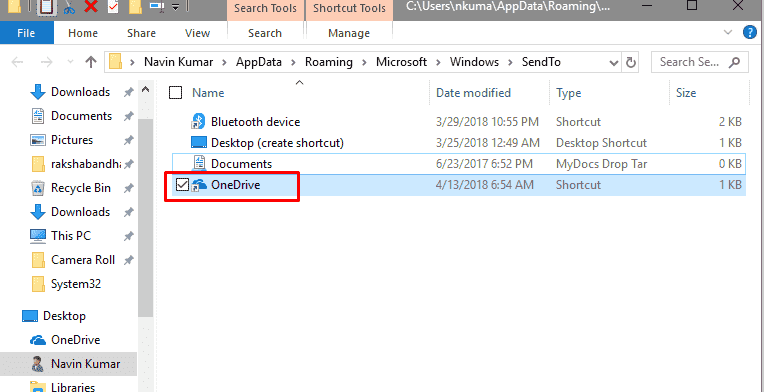
From now, at any time you can send your files and documents to the OneDrive folder. The process is too simple. Look for the files that you wish to send.
Step-8: Right-click on it, choose Send to and then make a click on the OneDrive from the arrived context menu.
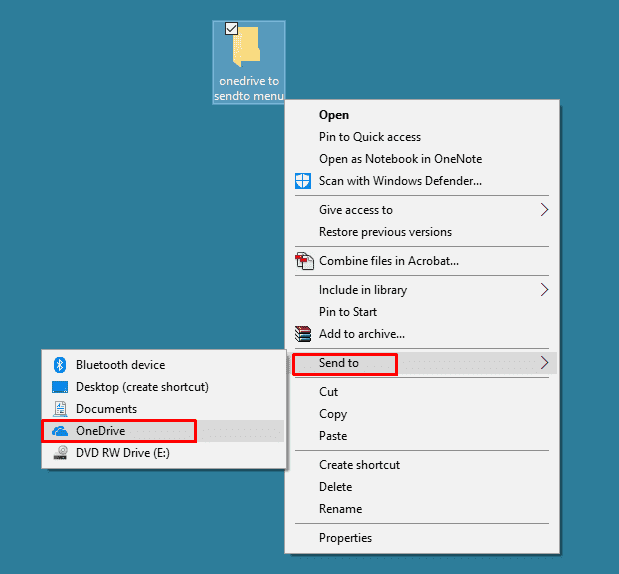
Step-9:The selected files or documents will be copied to the OneDrive folder in a moment. Open the folder and see them copied there.
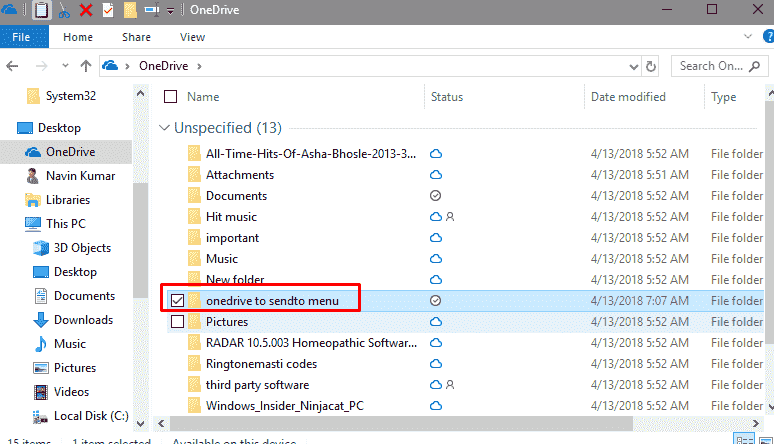
That’s it!!! It is so easy.
Finishing Touch
Without any fuss, you can copy your required files or documents in the OneDrive folder. Why don’t you try this and see how wonderful and simple it is to copy the required files. Share with us your sending experience to OneDrive folder using the send to menu.
