You can now easily Customize Font Settings in Windows 10 and further take your visual creativity to another level. Microsoft introduces a new way to manage typography on your system pretty simply. The Settings application includes a separate page for Fonts in the Personalization category. It lets you search, install, uninstall, adjust the size or view metadata of a font family. Moreover, it also gives you an opportunity to acquire additional fonts from the Microsoft Store. However, to experience this new option you should be running Windows 10 build 17083 or higher on your system. Read our similar tutorial on How to Change Font of Handwriting Experience in Windows 10.
How to Customize Font Settings in Windows 10
You may be well accustomed to the Control Panel where you could view all the installed ones and options to manage them. But there was a drawback that it was not able to show off newer typography capabilities. So, before you learn how to customize font settings in Windows 10, first, let’s look at the way to access it.
How to Open Font Settings in Windows 10
Step 1 – Use a combination of hotkeys Win + I and let the Settings program show up on the screen. As an alternative, launch Start Menu and access the same by clicking its gear icon.
Step 2 – Upon the appearance of various categories, reach out to Personalization and click it.
Step 3 – Select the Fonts section on the left column of the following page. Now, shift to its corresponding right side and from here you can Customize Font Settings in Windows 10 as per preference.
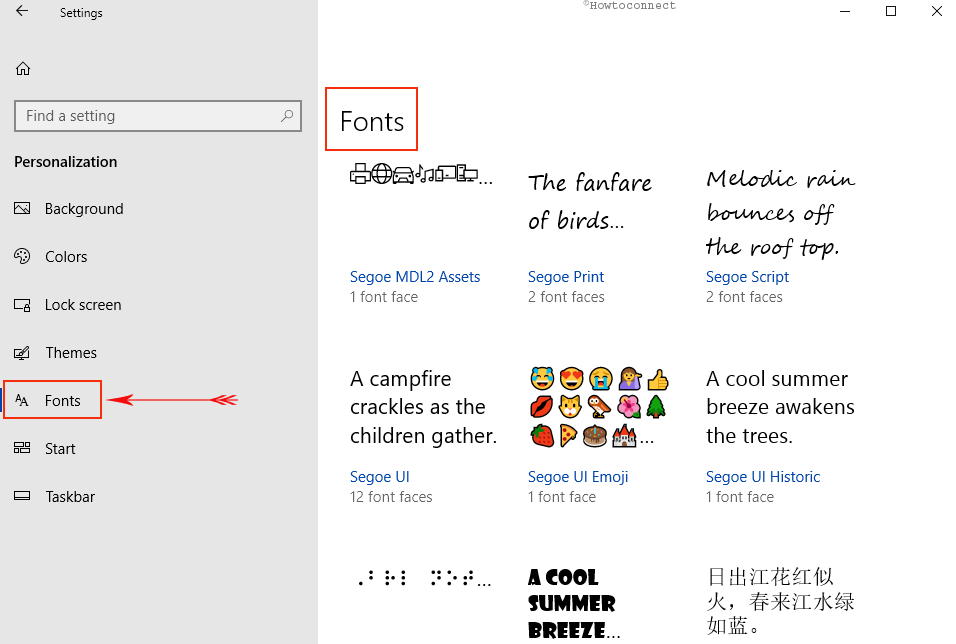
This is the initial page displays you a small preview of each type family which contains a variety of attentive strings. Matching with your own language settings, it shows typeface families. You can use the Filter option respectively to see the desired set of families.
Furthermore, if any type family gains an ability of multi-color built into it, then the short previews of them demonstrates that as well.
When you click on any preview, it takes you to the details page of that specific family. Once you reach out to the details page, you have plenty of options to Customize Font Settings in Windows 10.
The below section explains you each and every option in details along with supporting images.
How to Search a Font
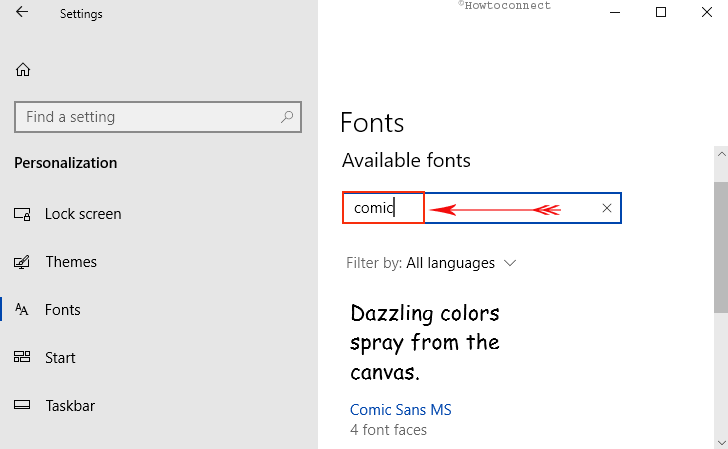
In contrast to the Control Panel, the interface of the Fonts page in the Settings program lets you search for an installed one pretty easily. All you need is just type the name of the font you are looking for in the search box and Windows will show you the result.
How to Get More Fonts From the Store
When you are on the Fonts Settings page, the first thing you notice is the option to Get more fonts in the Store. Once you click on it Microsoft Store comes into view.
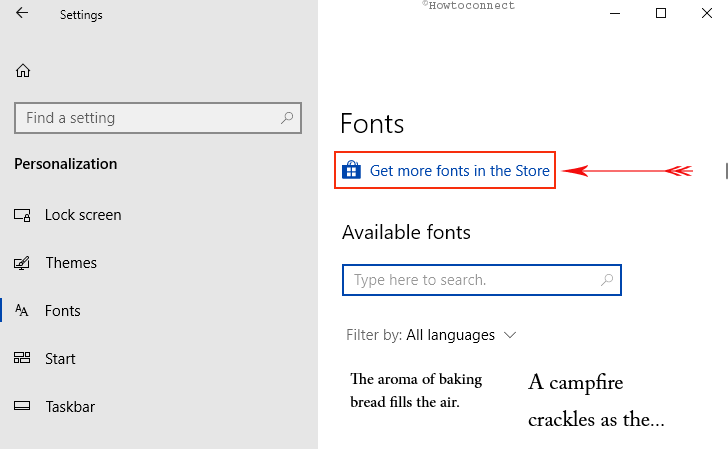
For the time being a small set of curated collection of fonts is available. But don’t worry as this will grow over time. So from the offerings select the one that you wish to install.
A noteworthy point is that you should be running build 17040 or higher in order to install the required packages from the Store.
How to Uninstall a Font
1. In the Fonts page, locate the one that you wish to eradicate from the system. Once you find it, perform a click on it.
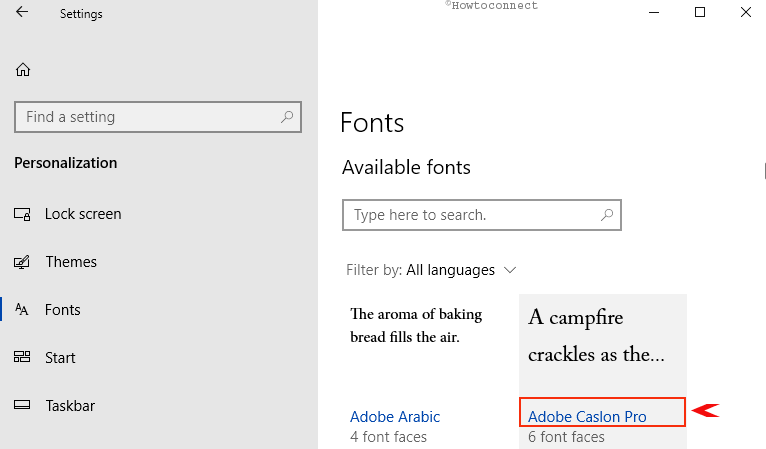
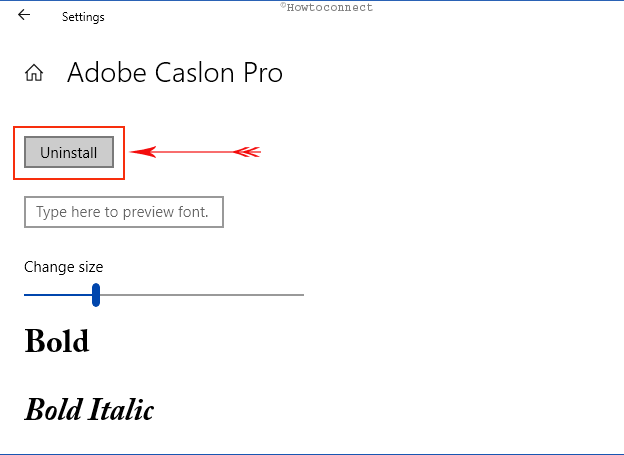
2. Here, you get to see an Uninstall button, click on it.
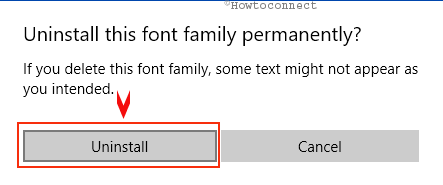
3. Again make a hit on Uninstall upon the prompt of a confirmation dialog box. The selected family will be permanently uninstalled from the system. However, you should remember that deleting it may affect certain text. Therefore, keep in mind that some text might not appear as you intended after removing it from Windows.
How to Change Size of a Font
a. Locate and click on the preview of typography whose size you prefer to modify. Moving ahead, on its details page you can notice an option Change size and the slider beneath it.
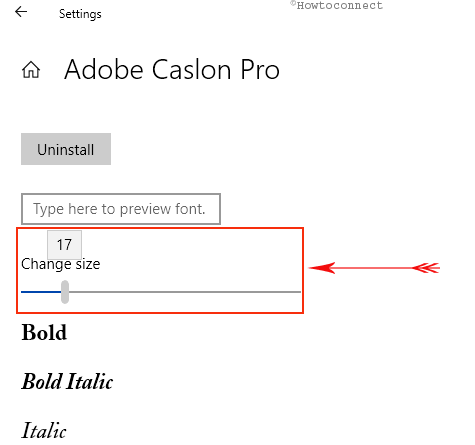
b. Drag the slider toward the right and it will increase the size of the font whereas moving it in the left direction eventually reduces it.
c. While you move the slider you can see the preview text just below the slider as shown in the screenshot below.
How to See Metadata of a Font in Windows 10
i. Metadata describes and gives information about font faces within a family. To see a Metadata of a font family, first, make a click on it on the initial page.
ii. On its details page, scroll down until you reach Metadata section.
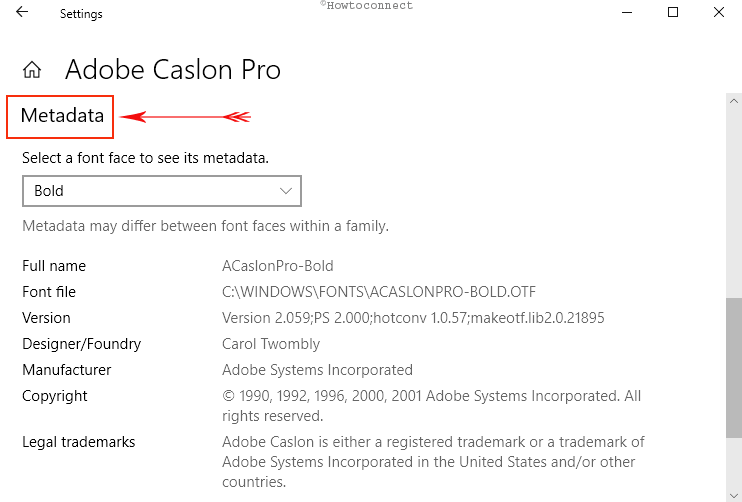
iii. Here, you need to select a typeface to view its description. Therefore, click on the drop-down and choose the face accordingly. Depending on what you choose you can see its details. You will get to know the full name, its location, version, designer, manufacturer and other details.
For advanced typographers and web developers, Microsoft also provided OpenType Variable fonts. It is the type in which the identification of several single fonts can be compactly packed within a single font file. In simple terms, it is a single font that acts like numerous fonts.
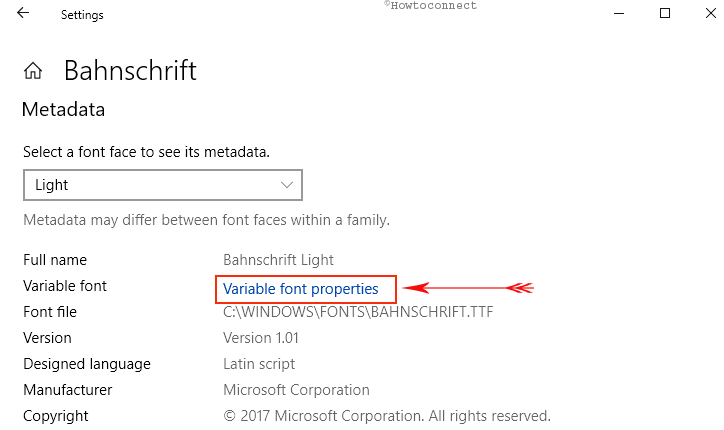
For instance, the Bahnschrift family is the OpenType Variable font. So, when you reach to its details page, its Metadata displays an option namely Variable font properties. Clicking on this option will take you to another window where you can explore more capabilities of such kind of font.
The below screenshot gives you a glimpse of Variable font properties page. Here it provides you various options to manage the family. You can view its various instances and its various properties. In the below discussion you will see all those settings that you can apply accordingly.
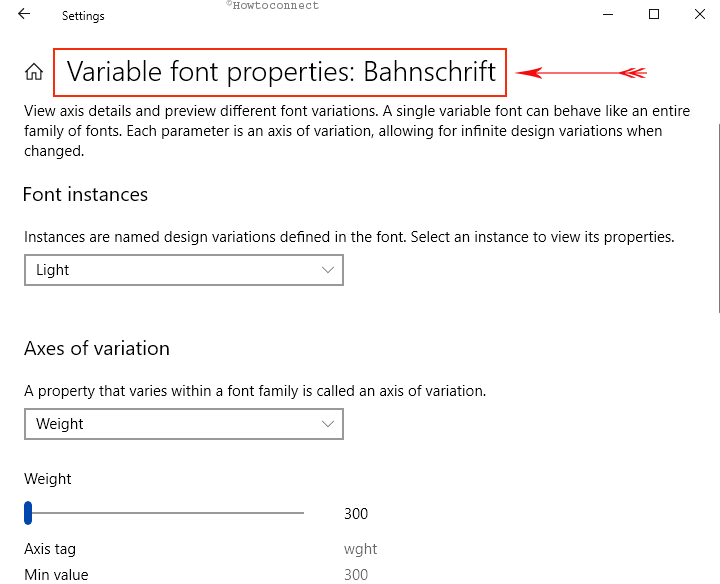
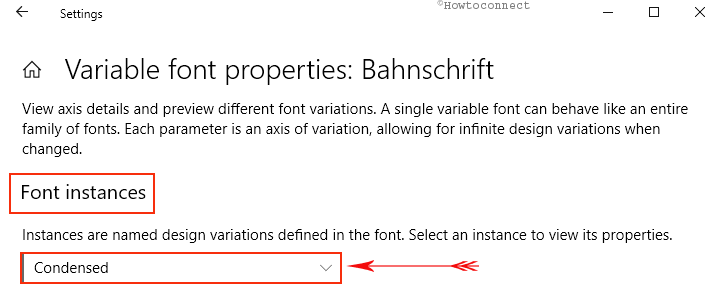
Font instances
The design variations defined in the font are explained as instances. So, click the drop-down underneath Font instances and choose the instance whose properties you wish to see further. For example, select the Condensed instance and you can notice that rest of the settings on the page are changed.
Axes of variation
A property that varies within a font family is called an axis of variation. Click the drop-down and select any of the property amongst the options. For example, if you select width, then all the properties related to the width of a font comes into view.
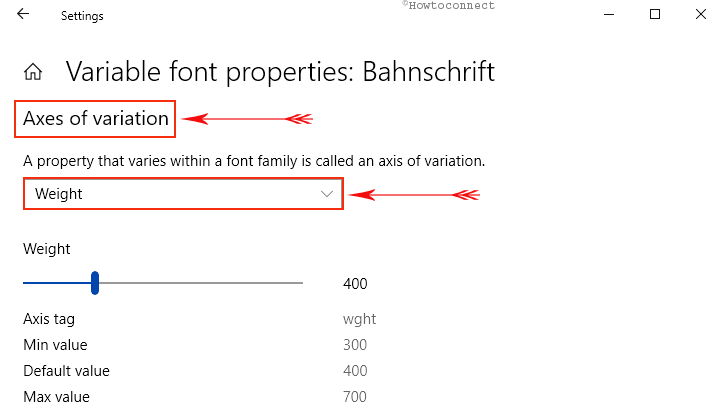
Now, using the slider you can adjust the width as per preference. It shows you some other details such as default value, minimum value, and maximum value. However, these options changes when you choose another axis of variation.
Preview Text
Type anything in the textbox that appears below Preview text. The moment you start typing you can notice its preview on the page. Moreover, you can also adjust the weight or width of the font and preview it right there.
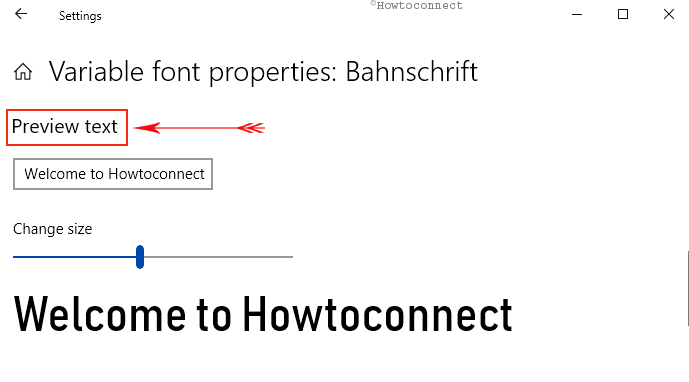
Change size
This is similar to the one that we discussed above. Use the slider and Customize Font Settings in Windows 10 as you prefer.
Related settings
Go to the initial page of Fonts and on the extreme right the Related settings display two options – Adjust ClearType text and Download fonts for all languages.
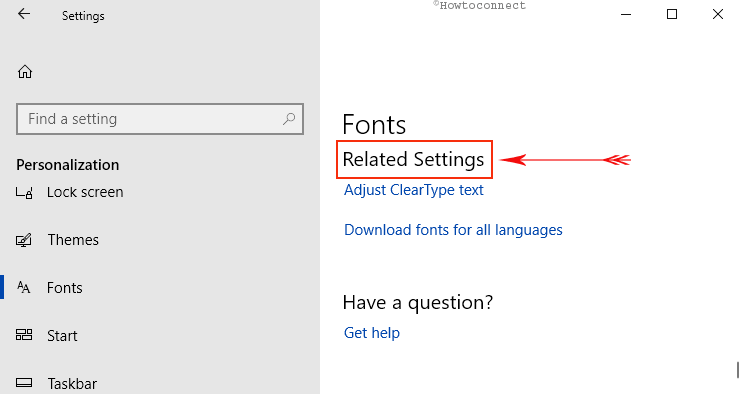
Adjust ClearType text
Windows provide you this option to make text easier, moreover simpler to read on your screen. This setting becomes very useful when the text on the screen start looking fuzzy. However, by enabling this option on your device you can make the text readable as well as sharper. Microsoft developed this technology in order to enhance the readability and visuality of text on LCD screens such as tablet desktop monitor laptop and so on.
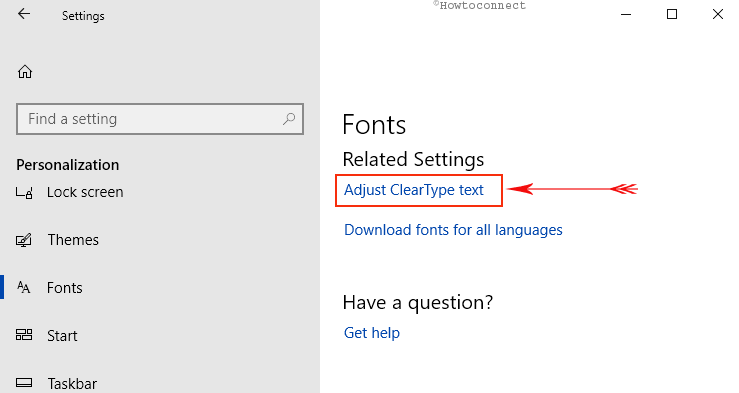
This piece of setting was previously available in the Display section of Control Panel. But with every update, slowly all the Control Panel items are being shifted to the Settings application. So, let us learn more about the usage of Adjust ClearType text which helps you to Customize Font Settings in Windows 10.
I. Hit on the “Adjust ClearType text” option as depicted in the given snapshot.
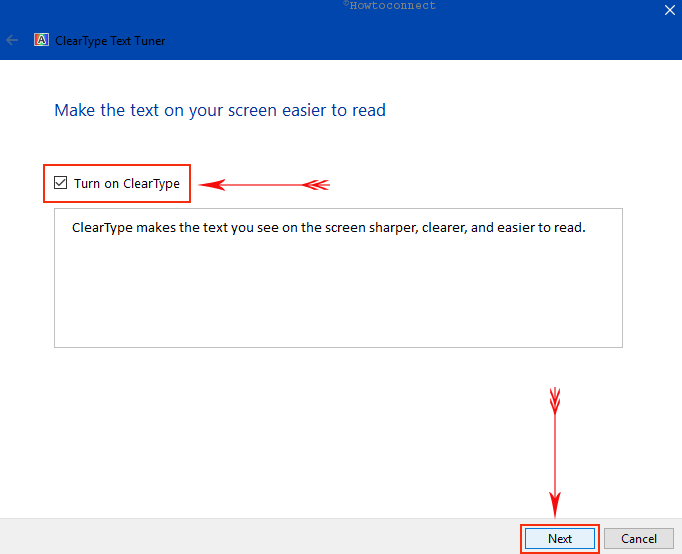
II. A separate window of “ClearType Text Tuner” comes up on the screen. Here, ensure to check mark the option namely Turn on ClearType henceforth click Next.
III. Now, the screen shows you few text samples for you to choose the best. Click on the Next button and select the one that fits best for your screen.
IV. Lastly, click Finish button once you are done with the tuning.
Get more details about this feature from here – Windows 10 – How to Turn on ClearType Use Tuner.
Download fonts for all languages
You can move ahead with this option if you want to download fonts for all languages supported by Windows. However, you should keep in mind that doing so will eventually occupy a huge amount of space on your hard drive. Therefore, if you really want to have all the fonts, you can grab them from here. But be a little patient as it will consume some good amount of time in downloading them.
Grab some Best Font Managers for Windows 10.
Conclusion
Hopefully, you will find new experiences in the Store as well as Settings application as it will increase your creativity. Users are welcoming the above-mentioned options and eager to explore more font offerings from the Store. So, go through each and every setting and Customize Font Settings in Windows 10 as per preference. If you have some items on this topic, do write them to us and help others to manage typography.

update to Insider build 17083.
Please HELP, There is NO fonts icon in my personalization folder. What should I do. ???