Windows 10 delivers a new setting option to Manage App Execution Aliases. This setting is effective on after the release of the build 17063. In app development, Microsoft usually suggests a developer using the short name of his application called Alias. Developers execute some commands in order to run their them. Microsoft suggests, this very app can be executed with windows.appExecutionAlias command to integrate it with Windows 10. Every alias must possess .exe extension. Let’s proceed to the method shortly.
How to Manage App Execution Aliases in Windows 10
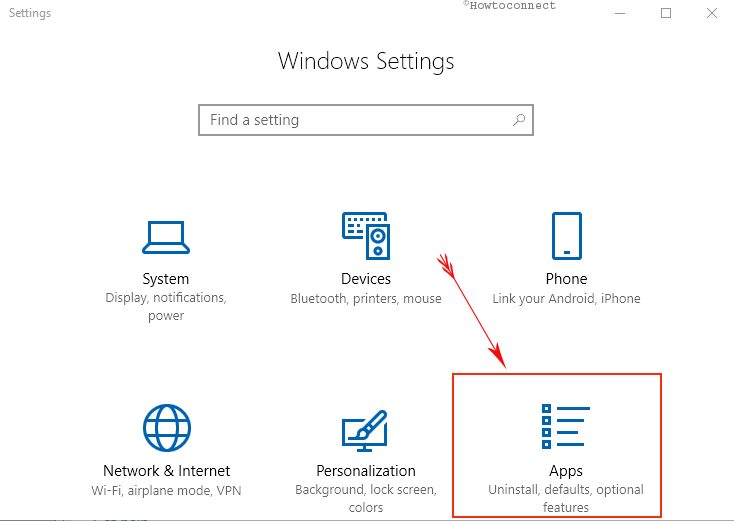
Step-1: Summon the Windows 10 default Settings on your PC screen using the Windows + I shortcut keys. Click on the Apps. It will open the additional options for applications on a new page.

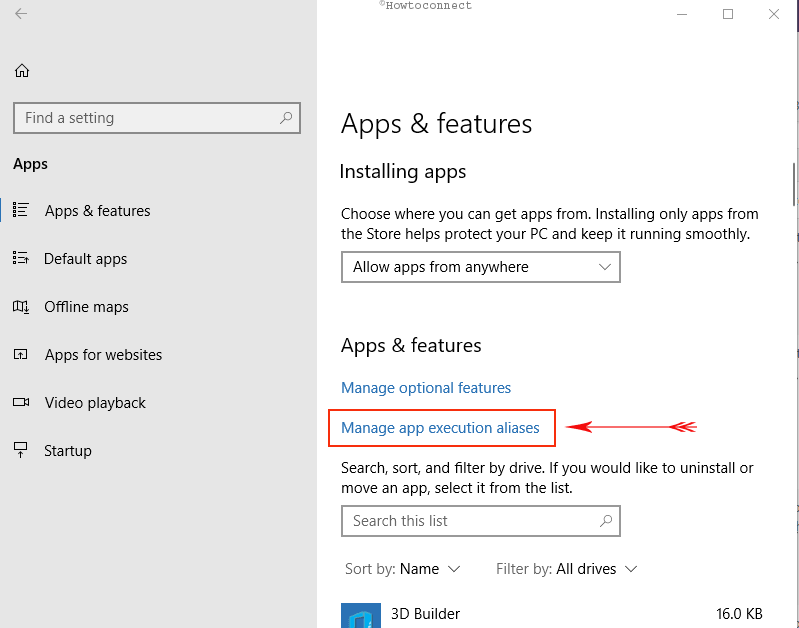
Step-3: On the following window quickly move to the right pane and click on the Manage app execution aliases link in the Apps & features section.

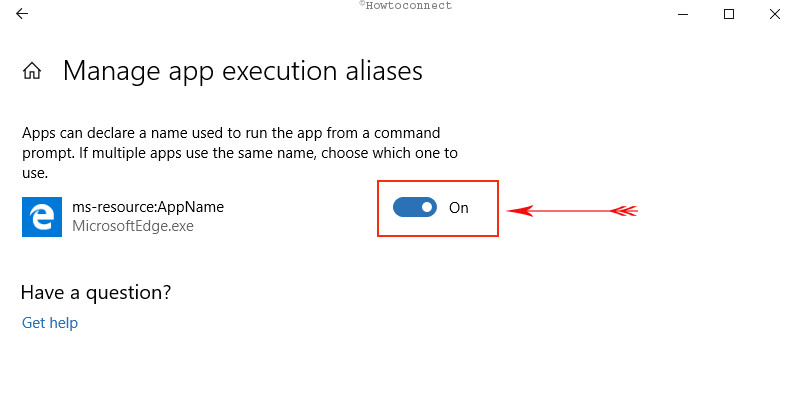
Step-4: A new page will appear on the screen with title Manage app execution aliases. You will see Microsoft Edge here with the toggling option on the right side. To Enable App Execution Aliases in Windows 10 Toggle it On and to disable pull the slider to Off.

It is just a start and a lot is yet to come as you will see this list full of applications in future. This will let you which app you want to use your system. This is how you can manage app Execution Aliases in Windows 10.
Conclusion
Managing app execution aliases is quite necessary for the third party apps especially. Once turned on, 3rd party applications can use your system resources to run codes on your computers. Alternatively, if you are a developer, you need to turn this setting on. We have discussed the process in order to Manage App Execution Aliases in Windows 10. Read and apply these guidelines as Microsoft is providing this option for the sake of keeping you out of trouble.
