Sometimes when you get a pop up stating Folder access denied you need to Take Permission from Trustedinstaller in Windows 11 or 10 including the previous versions. Trustedinstaller is a service that turns on modification, “installation”, and removal of Windows updates moreover optional components. This Service uses Trustedinstaller account that owns your System files.
When you delete an item which has a connection to System or update files you might find the Folder access denied error. But you can remove the same easily once you Take Permission from Trustedinstaller in Windows 11 and 10. See the process ahead –
Take Permission from Trustedinstaller in Windows 11 and 10
The following steps can be followed in the case of taking permission from Trustedinstaller in Windows 11 or 10:
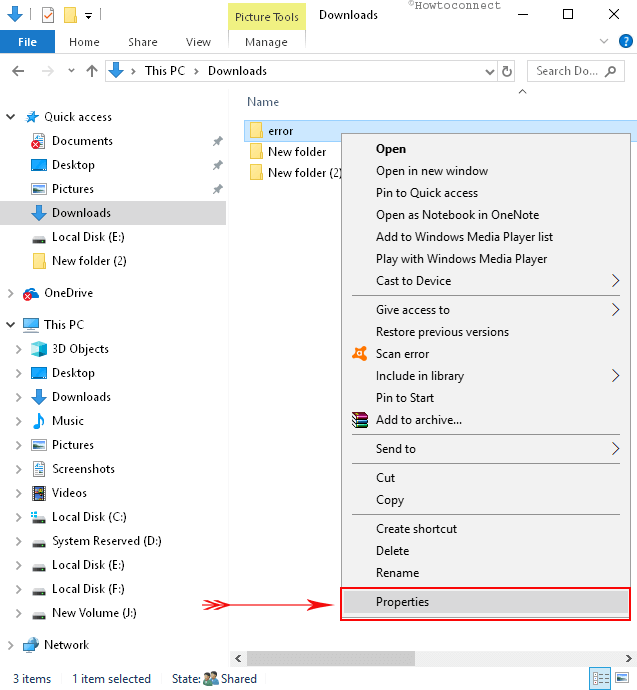
Step-1: Right-click on a file or folder. A menu will get popped up with various options, select Properties.
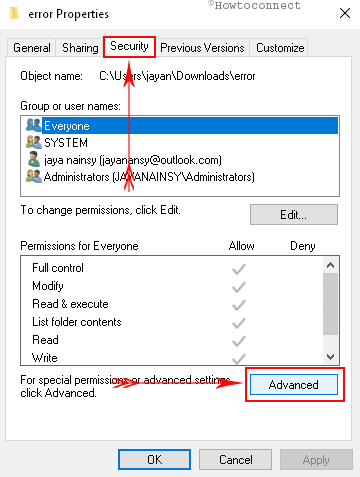
Step-2: The Header would have Several tabs, Chose Security. Click on Advanced option placed at the bottom part of the wizard to have access to Advanced Security Settings for the file or folder.
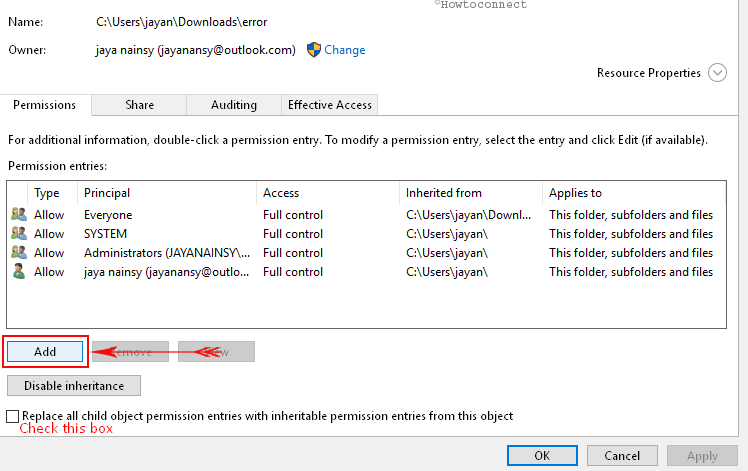
Step-3: on Advanced Security Settings for the file or folder window, click “Add” button staying on the Permissions tab. Remember to tick the square box “Replace all child object permission entries with inheritable permission entries from this object” prior to clicking.
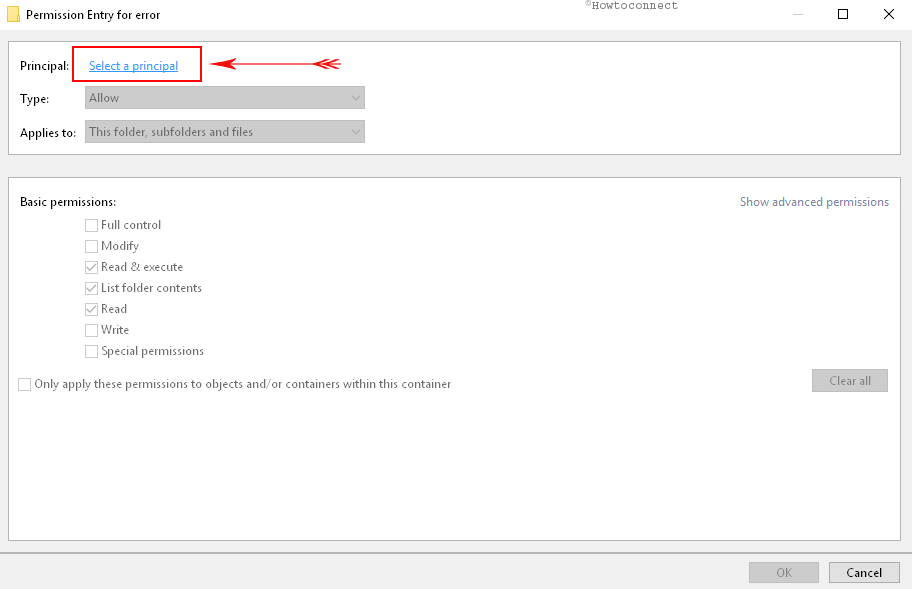
Step-4: On the Permissions Entry window that arises, click on “Select a principal”.
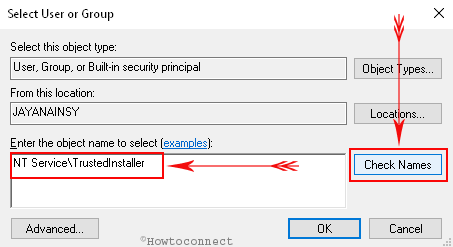
Step-5: Select User or Group small window appears. Enter the object name – NT Service\TrustedInstaller and click on Check.
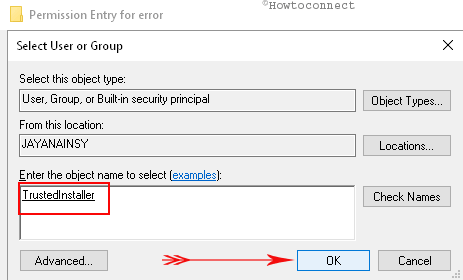
Step-6: You see the user gets converted into TrustedInstaller. Select OK to Take Permission from Trustedinstaller in Windows 11 or 10.
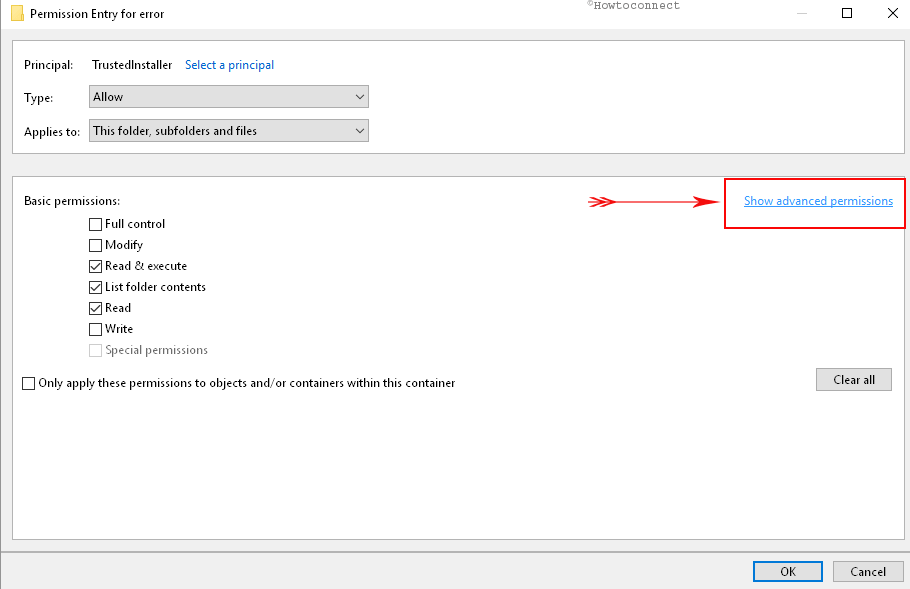
Step-7: Jump back to the Permissions Entry window. Click on the Show advanced permissions link on the right side.
Step-8: Check the boxes for – Take Ownership, Change Permissions, and Full Control.
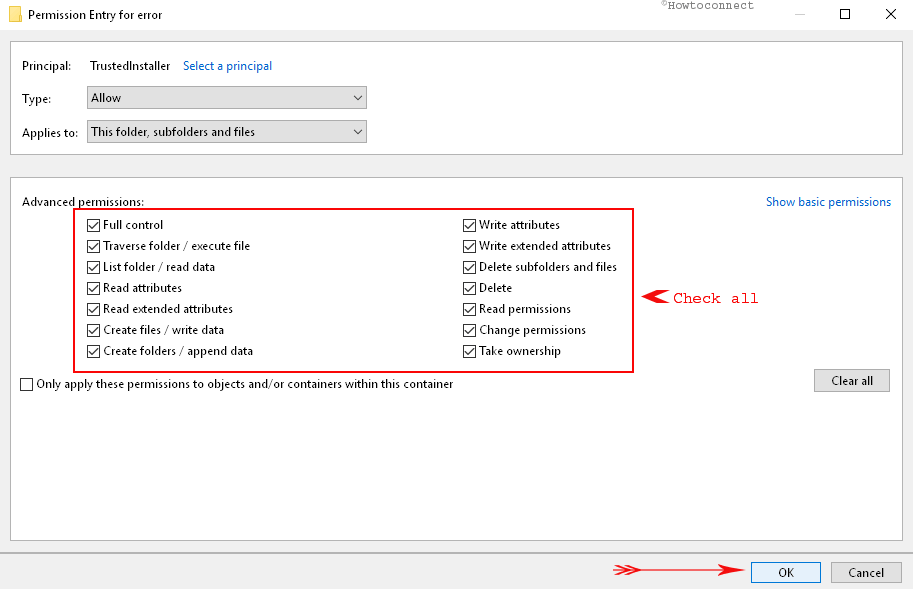
On the final window of Advanced Security Settings, click on Apply and OK.
When you want to gain Permission from users other than Trustedinstaller in Windows 11 or 10 you can do it easily. Whether it is Group or User, selection of principal for the object is the only task you need to do. Enter the object name to select from the following table –
| Object – Built-in security principal | Examples |
| For users | Administrator |
| For users | Guest (For users) |
| For Group | Administrators |
| For Group | Guests |
| For Group | Users |
| For Group | Power Users |
| For Group | Everyone |
| For Group | Authenticated Users |
How much easy it’s!