It might sound a little complex, but Win32PrioritySeparation would serve you the best if your PC runs slow. When you experience the computer running sluggish, you definitely take a look at the background processes. There are certain processes that are used once or twice per session but they continue to suck high CPU while the system continues to run. So, once you Tweak Win32PrioritySeparation, it will Improve Windows 10 Performance.
For the general users, it will be a little above head to understand the matter as it requires the idea of Bit masks, bit pairs as well as binary value. To make little simple, let’s consider the CPU of computer. When it runs, it does work on some of the systems at different time period on the basis of priority. Some of them have own priorities hence forces the CPU to gain added attention to them. This eventually causes the other applications to slow down. In that case, you can play a trick that might do the charm by restricting them unless they really need the CPU resources.
How to Tweak Win32PrioritySeparation in Windows 11 and 10
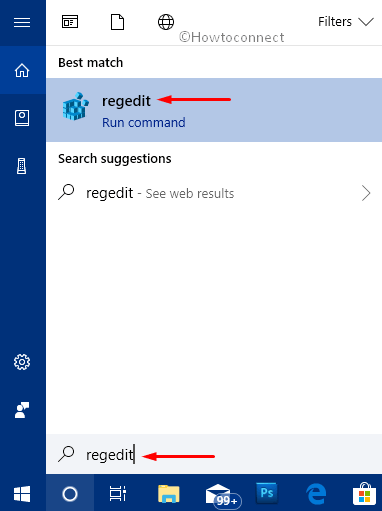
Step-1: Move the mouse pointer and click on the Start icon on the extreme left of the taskbar.
Step-2: Type Regedit and press Enter key when the result displays the same command. Once the UAC warning prompts for permission, click on the “Yes” button to access Registry Editor on the PC screen.
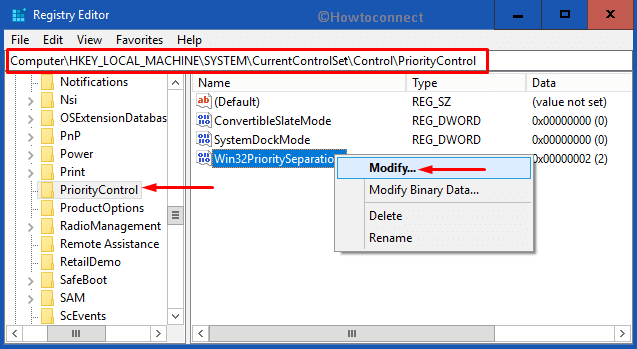
Step-3: When the new window comes into view, navigate to the following path from the left pane.
HKEY_LOCAL_MACHINE\SYSTEM\CurrentControlSet\Control\PriorityControl
Step-4: Upon reaching the PriorityControl key, move ahead to the adjacent right side. Do a right-click on the DWORD namely Win32PrioritySeparation. Choose Modify option to edit the DWORD.
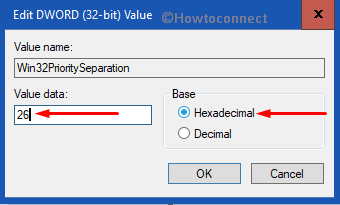
Step-5: On the edit box, if Hexadecimal is selected under the Base section on the right side, set the value to 26 in the text field below Value data (see screenshot).
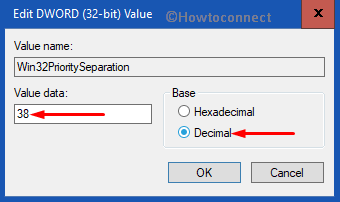
Note- Set the value to 38 if you select the Base as Decimal.
Step-6: Now, hit the OK button to save the DWORD and leave the Registry Editor window.
Step-7: Finally, restart Windows 10 PC to put these changes into effect.
That’s all about the way to Tweak Win32PrioritySeparation in Windows 11 or 10. Hopefully, this small but necessary modification will make Windows 10 PC fast and you can work comfortably.