You may feel the need to Work with Library in Windows 10 as a part of file management. By making the proper use of Library, you can organize the shortcut files from the local computer in addition to the Network drives. Hence you are just a single click away from finding it in File Explorer.
However, the management isn’t always an easier task to do and you might be looking for little favor. It will include tasks like enabling the Library view, modifying its properties, addition or removal of new files, file type optimization and so on. Let’s discover them in details.
How to Work with Library in Windows 10
How to Include Library in Windows 10
The Library is kept hidden in Windows 10 as a built-in feature but, the below-given steps will help you to unhide this amazing specialty.
Step #1: Press or hit Win+E hotkeys in one go to open File Explorer.
Step #2: Click the View tab and make a hit on the Navigation pane. You can find it at the extreme left of the ribbon.
Step #3: Select Show libraries option from the list to unhide Library in File Explorer.
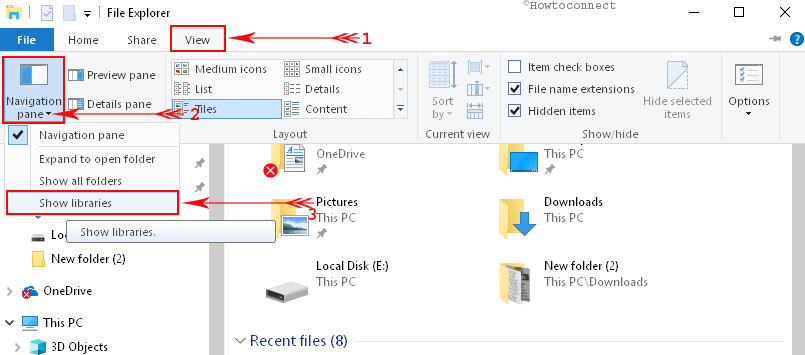
Step #4: Finally, explore Libraries from navigation pane to make the best use of it.
After showing in File Explorer Navigation Pane, you need to carry out few more Work with Library in Windows 10 to make it well organized.
How to Create a New Folder in Library
Shortcut files or folders both from the Local computer and network drive can be included in the Library for ease of navigation.
1. To launch File Explorer, make a click on its icon that resides on the taskbar.
2. Select Libraries from navigation to see its contents.
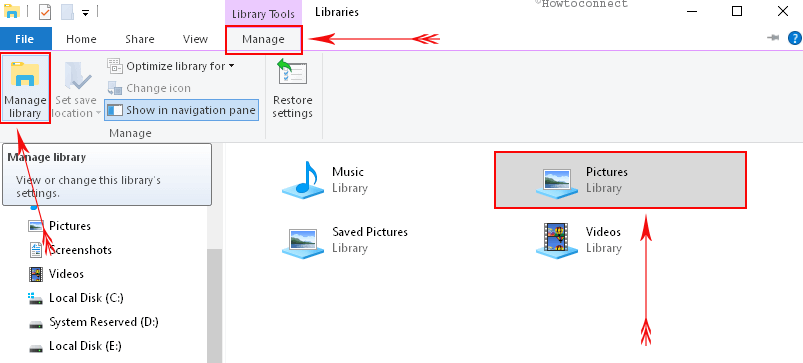
3. Jump over to the right side and choose the Library you would like to change.
4. Click Manage tab at the top and select “Manage library” option from the left corner of the ribbon.
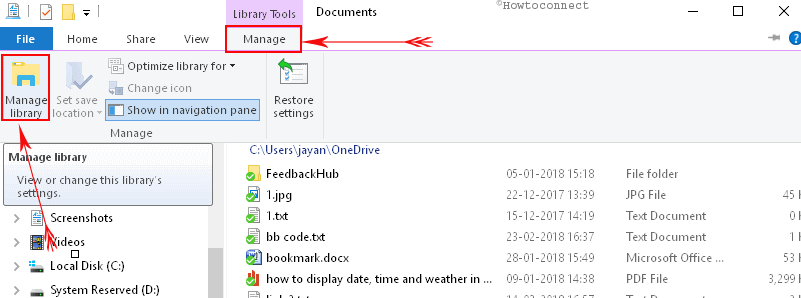
5. Once the popup opens with Library Locations, perform a click on Add button (see screenshot).
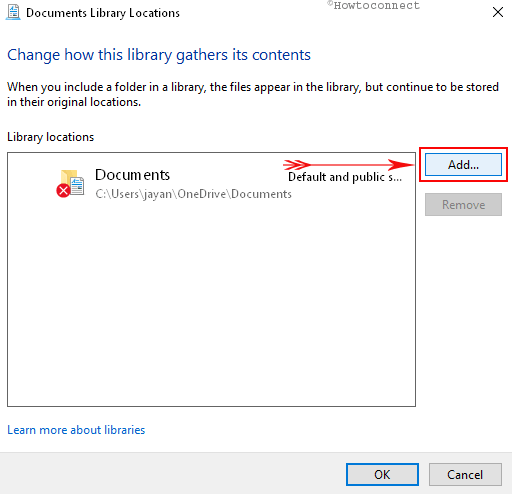
6. Now, browse the folder you want and click the Include folder button from the bottom.
7. Finally, Hit the Ok button from the bottom of the popup to add the folder successfully.
How to Change the File Type of a Library in Windows 10
Users have the right to change a file type that a specific Library is optimized for.
a) Access File Explorer by using any method as multiple are available. You can perform a click on the Cortana search box and type File Explorer and hit Enter.
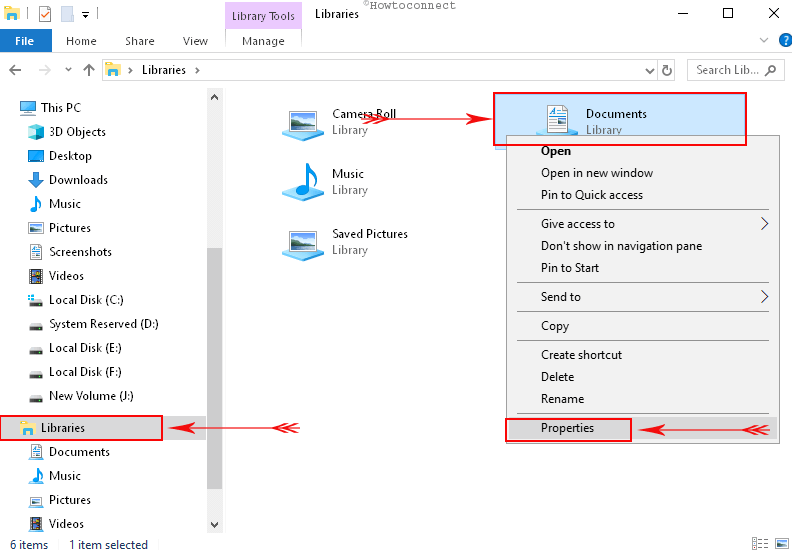
b) Select Libraries from the left Navigation pane and roll over to the right side.
c) Make a right-click on any Library and pick Properties option from the list.
e) On the Properties dialog, reach out to the down menu under Optimize this library for and choose the type of file.
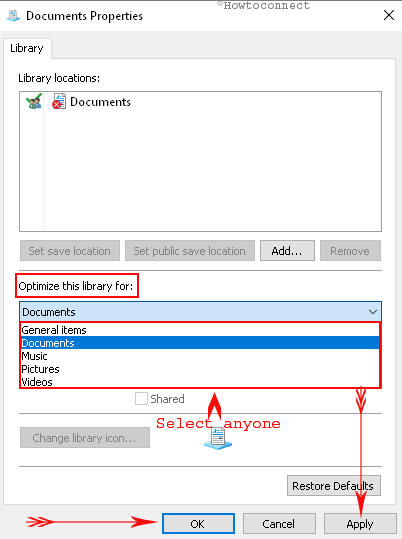
f) Hit the Apply and OK buttons in order to save the changes in the Library.
How to Modify the Default Save Location for a Library in Windows 10
When you save, copy, or move a file to a Library, its default “Save location” directs the storage place. You can change the location on your own too and Work with Library in Windows 10.
i. Open File Explorer following above method as well as select Libraries from the navigation pane on the left.
ii. Shift to the corresponding right side and put a right click on the one whose default save location needs modification. Select Properties from the options to open a popup.
iv. Make a click on the Add button under Library locations and pick up a location that you want to set as default.
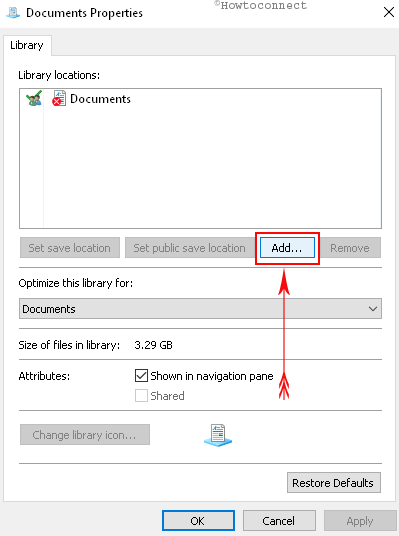
v. Select the location from the list and hit the button “Set save location” as shown in the given image.

vi. Click Apply option first and then Ok for storing and implementing these changes.
How to Remove an Existing folder from Library in Windows 10
a. Press Windows and E keys combinedly to launch File Explorer and perform a click on Libraries on the left pane.
b. Move ahead to the right side and select the one from where you opt to remove a folder.
c. Click the Manage tab from the top and perform a click on “Manage library” option from the top left corner of the ribbon.
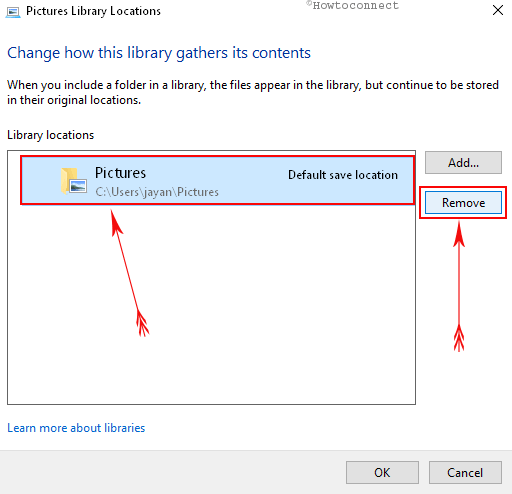
d. From the popup that appears for Library Locations, select the folder and hit the Remove button on the right side.
e. Select Apply and OK to save the changes.
How to Include a Network Folder which is not Indexed to any Library in Windows 10
If you are curious to know how to work with Library in Windows 10 the Network folder is an important part for you. People, after prolong using, might need a network folder shared from other users and not actually indexed into library. However, it’s rather quite simple so let’s look at the way to do:
a) First of all, launch File Explorer following any of the methods we advised above and select This PC from the left navigation pane.
b) Take the cursor to the adjacent right side and open a disc drive.
c) Create a new folder here and give a name to it according to your choice.
d) Open the folder and “create another folder” here. Provide a name for this to distinguish easily.
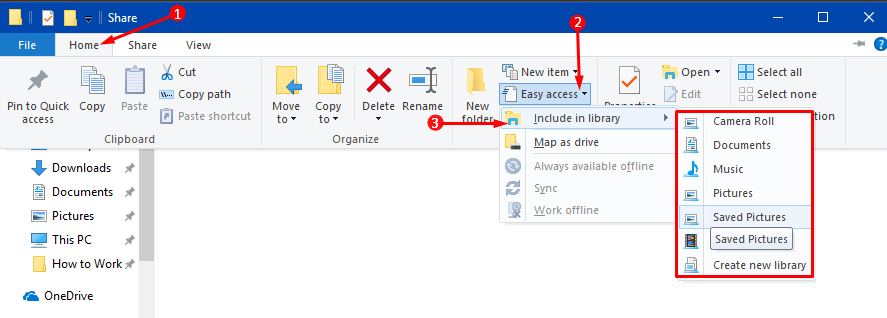
e) Select the subfolder you have just created and make a click on the Home tab from the toolbar.
f) Click on the option Easy access and hover the mouse cursor over Include in library from the list. Select a Library where you want to add this folder.
g) Now delete the folder at this stage.
h) Perform a click on the Cortana Search box and type “CMD” in it.
i) When Command Prompt is visible in the search result, make a right click on it and select “Run as administrator”. Click Yes when you come across UAC prompt on the screen.
j) Type the following command at blinking cursor and press Enter key.
mklink /d X\\Y
Note- Replace “X” with the navigation path of the folder you have deleted and “Y” with the path of that network folder. If both of the folders have spaces with their names, you have to encase them inside of the quotes. For example – the entire command will look like this –
mklink /d “c:\shared files\document” “\\server\shared video”
The End
That’s all about the things you need to Work with Library in Windows 10. These items will be thoroughly helpful for you once you start managing Library to make the best use of it.