Multiple Procedures to Import EFS File Encryption Certificate with Key in Windows 10 with steps. – The Encrypting File System (EFS) is the built-in tool in Windows 10 to encrypt files and folders on NTFS drives. It helps in protecting these important files and folders from unwanted access. Encrypting File System helps in the encryption of files using a few algorithms.
A backup of Encrypted certificate and the key to a PFX file provides you uninterrupted accessibility to the encrypted files and folders even after original certificate and keys are missing. When you lose encrypted files and folders, then you cannot enter into them until you restore the file encryption certificate and keys (EFS). Encryption is the best security that Windows provides to help you keep the data secure. This guide will help you Import EFS File Encryption Certificate with Key on Windows 10. But before you begin it is noteworthy mentioning that when you back up the File Encryption Certificate and Key as a PFX file, you need to enter a password to protect the private key. It is extremely important to keep this password safe. You can write it down in a secure place to restore backed up file encryption certificate and key.
Ways to Import EFS File Encryption Certificate with Key on Windows 10
Option 1 – Importing PFX file for Restoring EFS File Encryption Certificate and Key from PFX file
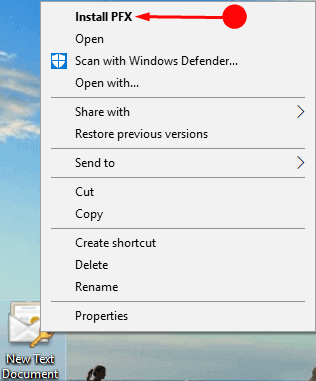
Step 1 – Ether Double-click or right-click on the PFX File and select Install PFX.
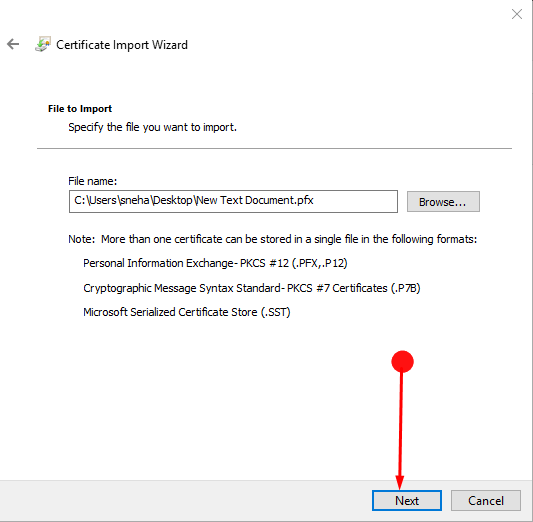
Step 2 – In the next dialog box that appears click on the Next button. This shows the File name going to be imported and its path.
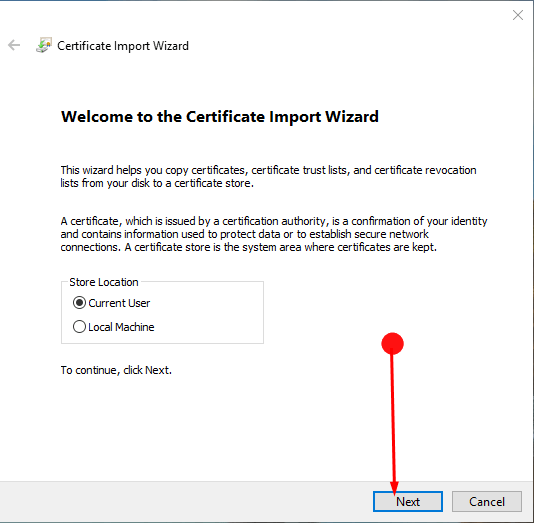
Step 3 – Similarly, click on the Next button in the other dialog box too. This dialog box will be named as Certificate Import Wizard.
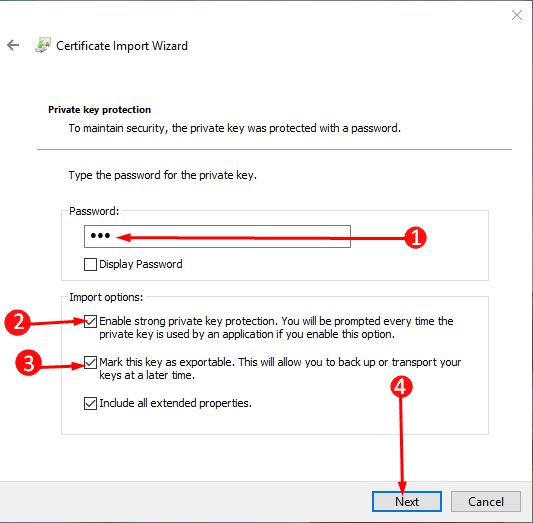
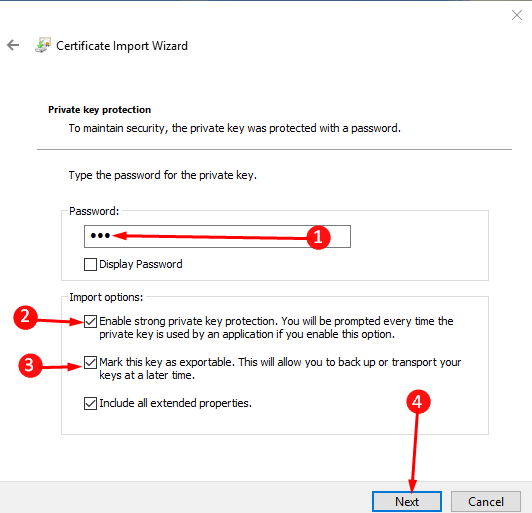
Step 4 – In the appearing box enter the password for the private key in the PFX file. Now select the box Mark this key as exportable, and Include all extended properties below. Finally, Write a password and click on the Next button at the bottom of the screen.
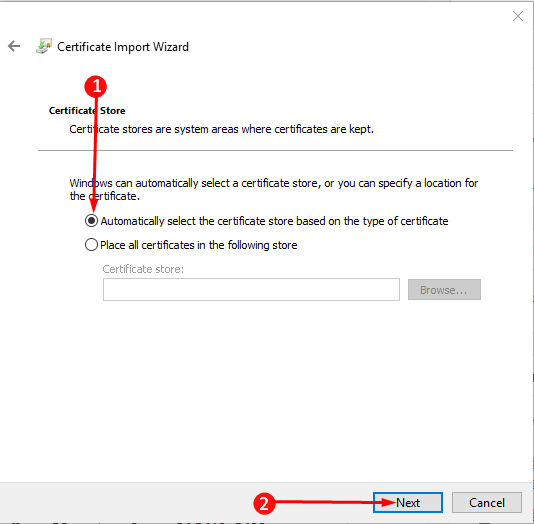
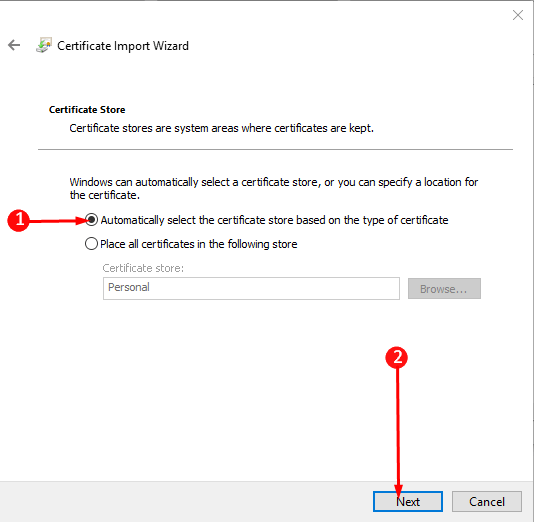
Step 5 – Here click on the radio button before the option Automatically select the certificate store based on the type of certificate. Now click/tap on the Next button to confirm your choice.
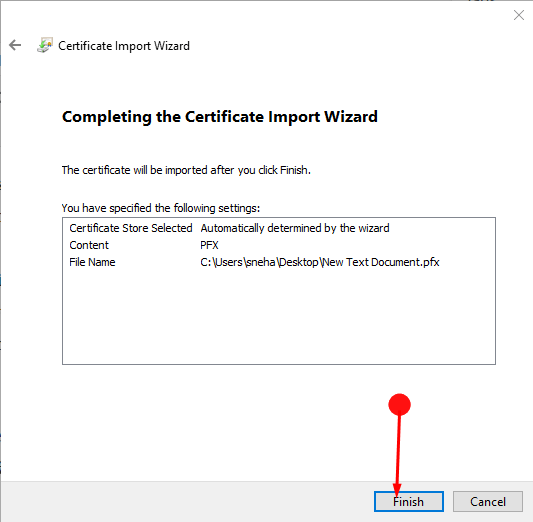
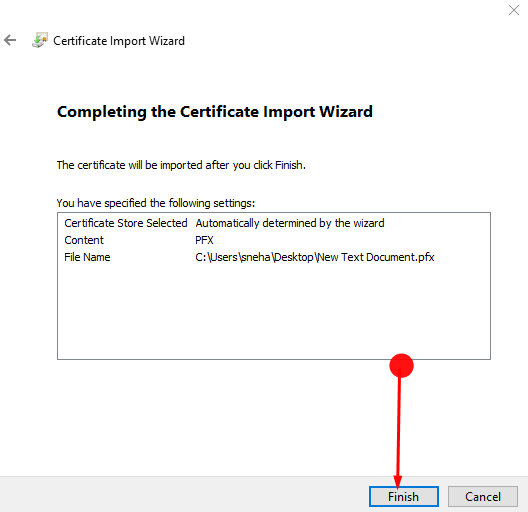
Step 6 – In the next dialog box click on the Finish option in order to end the process of importing. A next box will appear informing you about the completion of the process. Consequently, in the next box click on the OK option.
Option 2 – Importing PFX file for Restoring EFS File Encryption Certificate and Key from Certificates Manager
Step 1 – Use the key combination of Win + R and in the box that appears type or copy and paste the following command. Do not forget to click the OK button for executing the command.
certmgr.msc
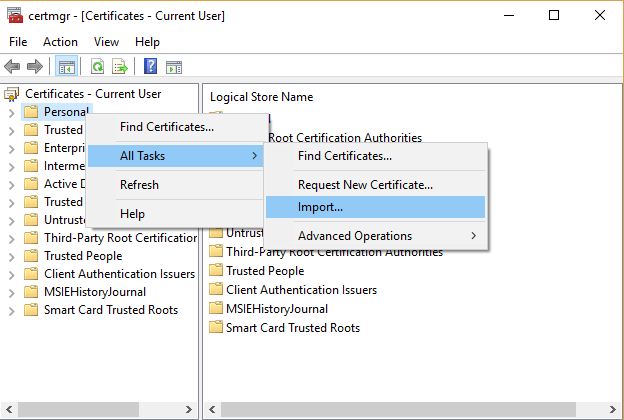
Step 2 – In the left pane of certmgr, right click on the Personal store and then click/tap on All Tasks. Then finally click on the Import option.
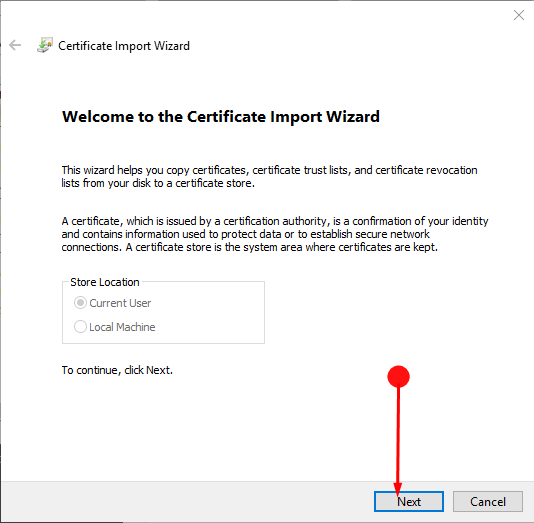
Step 3 – In the next dialog box that opens tap on the Next button at the end of the screen.
Step 4 – Click on the Browse button and then select Personal Information Exchange from the drop down. You can find the drop-down key beside the box File Name.
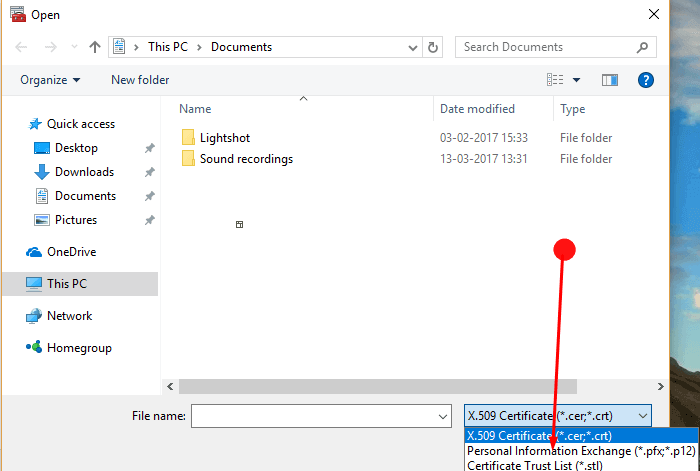
Step 5 – Now move on to the saved PFX file and select the same. Click on the Open option and finally finish the process by clicking on the Next button.

Step 6 – enter the password of the private key into the PFX file. Then click on the both Mark this key as exportable, Include all extended properties boxes. Click Next.
Step 7 – Tick “Automatically select the certificate store based on the type of certificate” from the two options, and click on the “Next” button.
Step 8 – Click on the Finish and in the next dialog box that appears click on the OK.
Finishing words
So now you can see how easy is it to Import EFS File Encryption Certificate with Key on Windows 10. Hopefully, you too will also try it as it will give extra protection to your files. Therefore it is a must for all to encrypt your important files.