Windows 10 offers a feature using which you can Limit Windows Update Bandwidth. You all know that downloading Windows Update uses most of the bandwidth, affecting your other online activities. So, with this new feature, you can optimize the amount of bandwidth your device uses to both download and upload Windows and app updates, including other Microsoft products. In addition, it also allows you to set a specific limit if you are worried about data usage. Read to know How to Check Monthly Data Usage in Windows 10.
You will see the options to Limit Windows Update Bandwidth in the Settings program. Well, you can only take benefit of limiting bandwidth if you are running Windows 10 build 16237 or higher. Well, let us now walk towards the steps and see how this new feature can help you in customizing your bandwidth.
Limit Windows Update Bandwidth in Windows 10
Step 1 – To Limit Windows Update Bandwidth, first, open Settings application. So, either press the shortcut Win&I or click Start icon and select Settings.
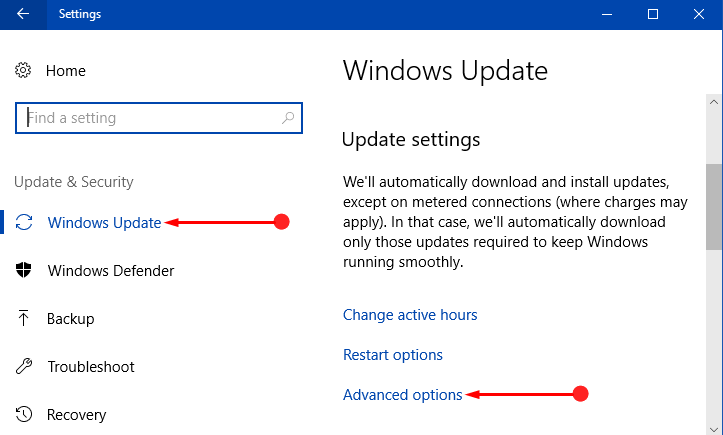
Step 2 – Click Update & security tab on the homepage of Settings application.
Step 3 – By default, Windows Update settings page will come into view. Click Advanced options and you will notice more related settings.
You may like to know How to View and Customize Windows Update on Windows 10.
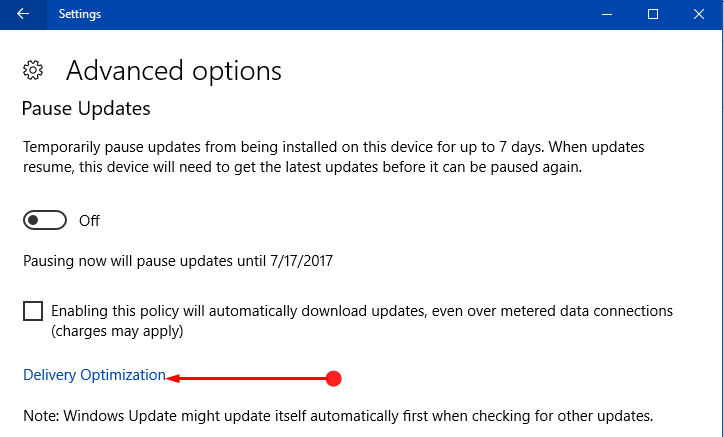
Step 4 – Click Delivery Optimization on the following page.
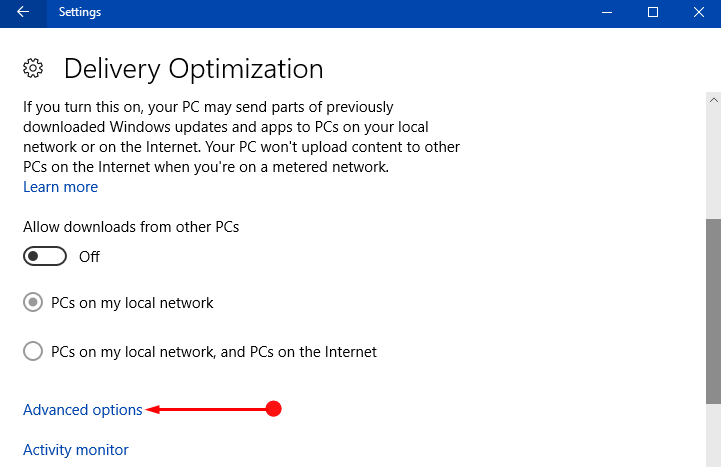
Step 5 – Delivery Optimization page will now display few options and settings. So, moving ahead, again make a click on Advanced options.
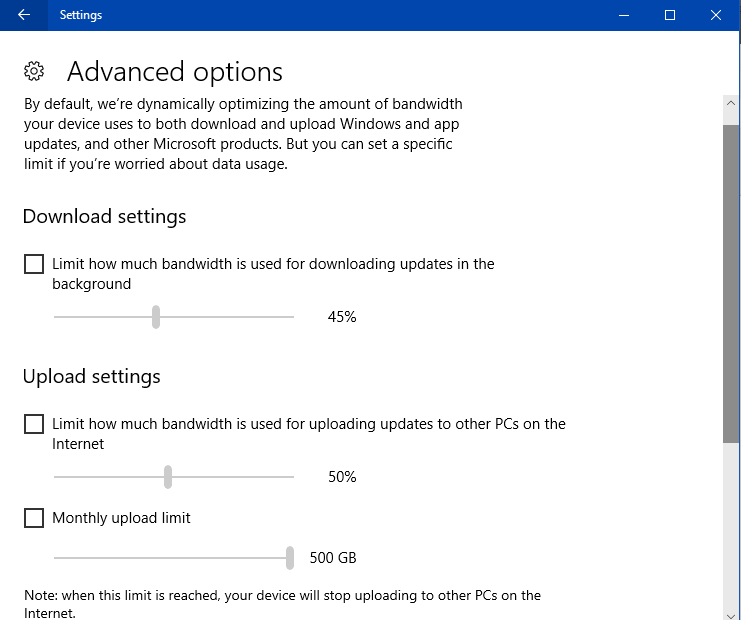
Step 6 – Here, you will find three options to Limit Windows Update Bandwidth – Download settings, Upload settings, and Monthly upload limit.
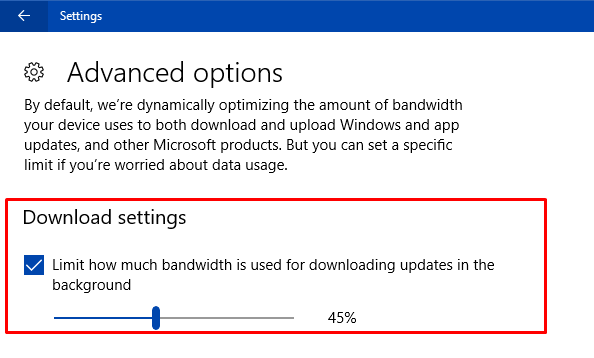
Download settings
Step 1 – Select the checkbox Limit how much bandwidth is used for downloading updates in the background as shown in the below image.
Step 2 – Drag the slider to the limit you prefer. However, by default, the limit bandwidth for Download settings is set to 45%.
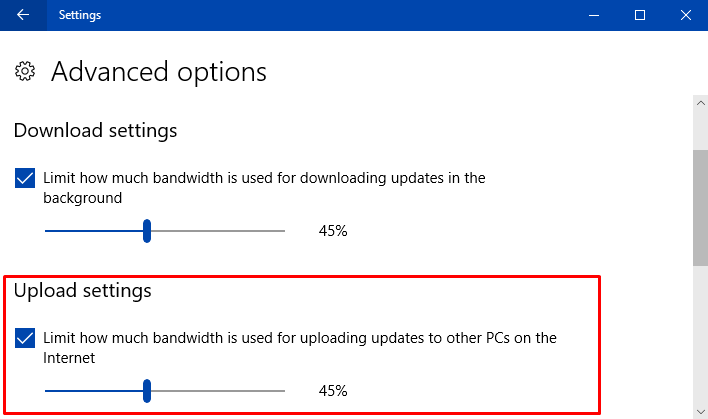
Upload settings
Step 1 – Select the checkbox against the option Limit how much bandwidth is used for uploading updates to other PCs on the internet.
Step 2 – Now, use the percentage slider and limit the bandwidth as per your preference.
Note – The overall bandwidth limitation for both downloading and uploading ranges from 5% to 100%.
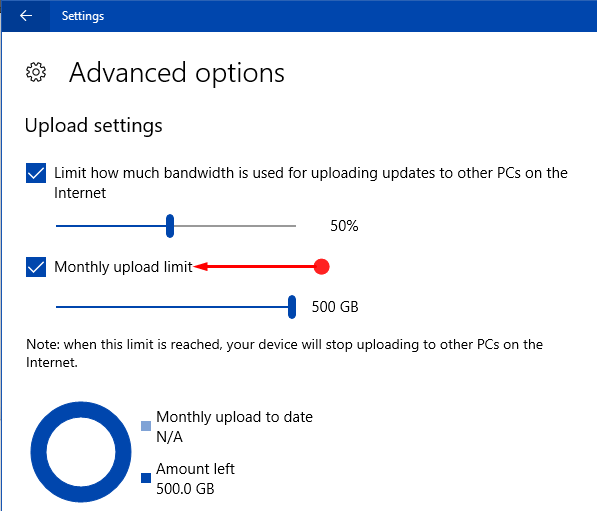
Monthly upload limit
Step 1 – Monthly upload limit lets you configure upload limit for update data. Hence, select Monthly upload limit box and adjust the limit accordingly.
Step 2 – The minimum value you can set is 5 Gigabytes and the maximum is 500 Gigabytes per month respectively.
This feature is available on the build 16237 so if you have at least this build you can follow this guide to save you data. You can also check How Much Data an App Used on Windows 10.
Conclusion
Hopefully, following this guide you will be able to Limit Windows Update Bandwidth in Windows 10 PC. This addition to Windows 10 OS is very helpful for the users because at times Windows Update consumes too much of bandwidth. This highly impacts the other activities such as surfing. Hence, give an attempt to this new feature of bandwidth and if you are aware of more tips, do write them to us.