Procedure to Manage Optional Features on Windows 10 After Creators Update with steps. – Windows 10 offers few additional features but most of them won’t be useful for a general user. These are optional features and you can access them through the Settings app after Creators Update. You cannot completely remove optional features from the system and they will continue to occupy space on your hard disk. So, depending on what functionalities you need, you can manage them accordingly.
So, in this guide, we will explain guidelines to Manage Optional Features on Windows 10 After Creators Update. The Settings application shows a list of features that are already installed in the system. In case, you don’t find any feature useful, you can uninstall it. Well, uninstalling an optional feature from Windows 10 does not eradicate it from the system. But, it also gives you the provision to install a feature if you find it needful for the OS.
Ways to Manage Optional Features on Windows 10 After Creators Update
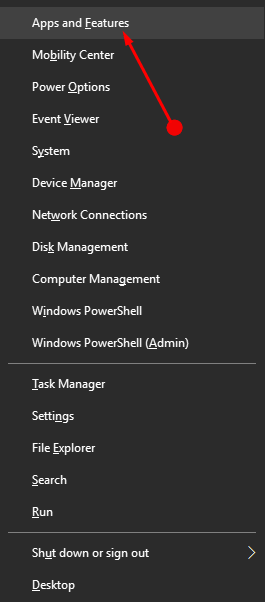
Step 1 – Press the key combinations of Win&X and click Apps and features.
You can also read How to Access Programs and Features on Windows 10 Quickly.
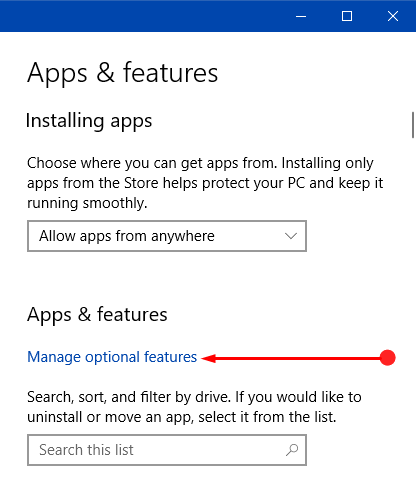
Step 2 – Apps & features page will open up. Move to its right panel and click the option Manage optional features.
For quick accessibility, you can also How to Create Shortcut to Apps Settings on Windows 10.
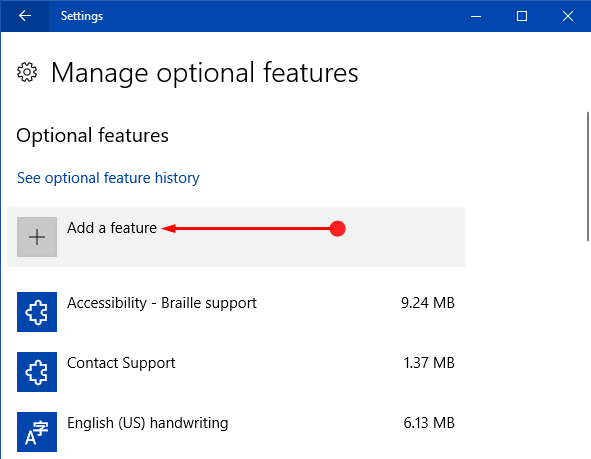
Step 3 – This will launch Manage optional features page displaying a list of various installed features.
After launching Optional features page, let us walk through the directions and see How to Manage Optional Features on Windows 10 After Creators Update.
Add a feature
Step 1 – On the Manage optional features page, a button named + Add a feature is visible, click on it.
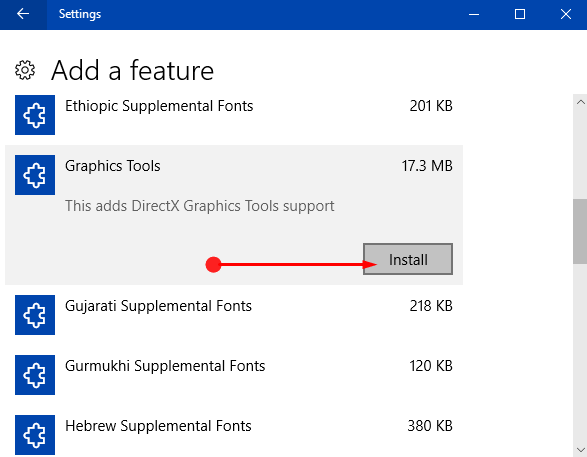
Step 2 – This will show a list of various optional features on the PC screen. Browse through the list of features and select the one you wish to add.
Step 3 – An Install button will be noticeable after you select the feature, click on it.
Step 4 – Now, head back to the Manage Optional features page and you will see that the new feature is added to the list.
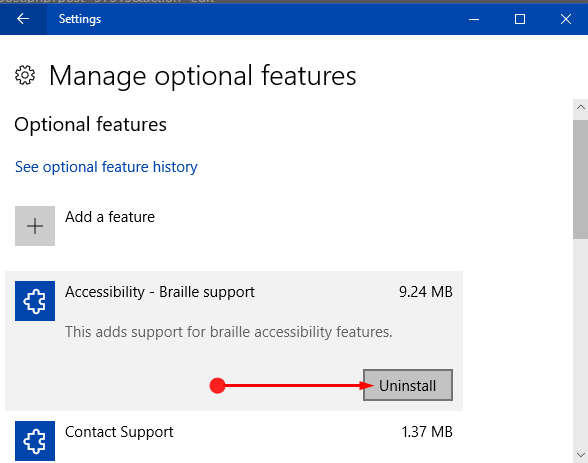
Uninstall a feature
Step 1 – Locate and click the feature you wish to uninstall on the Manage optional features page.
Step 2 – An Uninstall button will come into view, click on it. This will immediately uninstall the selected feature but after using the above Add a feature option, you can install it again when needed.
For reference, you can also read our guide on How to Uninstall Unnecessary Apps from Windows 10.
You all might know that Control Panel also includes Windows Features but most of them listed there are useful for a corporate environment. The Optional features on Settings program are not the same as you will find in the Control Panel. It only lists down certain modern Windows 10 features, such as Contact Support, Microsoft Quick Assist, Graphics Tools, Windows Developer Mode, and so on.
Conclusion
So, after completing the above instructions, you will be easily able to Manage Optional Features on Windows 10 After Creators Update. If you have more tips on this topic of managing optional features, write down to us.