Netsh winsock reset in Windows 11 or 10 is super handy for resetting “Winsock” catalog. This is an important command line tool that you often need to run during multiple Network issues. winsock means Windows Socket and Reset indicates to restore the original configuration. So the command brings back the WSA (Windows Sockets API) default settings.
Furthermore, this is more useful when a malformed LSP is installed which basically results in the loss of network connectivity. Winsock is an API that interacts between Network Software and services. In other words, this interface handles any input or output requests on the system for an internet application. Hence, if your system encounters any of these problems, executing the netsh winsock reset command will eventually bypass them. The following list of errors needs to run the command in Windows 10 or 11 –
1) Any sort of network moreover internet issues after the removal of malware or virus.
2) Failure in the network adapter’s IP address renewal.
3) Interruptions in network connection post the installation or removal of any malware-scanner such as antispam, spyware, adware, VPN, firewall etc.
4) DNS related issues.
5) Inability or a limited ability to access any webpage(s).
6) Any network related pop-up error messages.
7) Registry errors result in poor or no network connectivity.
8) Other networking related troubles.
netsh winsock reset in Windows 11 or 10
Here is how does netsh winsock reset Work in Windows 11 or 10 –
Step-1: Open Run dialog box and to do so, hit “Win + R” shortcut keys. Here, type in cmd and altogether press “Ctrl + Shift + Enter“. Alternatively, follow the instructions here – How to Launch Elevated Command Prompt on Windows 10.
Step-2: Click Yes on the UAC prompt to give permission.
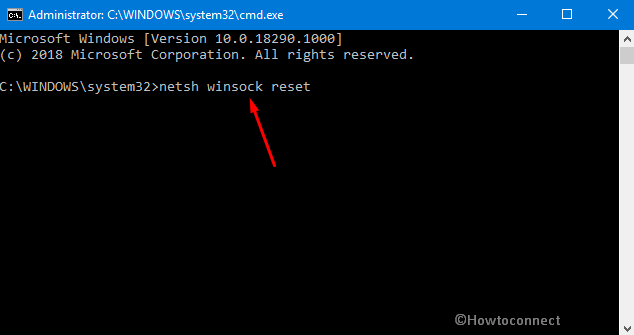
Step-3: Once you access the elevated Command Prompt, copy-paste or type in the underneath command. Hit Enter to execute it.
netsh winsock reset

Step-4: Restart Windows 10 PC and see if it bypasses the network related issues.
How does netsh winsock reset to resolve network related problems?
Once you run the above command, it will instantly reset the “Winsock catalog” to a clean condition or the default settings. Moreover, it will uninstall the network service providers that are present in your systems such as USB network connections, Bluetooth bridges, or malware installed providers. So, once you successfully remove the harmful elements from the system, you will not have any further network issues.
It will clear any Layered Service Providers that were installed previously. This ensures that any LSP that might be malfunctioning or cause the problem is removed, thus potentially resolves the trouble you were facing.
So, after you run this command, you will not come across any browsing or network problems as well.
That’s all!
Adjunct –
1) How to Fix Network Connection Problems in Windows 10 All in One
2) How to Troubleshoot Incoming Connections in Windows 10
3) How to Fix Airplane Mode Issues in Windows 10
4) Fix WiFi Missing from Network & Internet Settings in Windows 10
5) Network Discovery is Turned off Windows 10
