Complete Guide to Personalize Windows 10 Desktop With Rainmeter with Steps. – Do you like to make your desktop appearance cool and touching? Then you must try Rainmeter that can effectively change a Windows 10 desktop look to your lovable one.
By installing Rainmeter, you can follow your system details, notice the disk space, calendar, and many other things on your desktop. It is loaded with tons of configuration options which are very powerful and at the same time effective. So, today we are presenting this guide with a view that you can personalize Windows 10 desktop with Rainmeter. The guide is divided into various sections and each section is described in steps.
Personalize Windows 10 Desktop With Rainmeter
The first task you need to do is to grab and install the application. After installing the application, we will explain to you the few terms that will help you in using the tool. Hence, let us now start with installing the tool.
Installing Rainmeter
Step 1 – First of all, download Rainmeter from its official website. On its web page, you will notice two versions, download the Final Release.
Step 2 – Now, run the .exe file and let the installation wizard show up on the screen.
Step 3 – While installing the free tool, ensure to select the box Launch Rainmeter on Startup, else, you have to manually start the application after every restart.
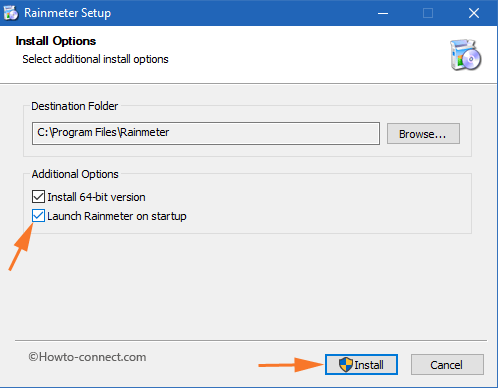
Step 4 – Simply follow the guidelines on the wizard and finish installing Rainmeter.
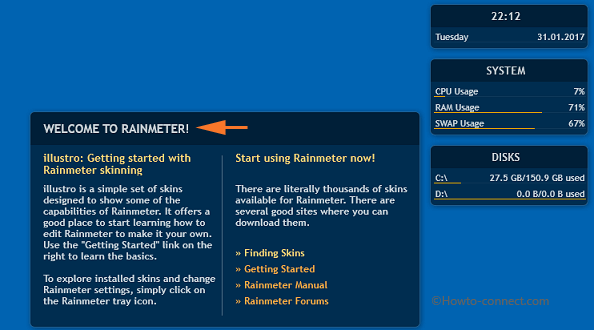
After installing the Rainmeter, few new things will show up on Windows 10 desktop. You will find their names as Clock, Disk Usage, System, and so on. Well, all these tiny applications that become visible on the desktop right after installing the tool are Rainmeter default skin.
Rainmeter is a little different from other tools in terms of the terms it uses. You will come across some different terms such as Skins, Skin Suites, Layout, and many others words. So, let us first clear a few of these terms.
Skin – You can easily compare Skins with the term Widgets of Android. In simple words, Skins are small applications that stay on Windows 10 desktop. You can show clock skin, Network skin, System skin, Playlist skin, and many other skins on the desktop.
Skin Suites – Skin Creators stores a group of same appearing widgets altogether and call it as Skin Suites. By default, Rainmeter carries a Skin Suite entitled as illustro that appears on the desktop after installing the tool.
Layouts – It determines the location of skin on the desktop. After personalizing Windows 10 desktop, save it as a layout and use it afterward.
Find and Download Your Skin
Well, if you want to personalize Windows 10 desktop with Rainmeter with some exciting skins, then many sites exist that provide the needful. Sites like DeviantArt, Rainmeter subreddit, Rainmeter Forums have dynamic collections of skins for Windows 10 desktop.
You can easily download and install skins. For reference, you can read our guide on How to Download and install Jarvis Theme for Windows 10.
After downloading the skins of your choice, there are two procedures to install them. Some skins come in .rmskin file whereas many others come in .zip or .rar archive.
Install .rmskin file
Step 1 – To begin with, navigate to the folder where the download skin is stored. You will notice the skin is in .rmskin format.
Step 2 – Now, just double click the .rmskin file.
Step 3 – Moving ahead, a Rainmeter Skin Installer box will show up on the screen. Some skins are loaded with multiple features, and so, if you don’t want everything to load at once, deselect the option Load included skins.
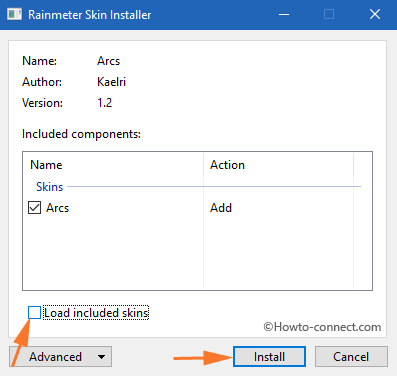
Step 4 – After you uncheck the option, Rainmeter will only include them to the list of skins and later on you can manually add to the desktop.
Install .zip or .rar Archive
Step 1 – First of all, download the .zip or .rar file that comprises of all the skins you wish to use.
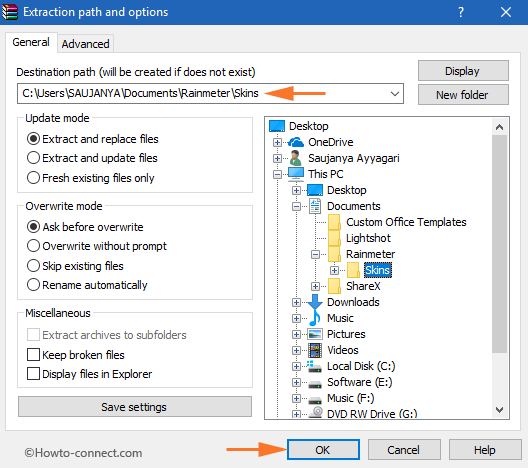
Step 2 – Next, perform a right-click on the .zip or .rar file. From the list of options that pop-up, select Extract files.
Step 3 – Now, browse to the following location and extract the contents into Skins folder.
\Documents\Rainmeter\Skins
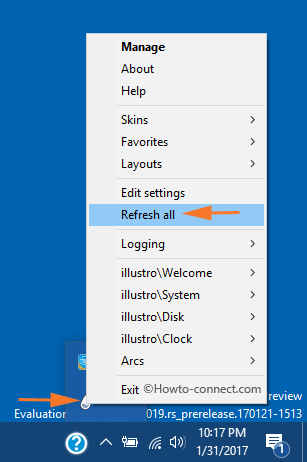
Step 4 – After extracting the contents, click the Show hidden icons arrow on the taskbar. Now, the Rainmeter icon will be visible.
Step 5 – Finally, do a right-click on Rainmeter icon and select Refresh all. All the new skins will be accessible on your Rainmeter.
Load a New Skin
After completely loading Rainmeter for the first time, illustro suite and some of its skin will be visible on the desktop. So, let us first see how to load more skins of illustro to Personalize Windows 10 Desktop With Rainmeter.
Step 1 – To begin with, perform a right-click on any of the visible skin, for example – DISKS.
Step 2 – A menu with a few options will appear, go to illustro. Now, you will notice all the skins under illustro. For example – go to Google and select Google.ini
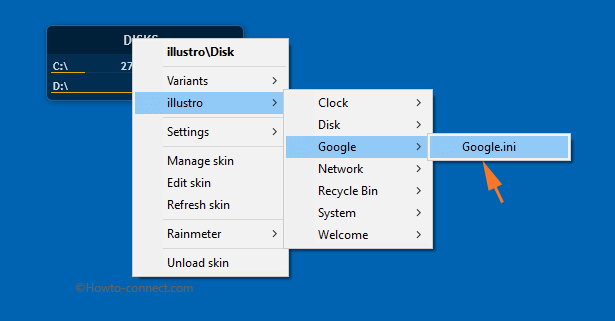
Step 3 – Finally, Google skin will appear on the desktop.
Now, let us see the steps to load the skin that you have downloaded.
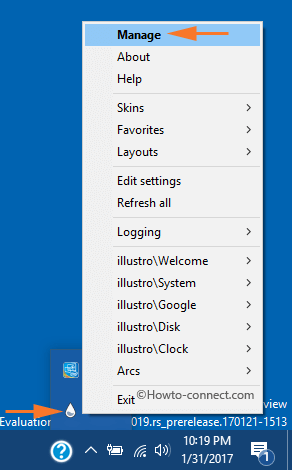
Step 1 – Click Show hidden icon arrow on the taskbar and locate Rainmeter. Now, do a right-click on Rainmeter and select Manage.
Step 2 – Moving ahead, Manage Rainmeter window will show up on the screen. By default, Skins tab will be open.
Step 3 – On the left side column, all the suites will be visible. Now locate the skin of your choice, for example – Now playing and then select Player.ini
Step 4 – Now, on the right pane, click Load button.
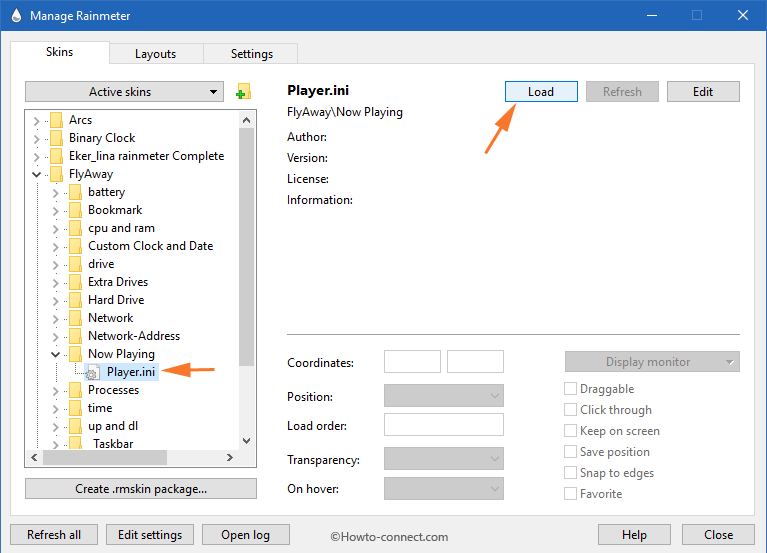
Step 5 – You will notice your selected skin on the desktop.
Unload a Skin
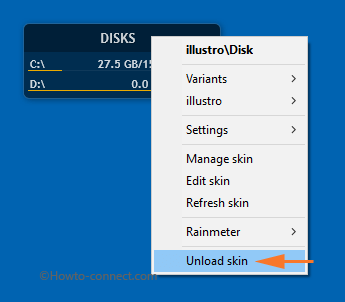
Step 1 – First, locate the skin you wish to clear off from the desktop. Next, right-click on that specific skin.
Step 2 – Few options regarding the skin will show up, select the last option Unload skin.
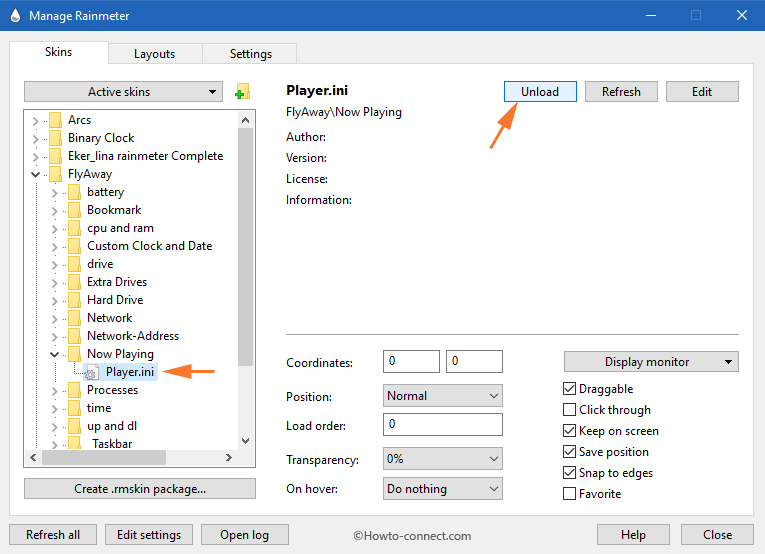
Alternatively, skin can be deleted from the desktop using the Manage Rainmeter window.
Step 1 – On the system tray, find Rainmeter icon. Do a right-click on it and click the option Manage.
Step 2 – The Manage Rainmeter window will come across the screen, so select the skin you wish to withdraw from the desktop.
Step 3 – For example – to remove Now Playing skin, select Player.ini option. Then move to the right hand side and click Unload.
Rainmeter Settings of a Skin
To completely personalize Windows 10 desktop with Rainmeter, you have to understand its basic settings. After right-clicking a specific skin, one option will come up as Settings. Let us delve into those handy settings of the skin.
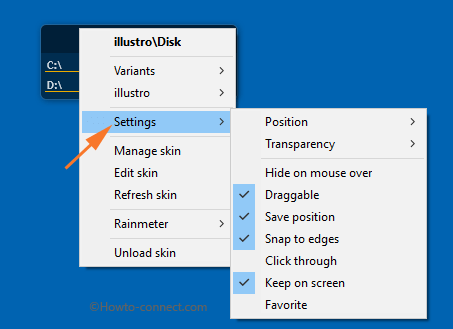
Position – Decide where your skin will appear on the desktop. For example – you can keep one skin on top of another. In short, it defines the position of the skin relative to other skins.
Transparency – This option lets you choose how much glassy you wish to make the skin. Though many skins are a little transparent, still if you want to see a little more, you can work on it.
Hide on mouse over – With this option you can hide the specific skin whenever you point the cursor on it.
Draggable – Keep this setting checked so that you can easily relocate the skin at your convenient place. But after placing it at the desired location on the desktop, you can uncheck the option to prevent any accidental replacement.
Save position – If you don’t wish to save the change of the position of a skin, uncheck this option.
Snap to edges – When you are arranging different skins on a line, this setting will help that they are in a perfect line.
Click through – When this setting is enabled, you cannot click anything on the skin. This is just like Hide on mouse over. Still, this option lets you see the skin and does not hide it.
Keep on screen – Check these settings and you cannot move the skin out of your screen.
Favorites – This option includes or excludes the current skin in the Favorites list.
Conclusion
For the first time, users usually get confused with Rainmeter. But, once you understand its basic features, it is very easy to follow. Hopefully, now, you will be able to personalize Windows 10 desktop with Rainmeter without any confusion. If you have any problem in understanding the guide, please write to us.
how to resolve the issues of blurness and other problems in my surface book (high dpi screen)?