Tips to Pick a Drive in Windows 10 Store to Install an App – Store ships miscellaneous applications having gigantic volumes which could put a bad impact on the smooth functioning of a computer. Hence, a tool is appended here permitting to Pick a drive prior to the beginning of its installation where you have determined to stockpile the files of the application. Related – How to Uninstall Large Space Taking App from Windows 10
Earlier an addition arrived at the System category of Settings program which allowed the accommodation of new data in the existing storage at your choice and preference. on a Machine. Microsoft has provided a settings Space management significantly matters to keep a Personal computer maintained and quick. So here we are elaborating on the steps for how to Pick a Drive in Windows 10 Store to Install an App. Related – How to Change Drive to Save Files in Windows 10
Ways to Pick a Drive in Windows 10 Store to Install an App
Via Store
Step 1 – Click or tap the Store icon noticeable on the taskbar.
Step 2 – Once the Store becomes visible, write out the app name in the Search field and trace out your required app.
Step 3 – Click or hit the Install button for the required app and soon you will view a separate box that indicates the approximate size of the app and the prompt will also ask you to Pick a Drive in Windows 10 Store to Install an App.
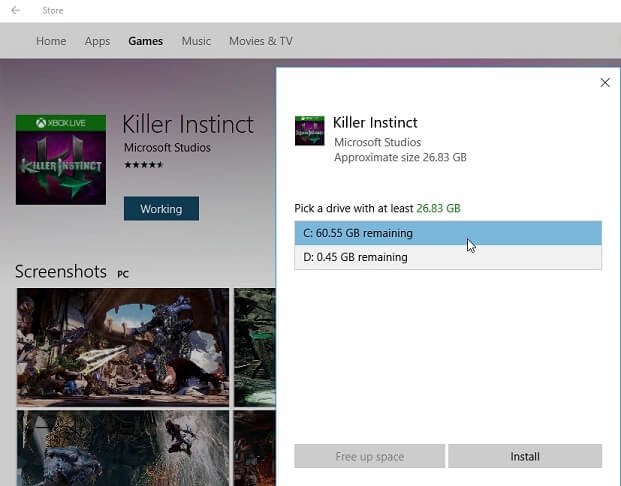
The pop-up will tell the required storage size and then list all the drives along with available free spaces. You will still get the pop up even when sufficient space is not available.
Step 4 – Pick up the drive and the app will straight away be installed on the same.
Step 5 – If sufficient space is not available on the drive where you want to install the app, navigate to the drive and vacate it, then click Install Button on Store.
However, for the time being, the current threshold for this feature is not revealed but assuming that the apps larger than 1000 Megabytes will receive this prompt because I tried to install an app of around 1000 Megabytes and was not shown the prompt.
Users are already delighted to note that something for app management will be hitting their computers very soon and this is definitely going to be a welcome feature which is going to hit the computers on Anniversary Update.
Via Storage
Before you head towards the steps, make sure that you are on Windows 10 build 1511 or the latest.
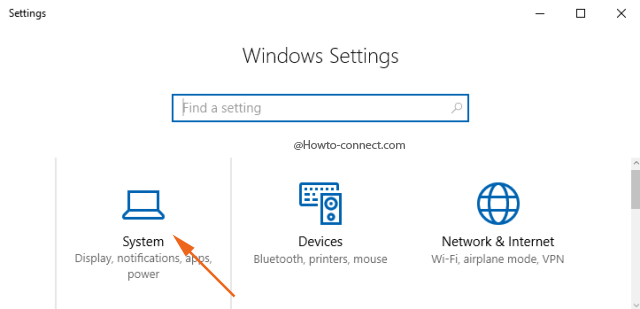
Step 1 – Hit the composition of Win & I keys altogether and in the outspread Settings program, click or hit System, the one positioned in the first place.
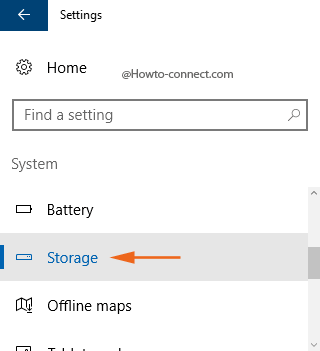
Step 2 – On the left flank of the System category you will notice various tabs, hence scroll little down and click or tap the segment labeled as Storage.
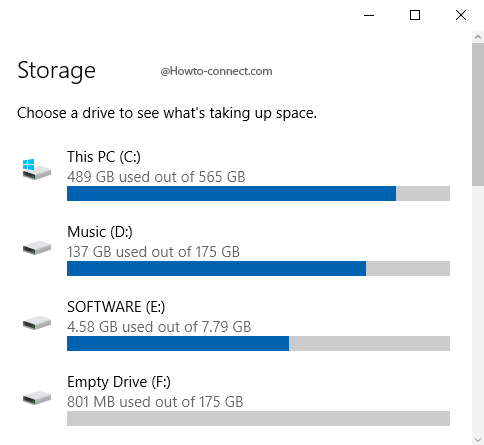
Step 3 – The topmost part of the screen exhibits all your storage drives along with available free spaces and this eventually assists you to consider which drive is better to install the apps.
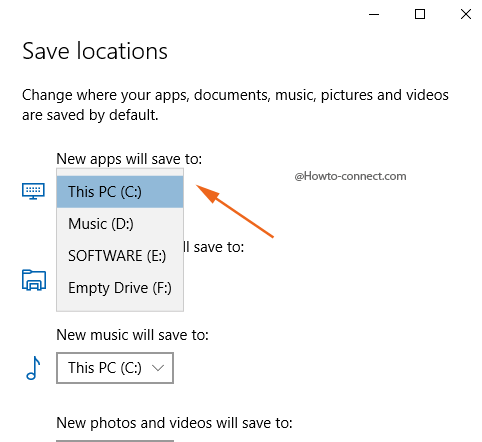
Step 4 – At the bottom of the screen is a section entitled Save location with choices for New apps, documents, music, photos, and videos. As our focal point is on apps, hence, click or tap the drop-down menu of the option that reads as New apps will save to and then pick up your desired drive location.
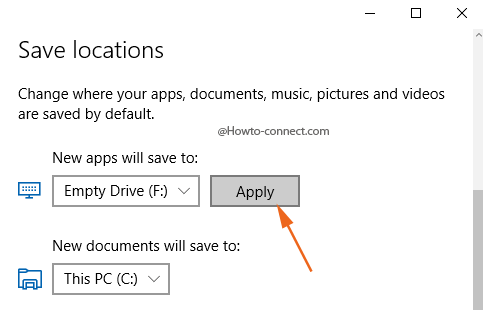
Step 5 – After choosing the location, click or hit the Apply button that is clearly noticeable alongside the option.
After the modification is over, you witness all Universal apps are forwarded directly to the newly appointed drive, rather than the system drive. When you download an app, all its content is straightway dispatched to the freshly assigned drive whereas the old apps are intact in their original location, system drive.