Prioritize Apps Notifications in Windows 10 Action Center – You might have recalled the old days in your mind when old toast shaped pop up arose having new information. After the advent of every build and version, perspectives moreover designs of Action center have been changed. Nowadays you are capable of measuring out notifications for distinguished apps more worthy for you. In the imminent lines, we are going to elaborate how to Prioritize Apps Notifications in Windows 10 Action Center.
First of all, you should know What is priority in the perspective of Apps Notifications if you talk about Windows 10. Priority belongs to the region in the Action center. Three levels of priorities are determined -1. top, 2. High and 3. Normal. Notifications of the particular applications comprising Top priority will be shown on the uppermost field of the action center. You will witness the Apps Notifications bearing High priority just underneath the top prior applications. and Normal priority apps notifications will be located at the lowermost region. The area under action center is comparable and not allotted or divided for apps notifications. Top Priority applications will exhibit its notifications on the uppermost area, High Priority notifications just underneath it and ultimately Normal priority apps at the lowest the notifications. Now let’s understand how to Prioritize Apps Notifications in Windows 10 Action Center to Exhibit it in descending positions area wise according to Top, high and Normal.
How to Prioritize Apps Notifications in Windows 10 Action Center
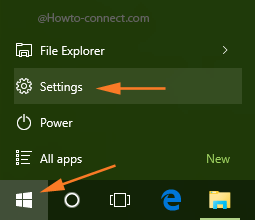
- Click or hit the Windows symbol on the foremost left end of the taskbar and thereon hit the Settings symbol.
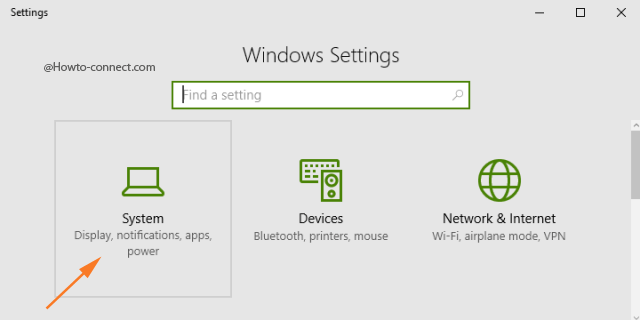
- In the resultant application, you will notice assorted categories, click the first one that is labeled as System.
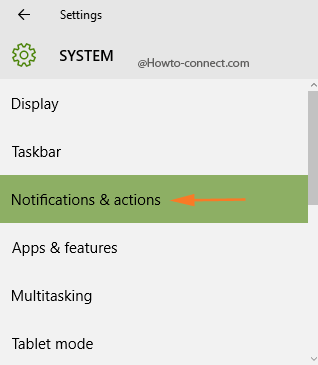
- Click or tap Notifications & actions segment emerges on the left flank of the subsequent page.
- Now, locate the opposite portion of the segment and straightforwardly navigate to the lowermost heading that reads as Show notifications from these apps.
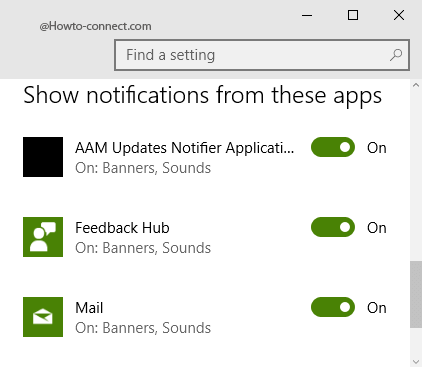
- See the apps present underneath the last section and trace out the one for which you desire to change the priorities, and thereafter click on it (for instance Mail app).
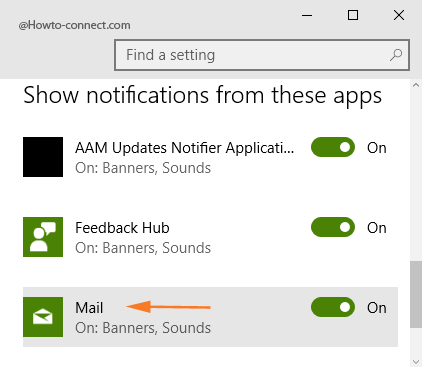
- The coming page will exhibit numerous settings, observe the last one that says “Priority of notifications in action center” and you locate three priorities – “Top”, “High” and “Normal”.
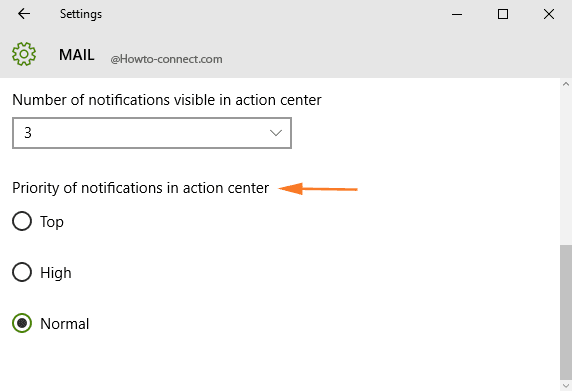
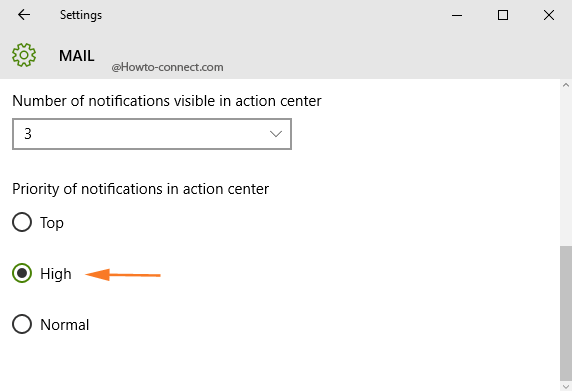
- Click on the round cell of the priority you wish to opt for that particular application and onwards you will never miss an important alert of that app.
Note – When you determine the “Top” priority level, you might witness a tiny confirmation note that says “Cortana is currently set to show always at top in action center and if you want to replace it with ‘your app'”, click or tap “Confirm” button.
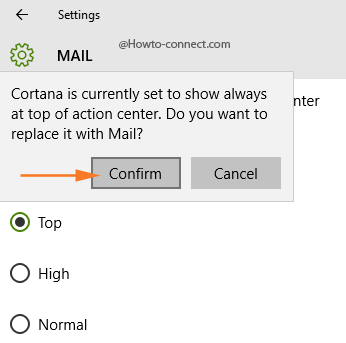
With this, we analyze that by default Windows has set Cortana’s priority at the “top” in action center and it will be superseded when you assign top priority to any other app.
