Often it’s necessary to Reinstall NVIDIA Drivers in Windows 10 and 11 to avail best user experience as backdated ones always create complications. Lately, multiple users have complained that they are having several issues while using multimedia files. Commonly, the problem arrives while playing a game and most of the time the culprit behind this is a corrupted or incorrect Graphics card driver. Thankfully, NVIDIA keeps on updating its utility on regular basis in order to fix the reported bugs and problems and make your computer smoother. So, when you encounter the graphics driver issue, there is nothing much to worry about as the re-installation method is very easy.
You can download the NVIDIA driver from the authoritative website either automatically or manually. But no matter which procedure you choose, the utility should be the correct one. In this context, we will show you the method of downloading the driver manually as it’s more secure. Related –
Way to Reinstall NVIDIA Drivers in Windows 11 and 10
Here is How to Reinstall NVIDIA Drivers in Windows 11 or 10 –
Uninstall the existing NVIDIA Drivers
Before Installing the fresh and updated NVIDIA Drivers, you need to completely wipe out the currently existing.
Step-1: Press Win+R to bring Run Dialog onto the screen. Type devmgmt.msc in the empty text field and hit Enter.
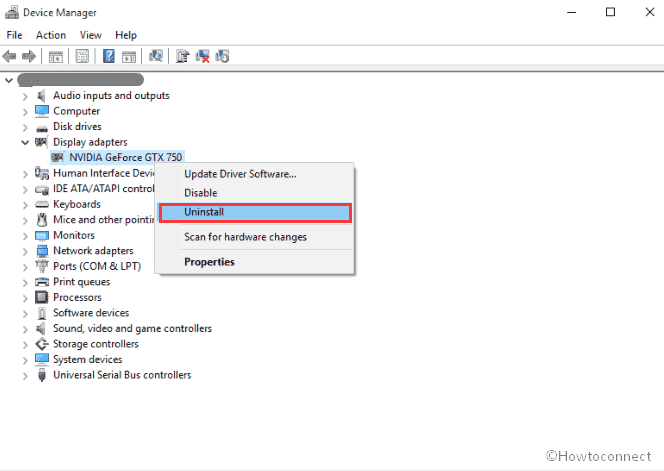
Step-2: When Device Manager comes into the view, Locate Display adapters and double click on it to expand.
Step-3: Right-click on the available NVIDIA driver and Select Uninstall device from its context menu.
Step-4: Once a pop-up rolls in, put a tick on the checkbox of “Delete the driver software for this device” and then click on Uninstall.
As now you have successfully removed, let’s surmount further with the procedure to Reinstall NVIDIA Drivers in Windows 10.
Install the NVIDIA drivers
It’s very important to select the correct driver for your PC, otherwise, it can cause serious corruption. In order to get the legitimate one, at first you need to know some system configuration of your computer.
- Right-click on the Start button and select Run. Once it turns up, write dxdiag in the text box and hit Enter.
- On the following Window of DirectX Diagnostic tool, shift to the Display tab and note down the Chip Type located under Device section.
- Navigate to System tab and take a look at the info ahead to Operating system to determine if you are running a 32 or 64-bit version.
Now, it’s time to download the latest one. For that, Surf the following link-
https://www.geforce.com/drivers
Subsequently, click on the DRIVERS from the menu bar of that page.
Reach out to Manual Driver Search section and provide the accurate information you just got. Then click on START SEARCH.

When the result is visible on the screen, Download the latest one.
Once the downloading process is complete, Navigate the directory where it has been saved. Mostly, it’s in Downloads folders.
At last Install, the driver, as usual, to get the best performance further.
That’s all! Hope it besteaded to successfully Reinstall NVIDIA Drivers in Windows 10.