Processes to completely Remove Akamai Netsession client on Windows 10 – Randomly you meet with unwanted software on your machine sneaking and leeching your data and movements. The presence of such an app is matter concern and worth uninstall. An alike software Akamai Netsession client gets involuntarily installed on the system, snoops download activities moreover, too inflexible to be eliminated. But here we are presenting a step by step guide to completely Remove Akamai Netsession client on Windows 10 and hopefully, this will be helpful to you.
For general information I like to tell, Akamai is a P2P company and comprises multitude servers all around the world. It rents servers to customers especially to host media content. But very often Netsession sends its clients application to computers along with adobe flash player. This application affects PC performance and further sneak kinds of activities on the PC.
Ways to Completely Remove Akamai Netsession client on Windows 10
1. Programs and Features
Step 1 – Begin the procedure by striking the combination of Win & X keys, and in the emerged menu click or hit the choice entitled as Programs and Features, the first positioned one.

Step 2 – In the resultant screen, underneath the Name column trace out the program labeled as Akamai NetSession Interface.
Step 3 – After you spot the program, select it and then tap or hit the button termed as Change/Remove which is noticeable on the bar just above the list.
Step 4 – Click or hit the Yes button in the succeeding popped up the box and affirm your decision.
In case, the aforementioned steps fail to Completely Remove Akamai Netsession client, give a shot to the further written alternative methods.
2. Command Prompt
Step 1 – Write the command cmd in taskbar search box, the full name Command Prompt will be exhibited as the Best match, perform a right-click on it and then click or hit the choice labeled as Run as administrator.
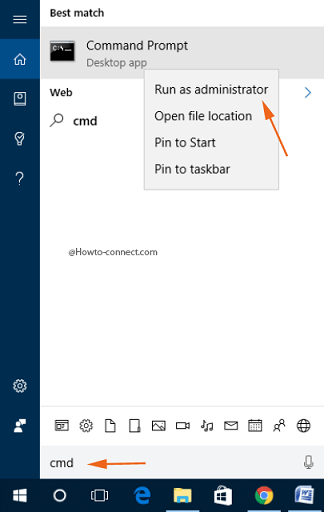
Step 2 – If you come across the UAC, agree to its conditions by hitting the Yes button.
Step 3 – Now, write this line of code in the outspread elevated Command Prompt and to carry out its duty, tap the Enter key –
CD c:\users\USERNAME\Appdata\local\akamai
Note – Kindly substitute the USERNAME with the actual username.
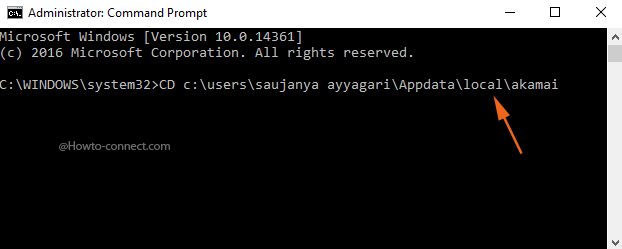
Step 4 – Now, write out this piece of code and hit Enter – Uninstall -force.
Step 5 – As the last course of action, reboot the machine.
3. Run Uninstall.exe
Step 1 – Click or hit the File Explorer symbol that you notice on the taskbar and then follow this path – C:\Users\UserName\AppData\Local\Akamai
Step 2 – Trace out uninstall.exe in that folder and when you spot it, double-click on it to proceed with the uninstall action.
Step 3 – If asked for confirmation, affirm to eradicate the service by hitting the Yes button.