From , Microsoft featured the Disk cleanup tool to remove everything existing in the Downloads folder. That is actually good sometimes but the problem is when you accidentally keep the option checked and delete important files. Generally, most of us utilize Downloads folder as system storage rather than a temporary one and rarely move things from there to another drive for a backup. As a result, there is always a risk over the head of wiping out the items availing that specific folder inadvertently.
Fortunately, you can remove Downloads option in Disk Cleanup by tweaking the Registry editor a bit. Proceed forward to know about the same.
Remove Downloads Option in Disk Cleanup
Here is How to Remove Downloads Option in Disk Cleanup On Windows 10 –
- Press Windows key R at one go to bring forward Run Dialog box on the screen.
- When it appears, type regedit in the void text field followed by clicking the OK button.
- If a UAC prompts for your confirmation, hit the Yes button to give access.
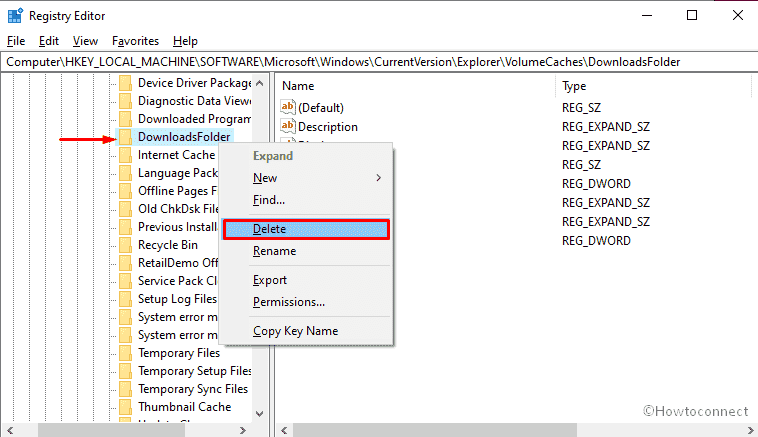
- Once Registry Editor comes into the view, navigate the following directory first –
HKEY_LOCAL_MACHINE\SOFTWARE\Microsoft\Windows\CurrentVersion\Explorer\VolumeCaches\DownloadsFolderNote – For safety purposes, keep a backup of this folder and for that right-click on DownloadsFolder and select Export option. Now provide a suitable name moreover save the registry file to a preferred location.
- Thereafter, again right-click on DownloadsFolder and select Delete this time.
- After doing so, Downloads Folder will not be visible in Disk cleanup tool anymore.
That’s all!!